Diagnostic describes a procedure or test which is performed to determine what is wrong with a patient, or what illness they have. So today, in this tutorial you will learn how to create a diagnostics icon in Adobe Photoshop. I will guide you step by step until it is complete. I hope you will like our new creation. Enjoy!
Other useful photoshop tutorials:
- Create a Wonderful Lock Icon in Photoshop
- Creating a Slick Silver Watch in Photoshop
- How to Make an Electronic Speaker in Photoshop
- How to Make a Bluetooth Device: Photoshop Tutorial
Tutorial Details:
- Program: Adobe Photoshop CS5
- Difficulty: Intermediate
- Estimated Completion Time: 50 Mins
Download source file:
Create a Diagnostics Icon in Photoshop – Final Preview

Tools and Resources

Photoshop Tools:
- Rectangle Tool
- Rounded Rectangle Tool
- Ellipse Tool
- Pen Tool
- Polygonal Lasso Tool
- Gradient Tool
Lets start to create a diagnostics icon in Photoshop
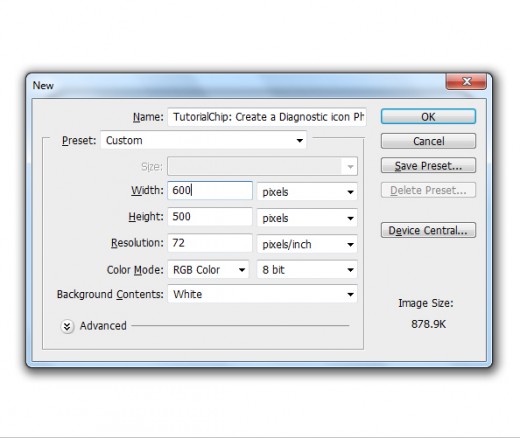
Step 1
Create a new document (Ctrl+N) 600×500 of size.
Step 2
Select the Rounded Rectangle Tool from Tool Panel and draw a rectangle with black color #000000, set Radius 30%.

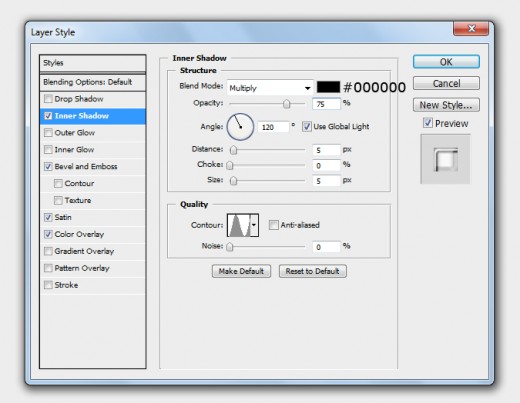
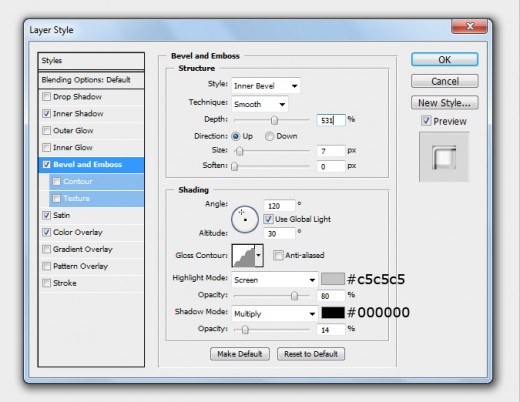
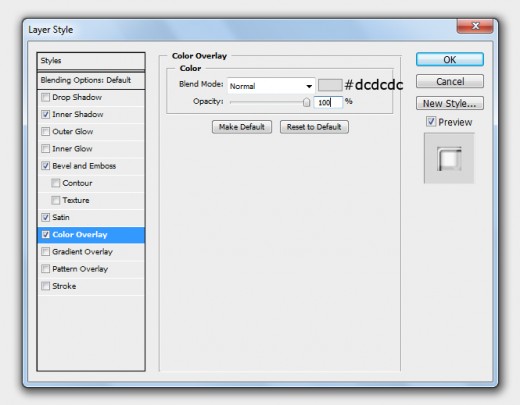
Step 3
Go to Layer > Layer Style or Blending Options and applying some effects.
Inner Shadow
Bevel and Emboss
Color Overlay
Satin
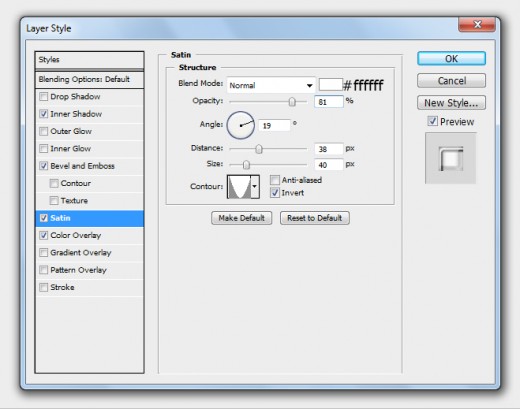
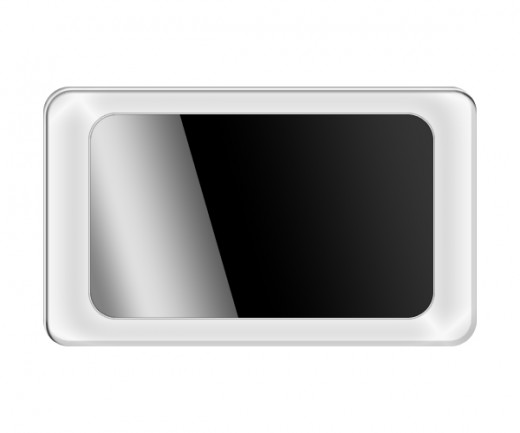
After applying layer styles or blending options we get nice effect on rounded rectangle layer.

Step 4
Select Rounded Rectangle Tool again and draw a rectangle with black color #000000, set radius 30%.
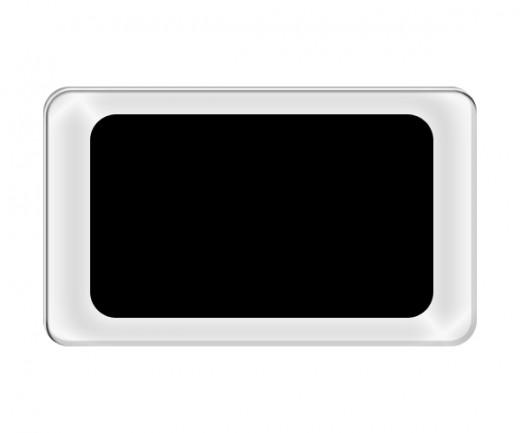
Step 5
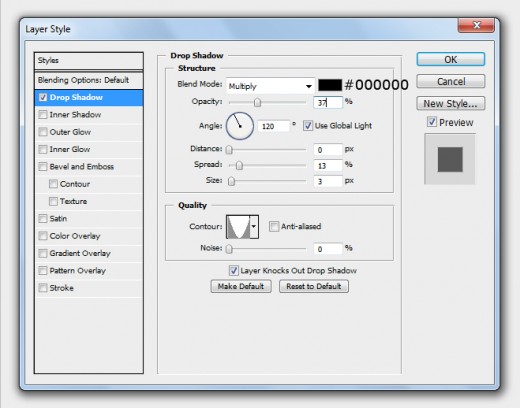
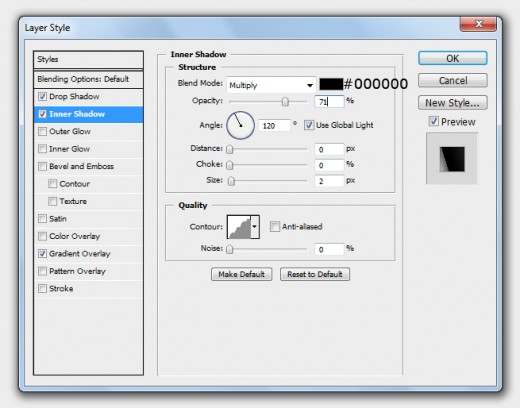
We are going to applying some Blending Options on the second rounded rectangle layer.
Drop Shadow
Inner Shadow
Gradient Overlay
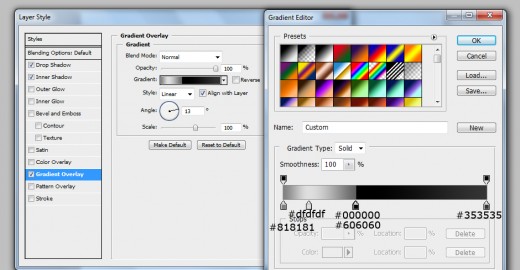
Now we get a beautiful second rectangle as like in preview.
Step 6
Ones again select Rounded Rectangle Tool and draw a third rectangle with this color #00b5b7.
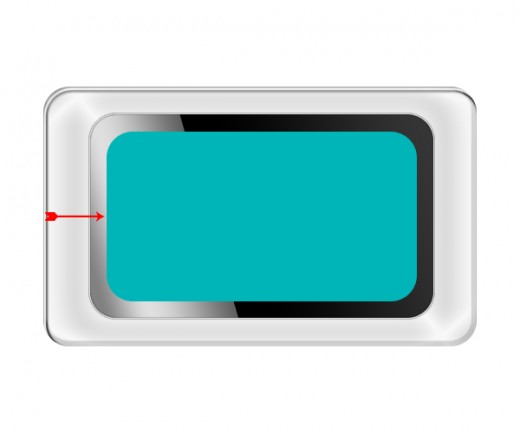
Step 7
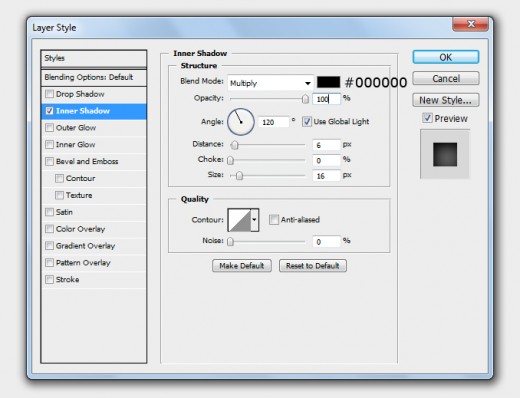
Go to Layer > Layer Style and applying some effects on third rectangle layer.
Inner Shadow
Stroke
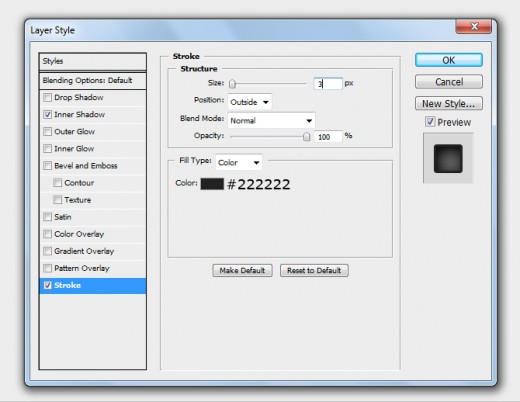
After applying layer styles we get new effect on third rectangle layer.