A puzzle is a problem or enigma that tests the ingenuity of the solver. In a basic puzzle, one is intended to put together pieces in a logical way in order to come up with the desired solution.
So today, in this tutorial we will learn that how to create a puzzle effect with any image in photoshop CS5. If you are beginner, intermediate and advance Photoshop designer you can easily create your own puzzle effect. This tutorial just take your 30 minutes to make such a amazing effect. So feel free and remember to share your opinions with us.
You may also like:
- Create a Realistic Landscape in Photoshop
- Create a Fantastic Special Lighting Effect in Photoshop
- Create a Lightning Effect on Flying Man in Photoshop CS5
- Create a Tempting Breaking Apart Effect in Photoshop CS5
Tutorial details:
- Program: Adobe Photoshop CS5
- Difficulty: Intermediate
- Estimated Completion Time: 30 Mins
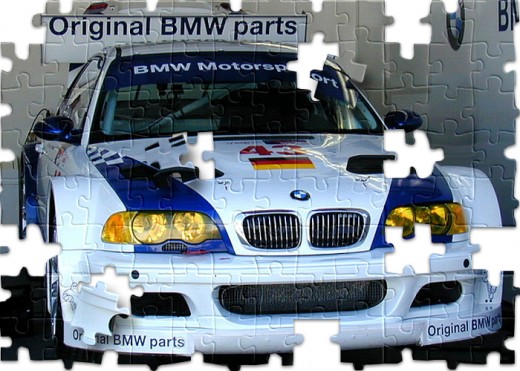
Create a Fascinating Puzzle Effect in Photoshop – Final Preview
Tools and Resources

External Resources
Photoshop Tools
- Pen Tool
- Gradient Overlay
Lets start to create fascinating puzzle effect in in photoshop.
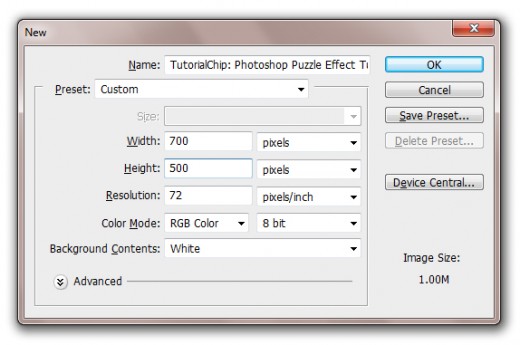
Step 1
Create new document (Ctrl+N) with 700×500 of size.
Step 2
First of all Add BMW Car Image in photoshop
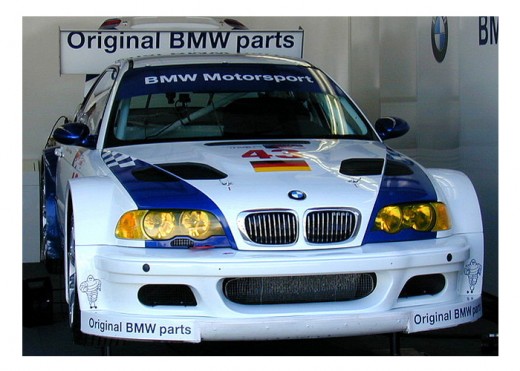
Go to Edit > Free Transform or press (Ctrl+T) to transform car image, and set it to the whole canvas.
After set car image we get this result.

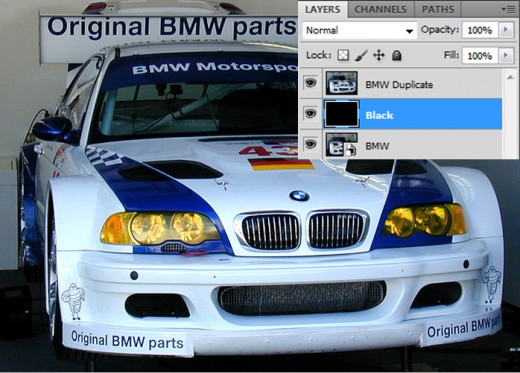
Step 3
Now duplicate car image layer one time (Ctrl+J) then create a new layer (Shift+Ctrl+N) center of both car and duplicate car image layers and fill with black color.
Step 4
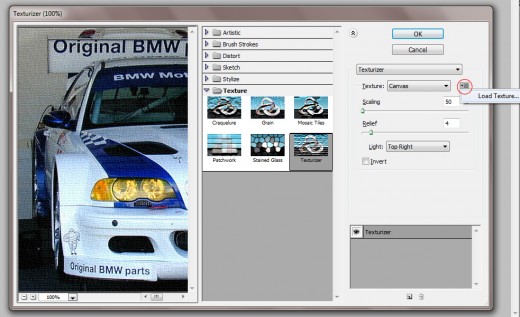
Now we are going to add the Puzzle Texture in photoshop, select duplicate car image and go to Filter > Texture > Texturizer and set this settings.

Now click the arrow button and select Load Texture option as like in preview.
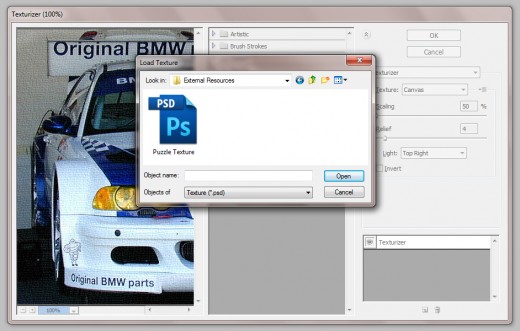
Now a window opened, select puzzle texture and click OK then puzzle texture applying on duplicate car image layer as like in picture below.
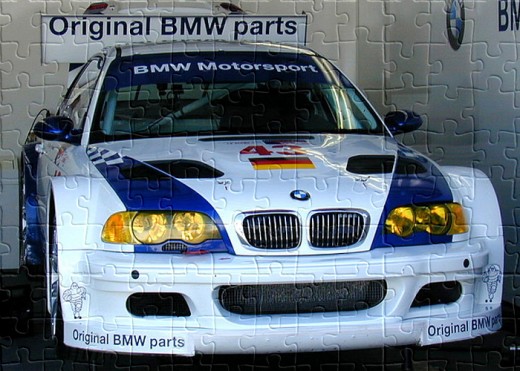
After applying puzzle texture, here we get a beautiful effect on duplicate car image.
Step 5
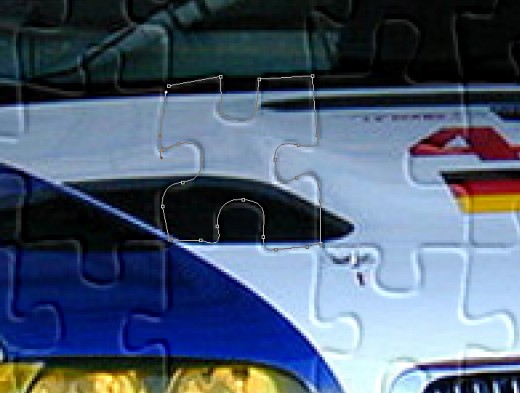
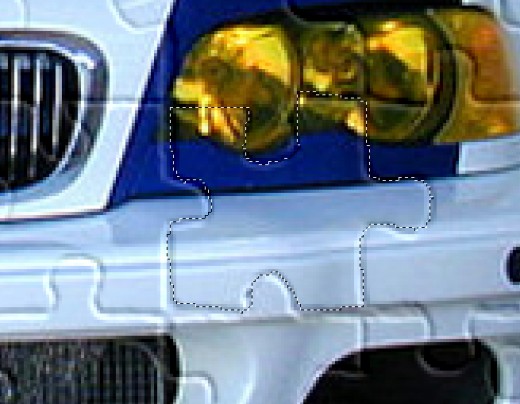
In this step select Pen Tool from tool panel and create a puzzle path as like in preview.
After create path right click on path and select (Make Selection) option to create a selection.

Now go to Layer > New > Layer Via Cut, after this implement, selected area cut in to a new layer name it layer Puzzle.
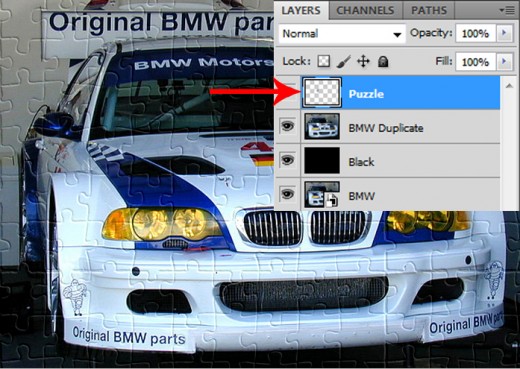
Step 6
Select puzzle layer go to Edit > Transform or press (Ctrl+T), rotate it and set it little bit left side.
After rotate puzzle layer we get a new result.
Now go to the Blending Options and applying Drop Shadow on puzzle layer.
Go to Layer > Layer Style > Drop Shadow.
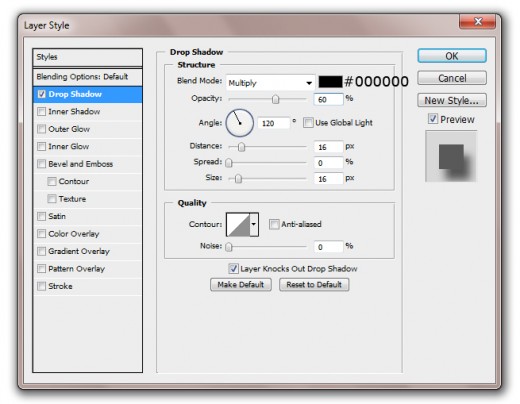
After applying drop shadow here we get a nice effect on puzzle layer.
Step 7
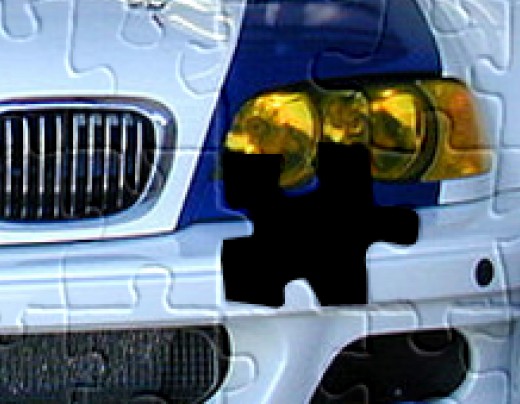
Select duplicate car image layer then select Pen Tool and create a path as like in preview.
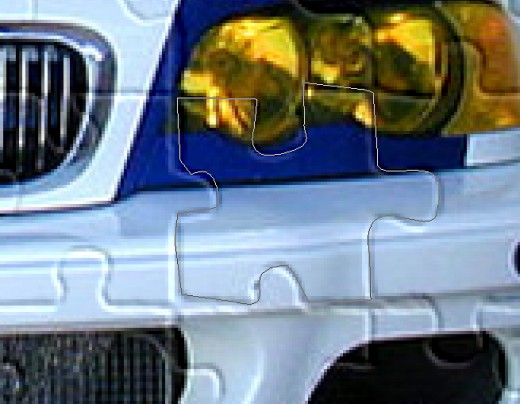
right click on path and select (Make Selection) option to create a selection.
After create selection hit Delete button to delete selected area then press (Ctrl+D) to deselect selection, we get a new result.
Step 8
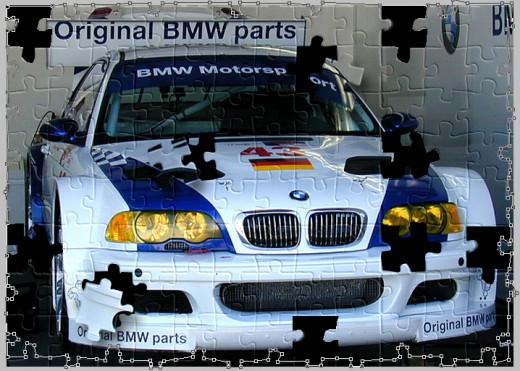
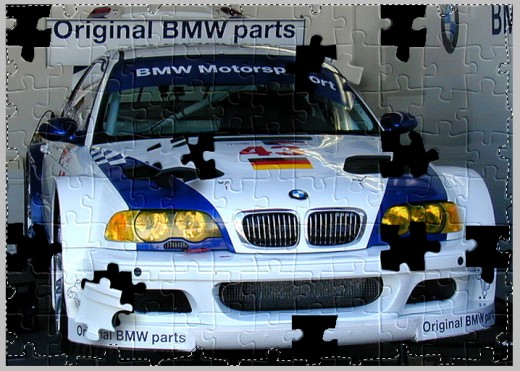
Repeat step 6 and step 7 to make more puzzle effects as like in picture below.

Step 9
Select Pen Tool again create a path to the whole picture as like in preview.
After create path right click on path and select (Make Selection) option then a selection created.
Now press (Shift+Ctrl+I) to inverse the selection.
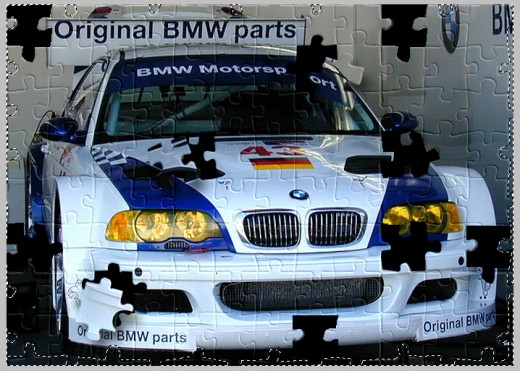
Hit delete button to delete the selected area then press (Ctrl+D) to deselect the selection and applying white color #ffffff on black background layer.
Go to the Blending Options and applying Drop Shadow on duplicate car image layer.
Go to Layer > Layer Style > Drop Shadow.
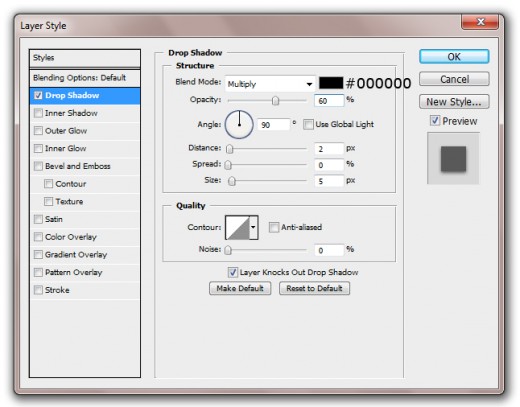
After applying drop shadow we get new result.

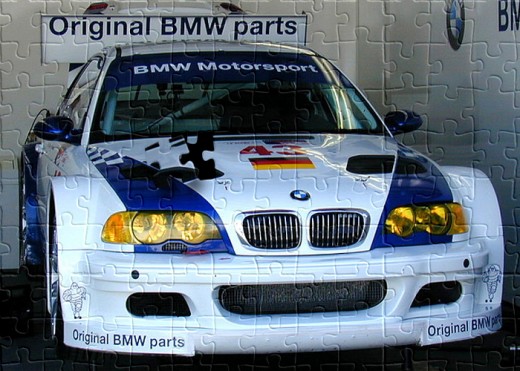
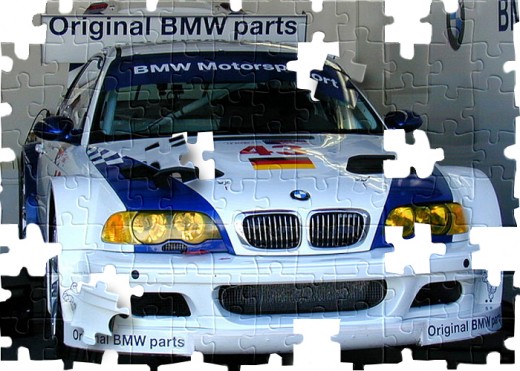
When we complete all steps we get our puzzle effect photo in final preview.
Final Preview
We hope you will definitely like this puzzle effect tutorial and always share your lovely comments with us. Follow TutorialChip on Twitter or Subscribe to TutorialChip to Get the Latest Updates on Giveaways, Tutorials and More for Free.
You have done really awesome job, great tutorial it is. Thanks a lot for sharing !!