Photoshop is a standard name in graphic design for web use, print layout, and more. Recognized world-wide as the industry-standard, Photoshop offers one of the most robust graphics editing experiences available.
Today I’m going to show you how to create a stylish, reflected button in simple 8 steps. At the end of this tutorial, you will have the confidence to show the world an awesome button.
Related Tutorials:
- Photoshop Smoke Text Tutorial in 10 Minutes
- Photoshop CS5 Icon Tutorial in 5 Minutes
- Professional Photoshop Banner Tutorial
- Photoshop Navigation Bar Tutorial
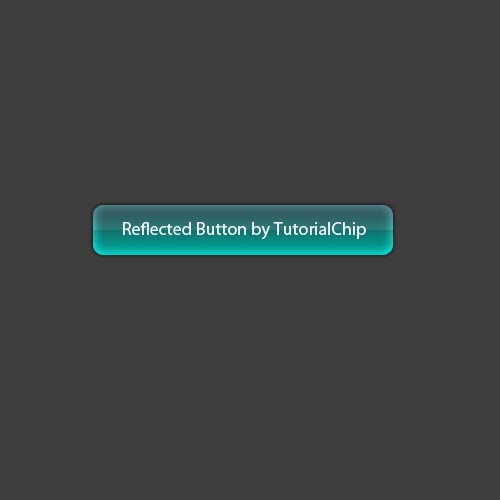
Photoshop Button Tutorial Final Preview

Let’s start our Photoshop button tutorial.
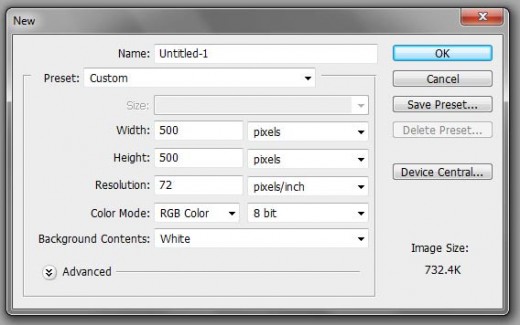
Step 1
Open Adobe Photoshop, and create a new Photoshop document (Ctrl+N). I am going to create a new document of 500 x 500 px with white background.
Step 2
Fill this background layer with #3e3d3d color.

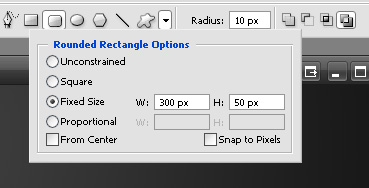
Step 3
Create a new layer and name it “Button Skin”. Use the rounded rectangle tool and make a fixed shape of 300 x 50 pixels in the middle of the document.

Now right click the shape and click make selection.

Step 4
Select the gradient tool and set the style to reflected gradient.
- Set Foreground Color: #1c3f47
- Set Background Color: #2a6976
Now click in the middle of the selection and drag to the bottom of the selection and release. Try to achieve the following effect.

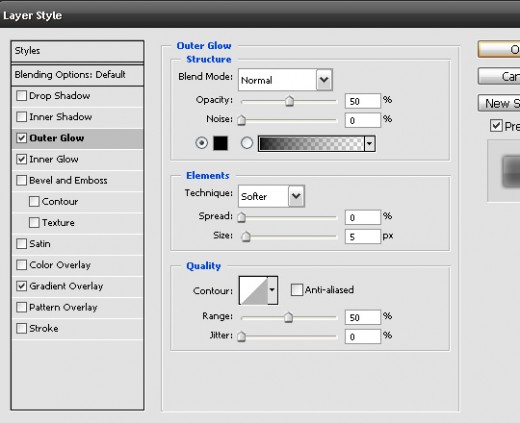
Step 5
Now we are going to add some blending option to our button to make it beautiful.
Outer Glow
Layer > Layer Styles > Outer Glow
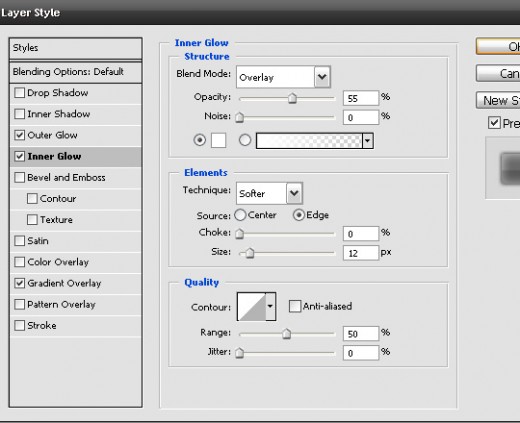
Inner Glow
Layer > Layer Styles > Inner Glow
 Gradient Overlay
Layer > Layer Styles > Gradient Overlay

Now your button should be look like this.

Step 6
Use text tool ( T ) and type any text on the button in white color.
Now right click on text layer and make a duplicate layer. Now you have two text layers. Make the text color of bottom text layer black.
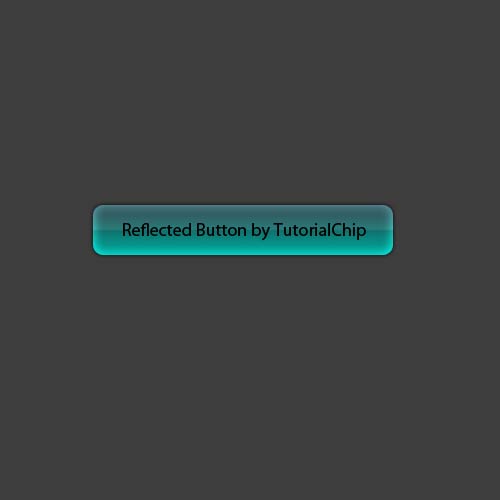
Move the bottom text layer 1 pixel down in order to achieve the following effect.

Step 7
Do the following steps,
- Select all three layers ( “Button Skin”, Both of Text layers )
- Duplicate these layers: Layer > Duplicate Layers
- Merge all these Duplicate Layers: Layer > Merge Layers (Ctrl+E)
- Name this layer: Reflected Button
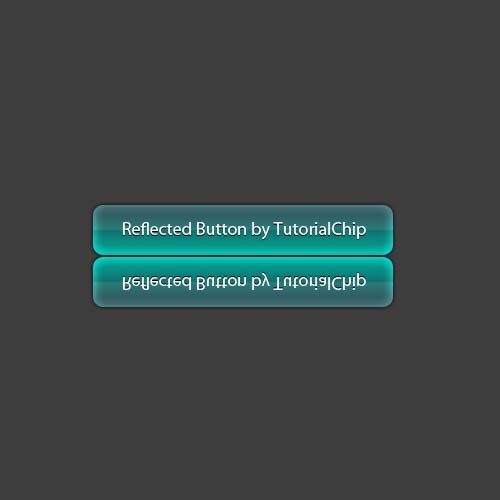
- Move the “Reflected Button” layer as shown in preview
- Flip this layer: Transform > Flip Vertical
Now you have the button as show in Step 7 preview.
Step 8
Do the following steps,
- Add “Vector Mask” to the “Reflected Button” layer.
- Press “D” to bring Foreground and Background color in its default form: Foreground Color: #000000, Background Color: #ffffff
- Choose Gradient Tool: Linear Gradient
- Make sure the Vector Mask of Reflected Button layer has been selected, and apply the gradient tool in order to achieve the effect as shown in Step 8 preview.
- Set the Opacity of this layer: 20%
Waooo, we have created a beautiful button in simple 8 steps.
Final Preview
 Dont Forget to Follow us on Twitter or Subscribe to Email to Get the Latest Updates on Giveaways, Tutorials and More for Free.
nice blog and nice posts thanks for sharing this posts!