A few days ago I have published “Photoshop Pen Tool Basics – Part 1“. I hope you will have like this tutorial. Today in this tutorial, I’m going to show you how to use free-form pen tool, add anchor point tool, delete anchor point tool and convert point tool in Photoshop to create your own custom shapes.
You may want to take a look at the following related articles:
- Photoshop Pen Tool Basics – Part 1
- Photoshop Navigation Bar Tutorial
- Lighting Effect Tutorial in Photoshop
- Photoshop Smoke Text Effect Tutorial
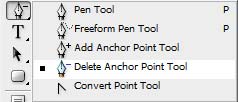
Photoshop Helping Tools of Pen Tool
Last week I have discussed about Pen tool in Photoshop Pen Tool Basics – Part 1. Ok I will discuss about other four photoshop helping tools of Pen tool.
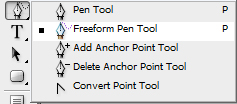
Useful Tools of Pen Tool
- Freeform Pen Tool
- Add Anchor Point Tool
- Delete Anchor Point Tool
- Convert Point Tool
Now I am going to discuss about these Pen tool options.
Freeform Pen Tool
Freeform Pen Tool is just below the path selection tool. With the help of freeform pen tool, we can create or edit lines, curves,or freedom lines and shapes. For most users, the freeform pen tool provides the best control and greatest accuracy for drawing. With the help of this tool, we can just draw with free hand. There is no need to draw points like pen tool.
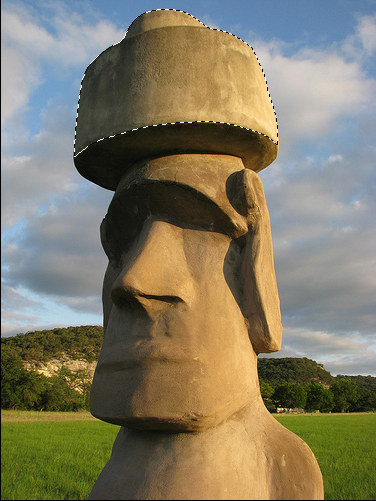
How Work Freeform Pen Tool in Photoshop
For example, we are having “Easter Island Head at Stonehenge” image in which we want to select the top of head stone.
Here we can draw with freeform pen tool and after drawing with this tool, right click & make selection. A separate window appears in which we can give feather for the selection and click OK. The area will be selected.
We can change the color, opacity and applying the blending options on selection path.
Add Anchor Point Tool
The Add Anchor Point tool is used to insert an anchor point in a path. The anchor point enables a user to edit the path. To add an anchor point in a path, position the pointer on the path where the anchor point needed to be added and click.

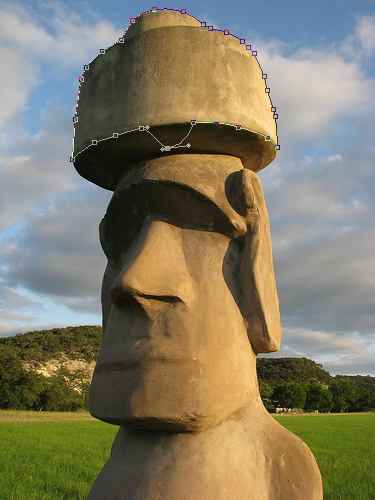
How Work Add Anchor Point Tool in Photoshop
For example, we are having this image which we want to select. Here we can draw with pen tool and after drawing with this tool, we observed that it need some more adjustments. Now we must add anchor point and adjust in this way as shown in preview. After drawing the path, we can make selection as like Freeform Pen Tool preview.
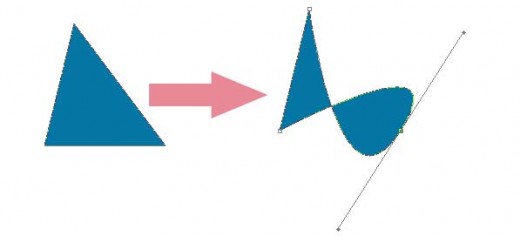
Delete Anchor Point Tool
The Delete Anchor Point Tool deletes anchors and reshapes existing vector shapes / paths (shape outlines).
How To Work Delete Anchor Point Tool in Photoshop
On the Toolbar, select the Delete Anchor Point tool. Click the anchor point or points you want to remove. When you remove one or more anchor points with this tool, the shape changes, but the path remains whole (it doesn’t split the path) you can see in preview below.

Convert Point Tool
The Convert Point Tool edits existing vector shape masks and paths (shape outlines) by converting smooth anchor points to corner anchor points and vice versa.

How To Work Convert Point Tool in Photoshop
The Convert Point Tool of Photoshop can be located in the Toolbox. You need to select the Convert Point Tool and then click on a smooth anchor point for converting it to corner anchor point. Dragging away from a corner anchor point, you can easily convert it to smooth anchor point again.
Summary
- Freeform Pen Tool helps we can draw a paths very easily.
- Using the Add Anchor Point Tool we can add new point in path.
- We can delete extra points from path help of the Delete Anchor Point Tool.
- Convert Point Tool helps us in change the shape angles in any direction.
We hope you will enjoy this Photoshop Pen Tool Basics Part 2. Don’t Forget to Follow TutorialChip on Twitter or Subscribe to TutorialChip to Get the Latest Updates on Giveaways, Tutorials and More for Free.
great tutorials as previous part. looking for pen tool tuts, thanks to post