Designing is not an easy job at all, especially when you don’t have any technical know-how and there is no one to guide you. However, there is no task in this world that cannot be achieved, so you should definitely try designing your own stuff, whenever required. It is quite a lot of fun and allows you to explore new ideas.
In order to design something, you need to have a good program such as Adobe Photoshop, which allows you to experiment and is extremely user friendly at the same time. Let’s say you need to design a visiting card for your business and don’t have the budget to hire the services of a professional designer. In that case, you don’t have to worry at all. Simply follow the below steps in order to get a perfectly designed business card.
Open a new file in Adobe Photoshop
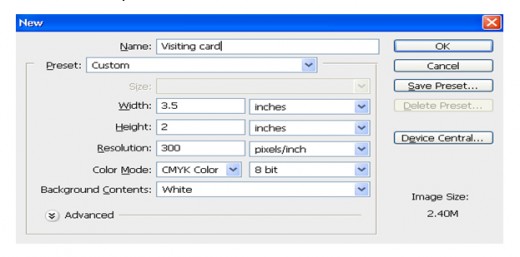
Ensure that you have got the latest version of Photoshop downloaded on your system. Once you launch it, you will see different tabs in front of you. Look at the top left corner of the page and you will find ‘File’. Hit that tab and select ‘New’ from the drop down list in order to open a fresh file. You will have to make some custom settings before proceeding further, so name your file, adjust the width, height, color, resolution and press ‘Ok’ to proceed. In the image shown below, we have adjusted the width to 3.5”, height 2”, resolution 300, color mode CMYK and background as white.
Mark different areas on the card
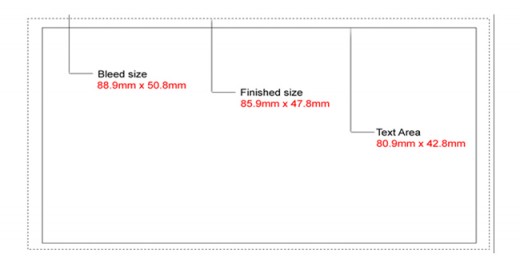
Select three areas on your card and mark the bleed size, finished size and text area. The former of the three is the total size of your card whereas the text area is where all of your printed stuff, including the text, will be entered. On the other hand, the finished size will be the one which specifies the boundaries of how much you can cut the card for designing purposes.
Choose the background
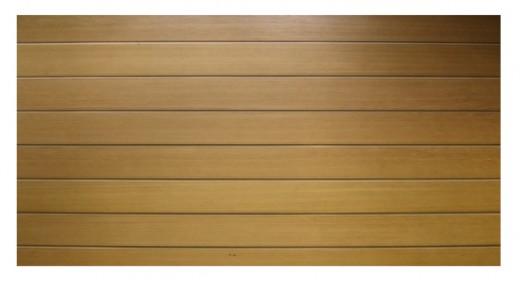
Select an ideal background for your card and paste it into your Photoshop file. In order to do that, you need to click on ‘File’ from the top left corner and choose ‘Place’ from the drop down list. You will then be asked to pick up a file, which you would have already picked from somewhere and saved on your system. You can also drag the file directly from its original location and drop it into the Photoshop window. Save your settings and continue with designing the card.
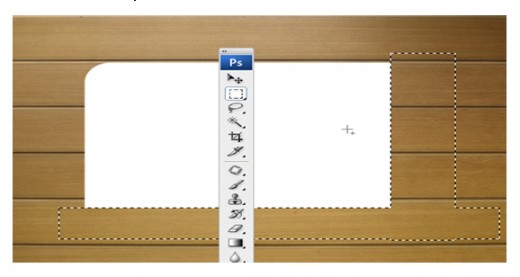
Select the Rounded Rectangle Tool
From the Photoshop tools, you will now have to pick up the ‘Rounded Rectangle Tool’ (U). You can keep the design as it is if you like, but you can make some more changes according to your liking.

Select Rectangular Marquee Tool
From the options available at the left side of your screen, choose the ‘Rectangular Marquee Tool’ in order to create a nice effect in your design. You can keep the card in round shape at two ends and keep the edges at the other.
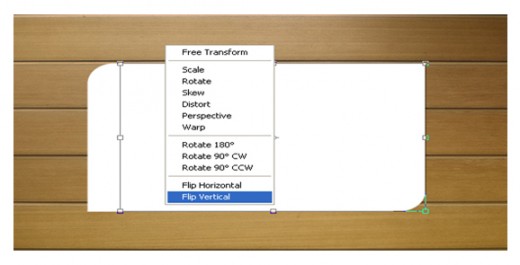
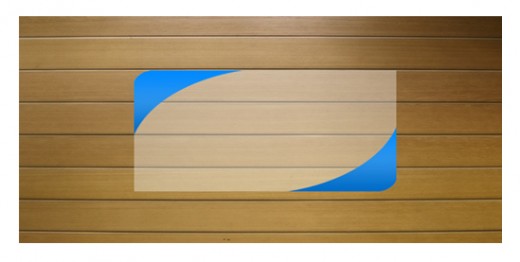
Finalize the edges by flipping them vertical
After following the previous step, you will get the rectangular edges at one side of the card, but that will not look cool at all. So, choose the ‘Flip Vertically’ option and you will get a similar result as shown in the below image:
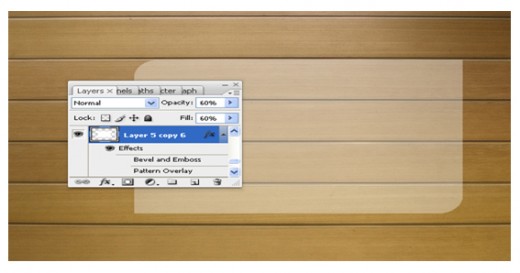
Change the opacity rate
Decrease the opacity rate in order to make the background color visible. You will find this option on the right hand side of your screen.
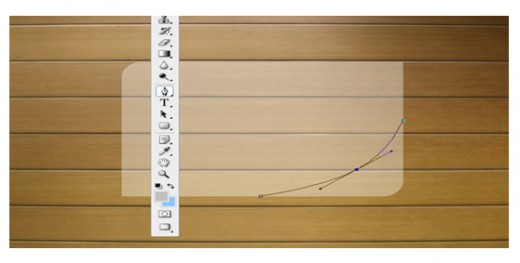
Use the Pen Tool
Once again, you will have to come back to the left side of your page, where you have a list of Photoshop tools available. From there, pick up the ‘Pen Tool’ (P) and add more elegance to your design.
Choose layer style
Add a new layer and choose some style for it from the given options. You can pick up the ‘Gradient Overlay’ from the blending options.
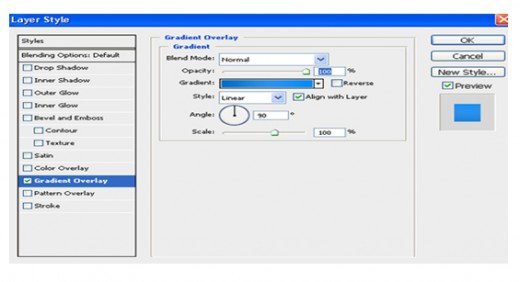
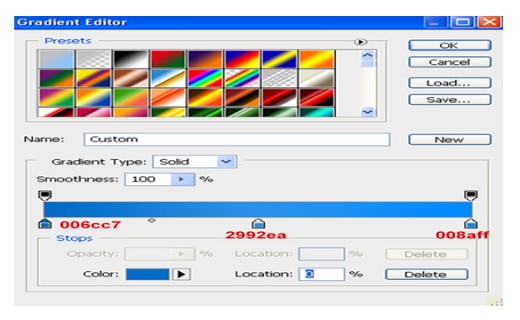
Edit the gradient
Open the ‘Gradient Editor’ and adjust the settings as per your liking. You will have to pick up color codes like shown in the below image:
The result you will get after this will be as follows:
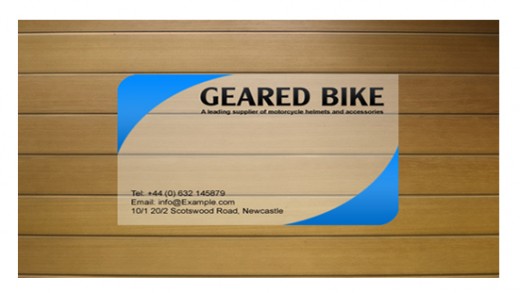
Enter the text
Choosing the ‘Horizontal Type Tool’ you can enter the text inside the body. The option will be present on the left of your screen. Once you have typed all of the necessary information, you can use the gradient settings to create cool effects and select your favorite color too. Moreover, you can change the font size of the details you enter inside the card as per your liking.
Add the logo
Finally, you will have to enter the logo inside the design of your card to make it perfect. It can be done easily just like the way you entered the background of your card in step 3. Simply choose ‘File’, followed by ‘Place’ and you will be asked to drag the logo inside your card. It will be ideal to keep it right in the center, but you can adjust according to your requirements.
By following these steps, you will be able to design cool embossed business cards. You can experiment in order to make it look unique and add different colors, which you feel will attract more users than normal. However, try to keep things simple and understandable for everyone, while designing stuff on Adobe Photoshop.