This post is completing the second part of CSS Basics Tutorial: Part 1. I have shared the following CSS concepts in the previous tutorial,
- The Basic CSS Selectors
- Inline: Adding Styles to an HTML Tag
- Embedded: Adding Styles to a Web Page
- External: Adding Styles to a Web Site
Let’s have a look into 4 more important concepts of CSS Basics.
5. Re-Defining HTML Tags
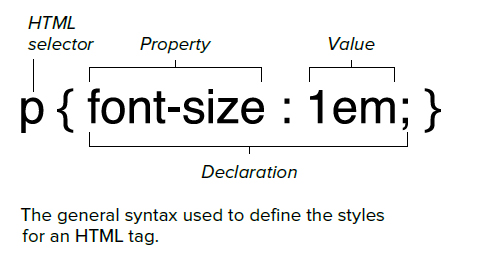
Almost all HTML tags have default browser styles associated with them. Take the <strong> tag, for example: Its inherent style declaration is the equivalent of font-weight: bold. We can change this default behavior of strong tag by adding new CSS declarations to the strong HTML selector. A general syntax example is,

Let Re-Define HTML Tags
- Start with the HTML selector whose properties you want to define.
- Follow the pattern as shown in above picture.
- CSS rules can be defined in the head of your document within the <style> tags or in an external CSS file that is imported or linked to the HTML document.
Full Example
<!DOCTYPE html PUBLIC "-//W3C//DTD XHTML 1.0 Transitional//EN" "http://www.w3.org/TR/xhtml1/DTD/xhtml1-transitional.dtd">
<html xmlns="http://www.w3.org/1999/xhtml">
<head>
<meta http-equiv="Content-Type" content="text/html; charset=utf-8" />
<title>Re-Defining HTML Tags</title>
<style>
h1 {color:#F00;}
strong {font-family:"Arial Black", Gadget, sans-serif;color:#00C;}
</style>
</head>

<body>

<h1>TutorialChip</h1>
<strong>Web Development and Designing Tutorials</strong>

</body>
</html>
6. Reusable Classes
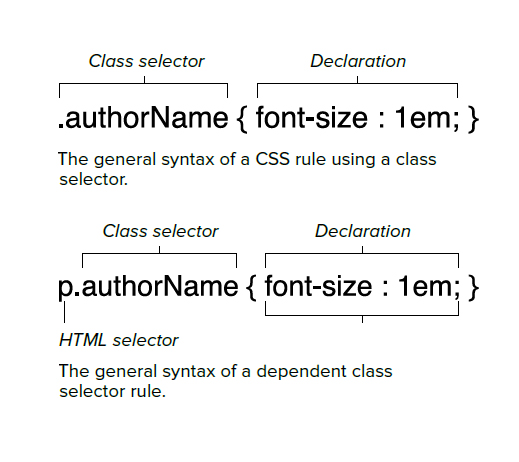
A class selector allows you to set up an independent style that you can apply to any HTML tag. Unlike an HTML selector,
which automatically targets a specific tag, a class selector is given a unique name that is then specified using the style attribute in the HTML tag or in any tags you want to use it.
However, you can also specify styles to apply using a class applied to a specific HTML tag, making it a dependent class.

Let understand Reusable Classes:
- Give your class a name. Type a period (.) and a class name you give it; then open and close your declaration block with curly brackets ({})
- CSS classes can be defined in the head of your document within the style tags or in an external CSS file that is imported or linked to the HTML document.
- The class name can be anything you choose.
- Add declarations to the rule.
Full Example of Independent and Dependent Classes:
<!DOCTYPE html PUBLIC "-//W3C//DTD XHTML 1.0 Transitional//EN" "http://www.w3.org/TR/xhtml1/DTD/xhtml1-transitional.dtd">
<html xmlns="http://www.w3.org/1999/xhtml">
<head>
<meta http-equiv="Content-Type" content="text/html; charset=utf-8" />
<title>Reusable Classes</title>
<style>

/**
Independant Class
*/

.blue {color:#00F;}

/**
Dependant Class
*/

p.red {color:#F00;}

</style>
</head>

<body>

<h1 class="blue">TutorialChip</h1>
<p class="red">Web Development and Designing Tutorials</p>

</body>
</html>
7. Defining Unique IDs
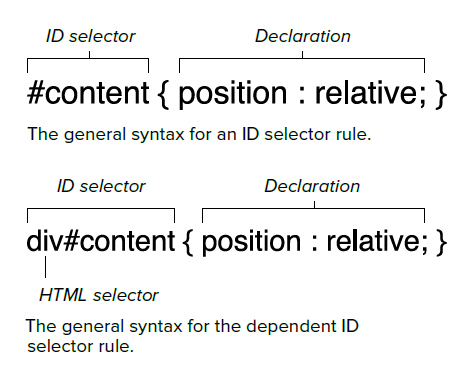
Like the class selector, the ID selector can be used to create unique styles that are independent of any particular HTML tag. Thus, they can be assigned to any HTML tag. IDs are used in HTML to help establish the structure of your page layout, identifying unique elements in the code, singling them out for special treatment, either for positioning with CSS or JavaScript.

To define an ID selector:
- Add the ID selector to your CSS. ID rules always start with a number sign (#) followed by the name of the ID.
- The name can be a word or any set of letters or numbers you choose.
- CSS rules can be defined in the head of your document within the <style> tags or in an external CSS file that is imported or linked to the HTML document.
- Add declarations to your ID.
- Add the id attribute to the HTML tag of your choice, with the name of the ID as its value.
Full Example:
<!DOCTYPE html PUBLIC "-//W3C//DTD XHTML 1.0 Transitional//EN" "http://www.w3.org/TR/xhtml1/DTD/xhtml1-transitional.dtd">
<html xmlns="http://www.w3.org/1999/xhtml">
<head>
<meta http-equiv="Content-Type" content="text/html; charset=utf-8" />
<title>Defining Unique IDs</title>
<style>

#block { width:500px; margin: 0px auto; padding:5px; border: 1px solid #F00; }
#left { width:200px; float:left; padding:5px; border: 1px solid #00F; }
#right { width:200px; float:right; padding:5px; border: 1px solid #00F; }

.clear { clear:both; }

</style>
</head>

<body>

<div id="block">

  <div id="left">Left Column</div>
  <div id="right">Right Column</div>

<br class="clear" />
</div>

</body>
</html>
8. Universal Styles
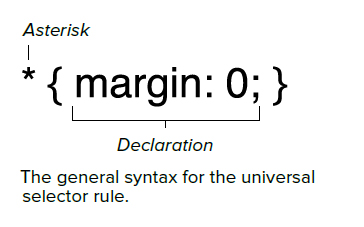
The universal selector is a wildcard character that works as a stand-in to represent any HTML type selector that can appear in that position in a contextual list.

Let use the universal selector:
- Add the universal selector. Type an asterisk (*) and then the open curly bracket.
- Add declarations to your universal selector rule.
Full Example:
<!DOCTYPE html PUBLIC "-//W3C//DTD XHTML 1.0 Transitional//EN" "http://www.w3.org/TR/xhtml1/DTD/xhtml1-transitional.dtd">
<html xmlns="http://www.w3.org/1999/xhtml">
<head>
<meta http-equiv="Content-Type" content="text/html; charset=utf-8" />
<title>Universal Styles</title>
<style>

* { margin:0px; padding:0px; }

</style>
</head>

<body>

<h1>TutorialChip</h1>
<p>Web Development and Designing Tutorials</p>

</body>
</html>
I hope you have enjoyed Part 1 and Part 2 of CSS Basics tutorial. Don’t forget to share your valuable comments.