Today we are going to share with you that how to create a beautiful lady bag in Photoshop. Its really interesting and easy to make like this lady bag. We have been published already many tutorials for you. You can very easily sharp your Photoshop skills with these tutorials. We hoped that you will like our tutorials. Don’t forget to share your opinion with us.
More creative Photoshop tutorials:
- How to Create a Radar Icon in Photoshop
- Attractive Yellow Flower Tutorial in Photoshop
- Tutorial: Create a Rainbow Effect in Photoshop
- Excellent Lighting Effect Tutorial in Photoshop
Tutorial Details:
- Program: Adobe Photoshop CS5
- Difficulty: Intermediate
- Estimated Completion Time: 1 hour & 30 Mins
Download source file:
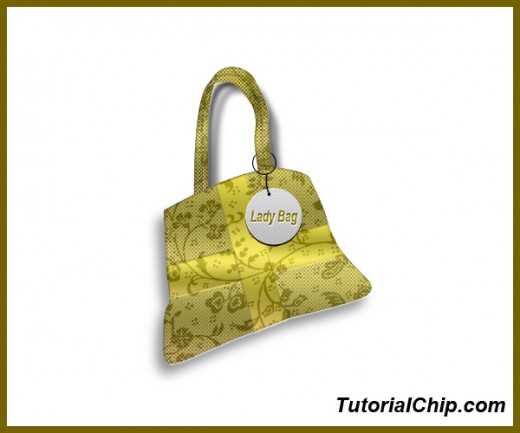
Lady Bag Tutorial in Photoshop – Final Preview
Tools and Resources
Related Tools Used in This Tutorial
- Gradient Tool
- Pen Tool
- Ellipse Tool
External Resources
Lets start to create a beautiful shiny lady bag in Photoshop.
Step 1
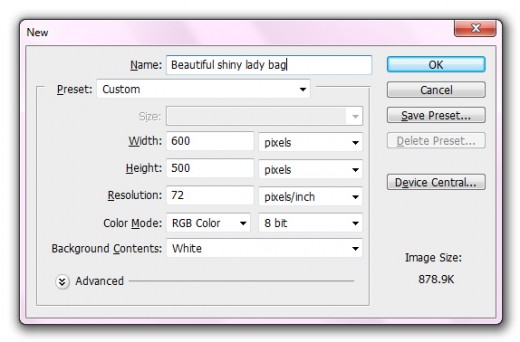
Create a new document (Ctrl+N) with size 600×500, any of color, I am creating with white color #ffffff.
Step 2
Select the pen tool from tool panel create a path of bag like show in picture below.

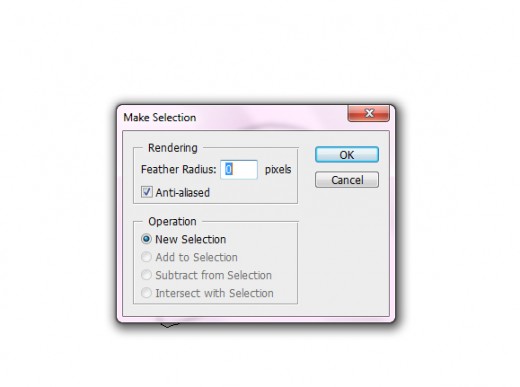
Step 3
After creating the path right click on the path and select the Feather radius 0% and ok, now apply any color u like, I am going to apply gray color #bab9b9, name it layer bag background.

Step 4
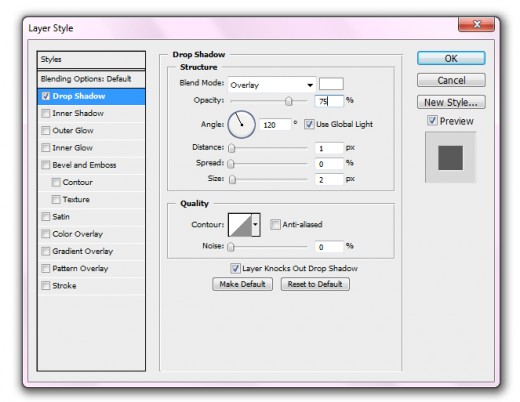
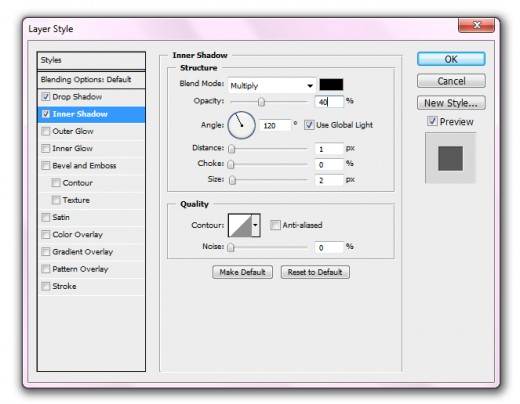
Now I am going to applying some blending options to the bag layer.
Drop shadow with white color #ffffff.

Inner Shadow with black color #000000.

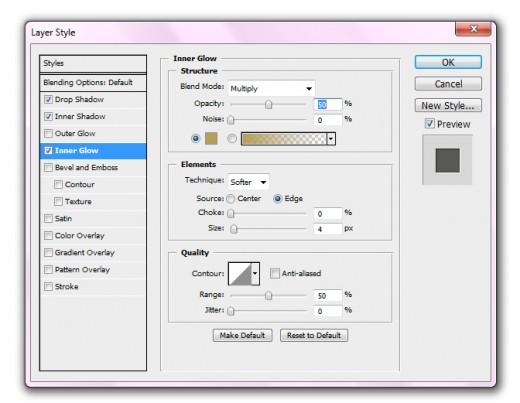
Inner Glow with color #b5a059.

Gradient Overlay
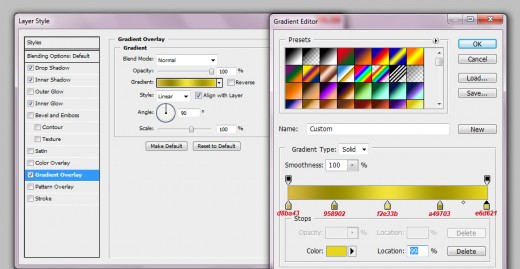
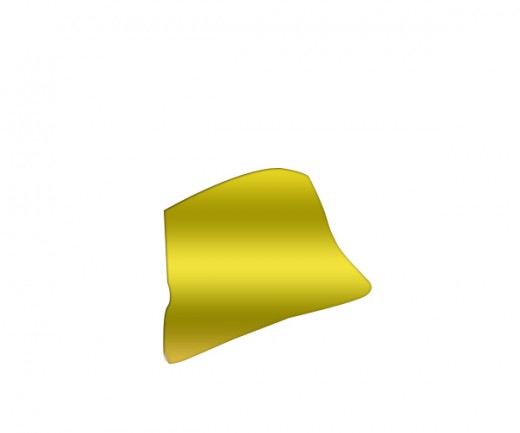
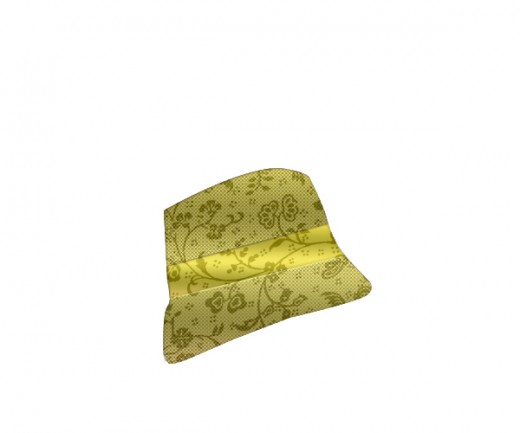
After applying these layer styles, we get a cool bag as like in preview.
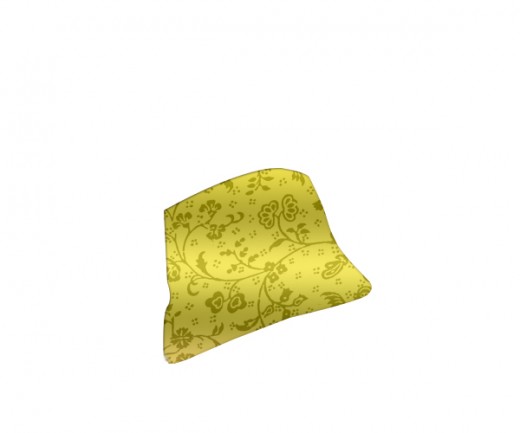
Step 5
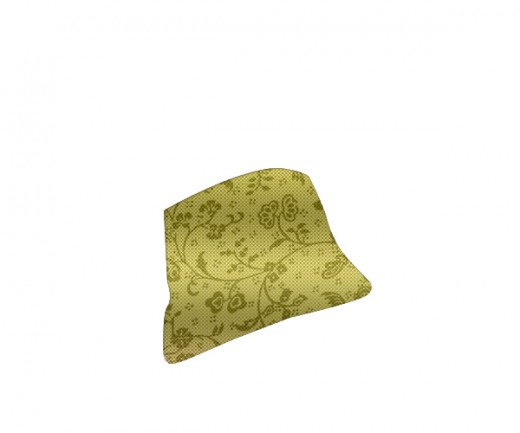
Now I am using the floral texture, you can download it. Use the texture and blend mode opacity set to 20%.
Step 6
Now I will applying net texture. I am going to use it, as like in picture below.
Step 7
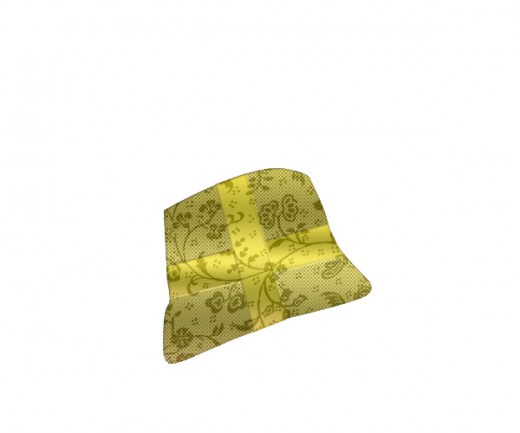
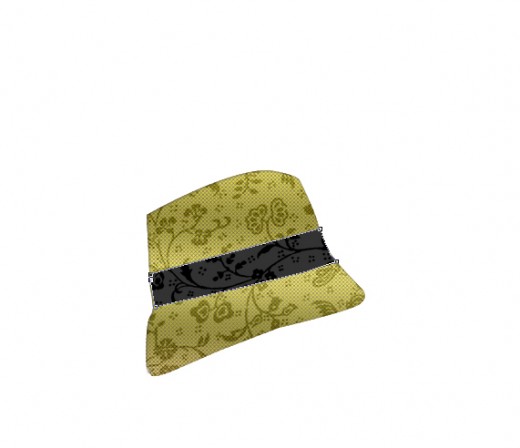
After this producer I am going to make path of the bag with the help of pen tool create a path, name it layer cool bag path, as like shown picture bealow.
Step 8
Now I am going to apply some blending options on cool path layer.
Drop shadow with white color #ffffff.
Inner Shadow with black color #000000.
Inner Glow with color #b5a059.
Gradient Overlay

After applying these all effects, apply the floral texture of this cool path layer, we get this result.
Now duplicate this layer and press Ctrl+T, and rotate to horizontally as like shown in picture below.