Television is a widely used telecommunication system for broadcasting and receiving moving pictures and sound over a distance. Now a days LCD television technology is very popular in the world.
So today, we are going to share with you that how to create a LCD TV in Photoshop. If you follow this tutorial then you can learn many new Photoshop techniques. This tutorial is present step by step. I hope you will like this and shar it with your friends.
Download other Photoshop tutorials:
- Create a Diagnostics Icon in Photoshop
- Create a Realistic iPhone in Photoshop
- Creating a Slick Silver Watch in Photoshop
- How to Make an Electronic Speaker in Photoshop
Tutorial details:
- Program: Adobe Photoshop CS5
- Difficulty: Intermediate
- Estimated Completion Time: 45 Mins
Download source file:
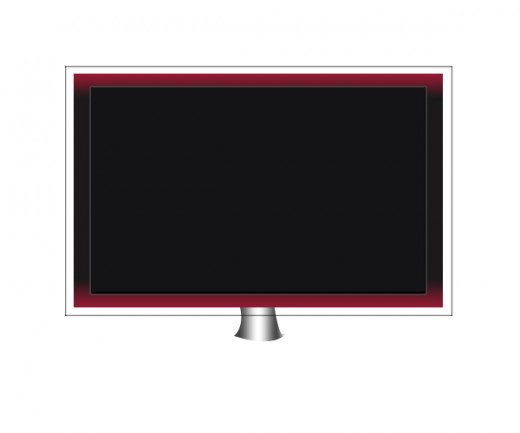
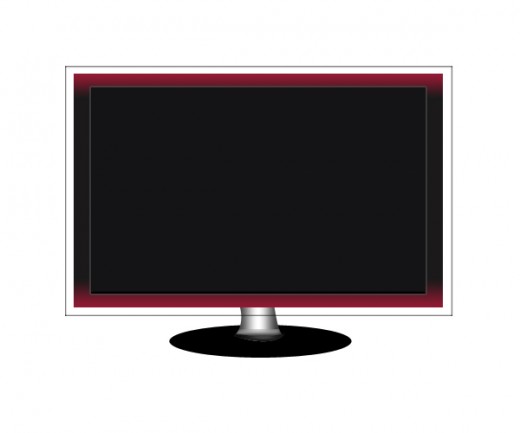
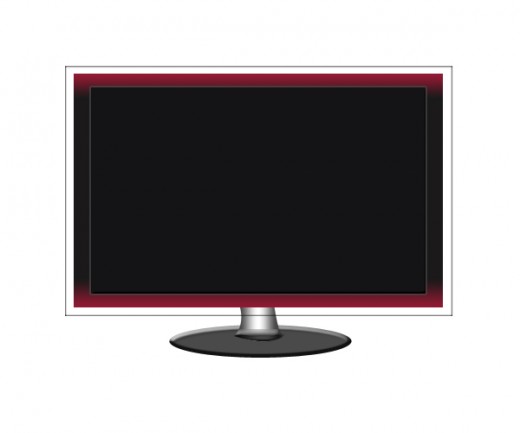
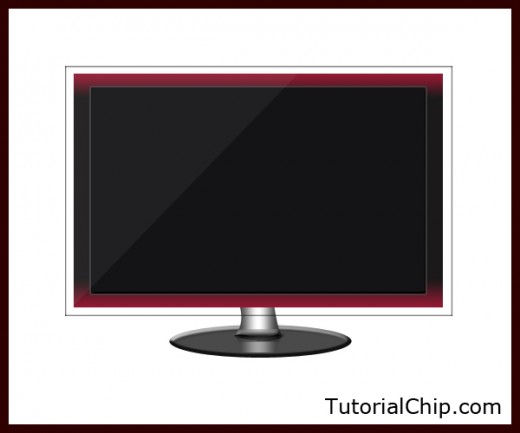
Create a Beautiful LCD Television in Photoshop – Final Preview

Tools and Resources

Tools
- Ellipse Tool
- Rectangle Tool
- Polygonal Lasso Tool
- Pen Tool
- Gradient Tool
Lets start to create a television in Photoshop
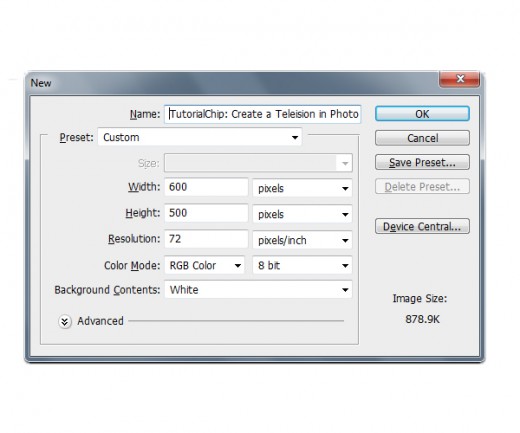
Step 1
Create a new document (Ctrl+N) 600×500 of size.
Step 2
Select Rectangle Tool from tool panel create a rectangle with black color #000000.

Go to Layer > Layer Style and applying some effects.
Inner Glow
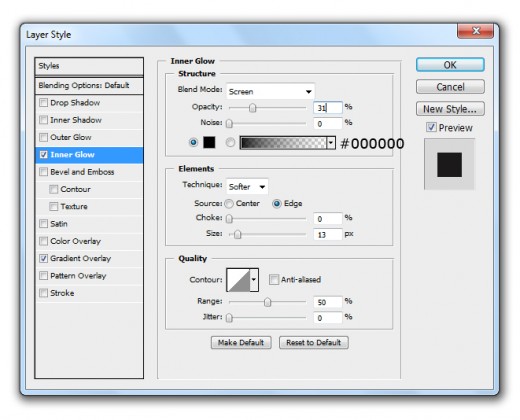
Gradient Overlay

When we applying layer styles, we get new effect on rectangle layer.

Step 3
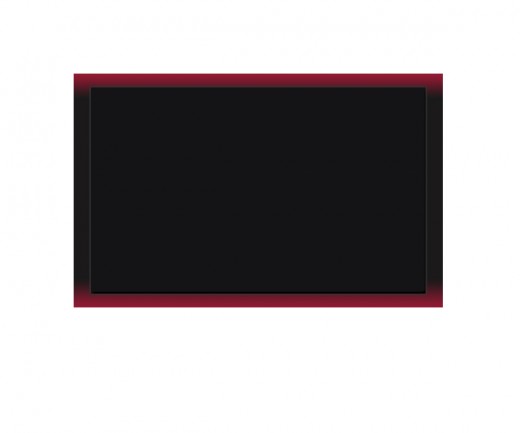
Select Rectangle Tool again and create a rectangle on first rectangle with white color #ffffff.
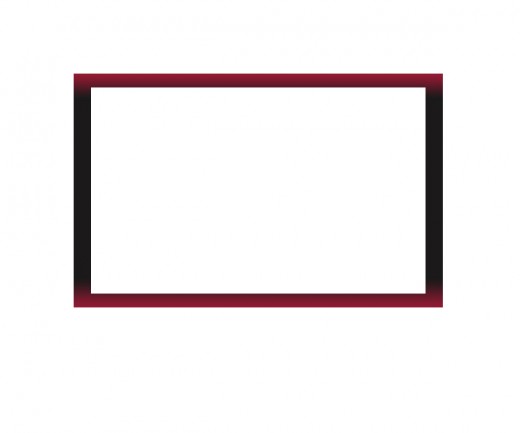
Now applying some blending options on second rectangle.
Bevel and Emboss
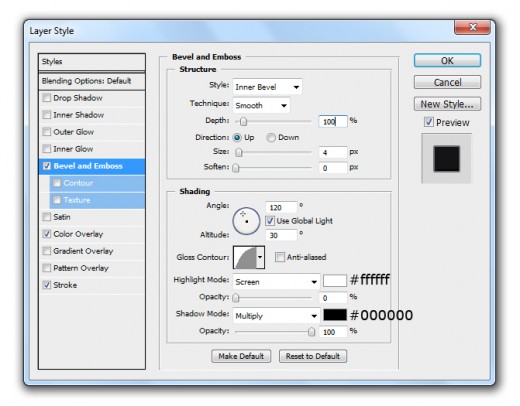
Color Overlay
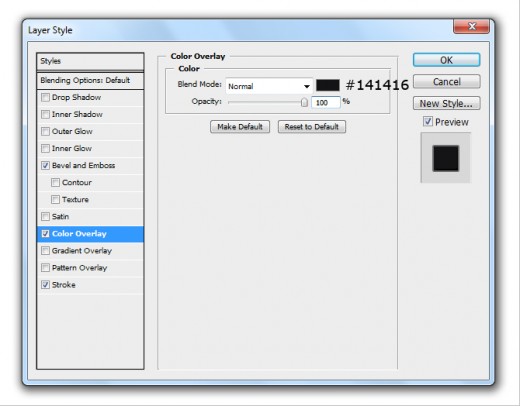
Stroke
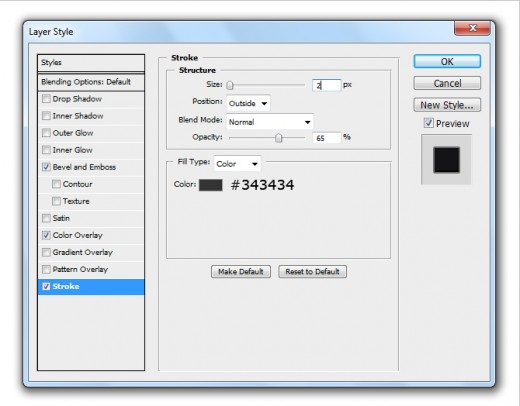
After applying these blending options we get nice effect on this rectangle.
Step 4
Now create a third rectangle with the help of Rectangle Tool and applying this color #dedede. Set this rectangle bottom of the all rectangle layers.
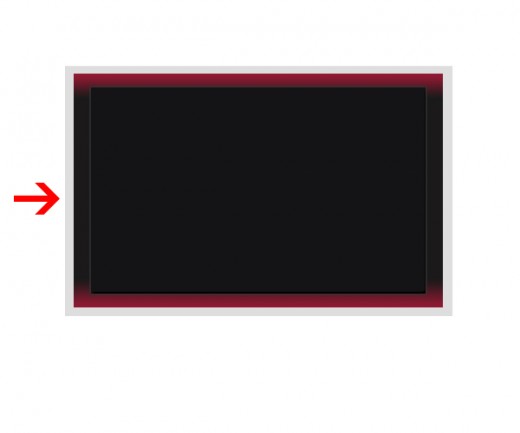
Go to blending option and applying Inner Glow. But remember first set the blend mode fill 0% from layer panel.

When we applying inner glow and set blend mode fill 0% then we get a cool effect in preview.

Step 5
Now create new layer select the Pen Tool and create a path as like shown in preview.
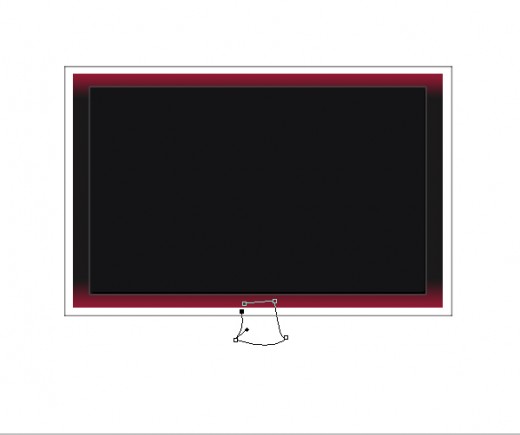
Now right click on path and select the Make Selection option.
Fill any color as you like, but I am filling with black color #000000 named it layer Stand.
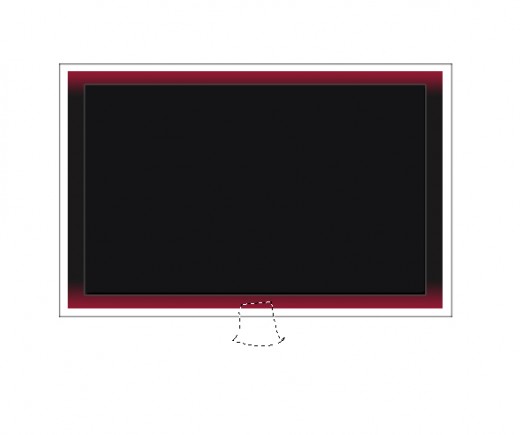
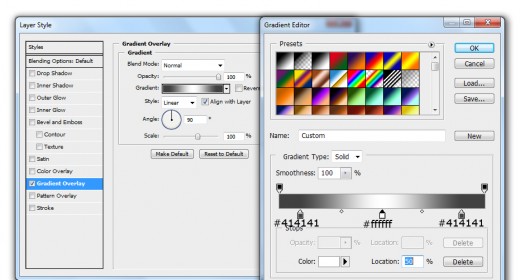
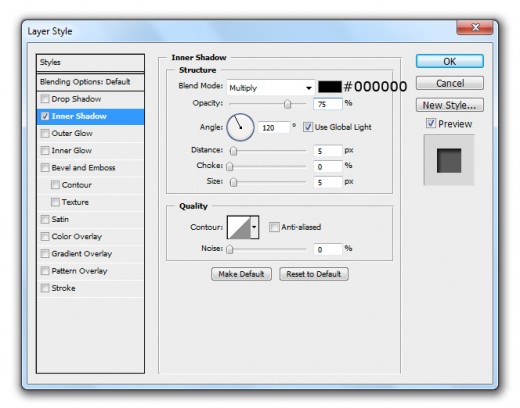
Step 6
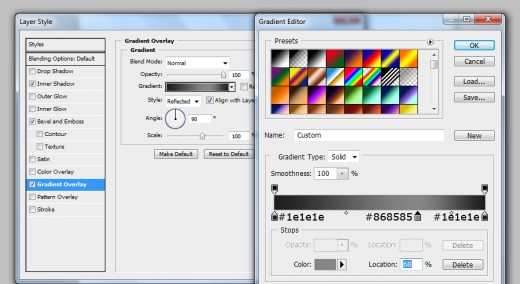
Set this stand layer bottom of all the layers and applying Gradient Overlay.
After applying gradient overlay we get new effect on stand layer.
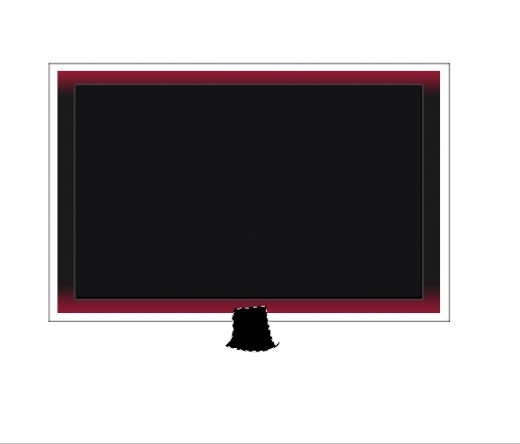
Step 7
Create new layer make a selection on stand layer with Pen Tool or Lasso Tool as you like and name it layer Small Stand.
Fill it with black color #000000.
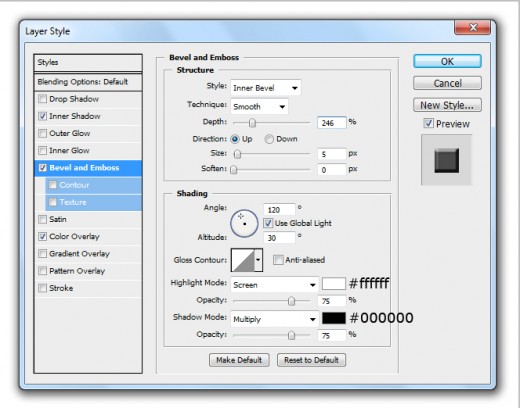
Now go to blending option and applying some effects.
Inner Shadow

Bevel and Emboss
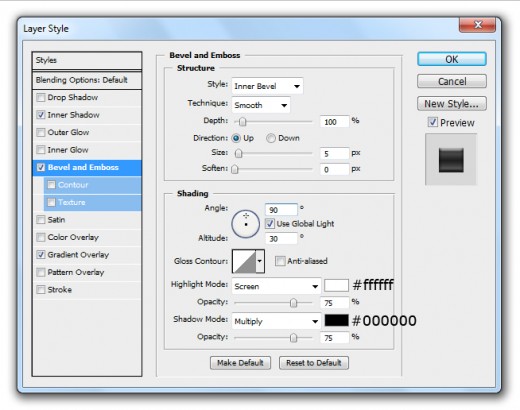
Gradient Overlay
When we applying these effects on this layer we get a cool result.
Step 8
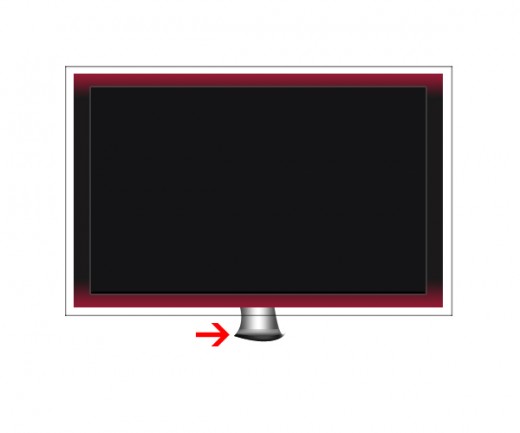
Select the Ellipse Tool and create a circle shape with black color #000000.
Go to Edit > Transform > Perspective and set this circle layer as like in picture.
After this producer set this circle layer bottom of the stand layer as like in picture below.
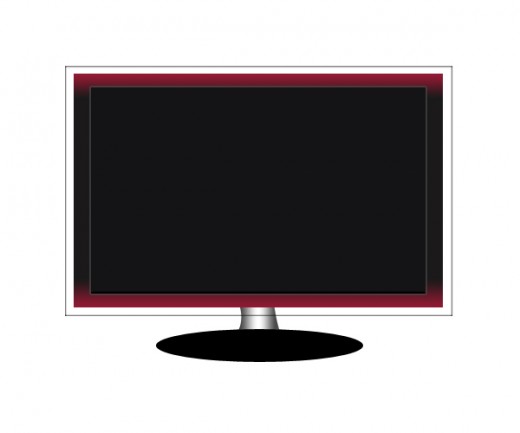
Now go to Layer > Layer Styles and applying some styles on this circle layer.
Inner Shadow
Bevel and Emboss
Color Overlay
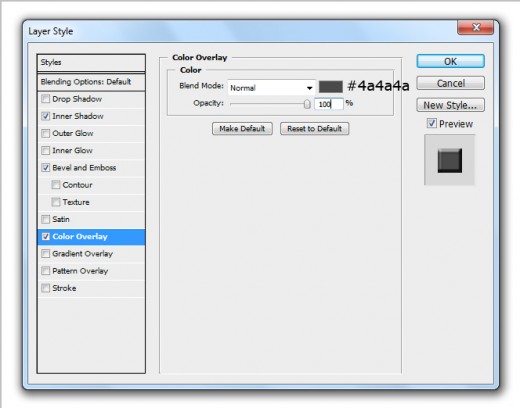
After applying these effects we get a new stylish circle.
Step 9
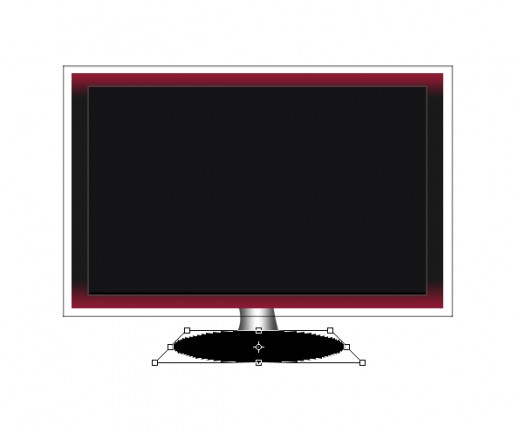
Duplicate the stand and small stand layers, merge them both duplicate layers (Ctrl+E) name it layer Vertical Stand and go to Edit > Transform > Flip Vertical as like in preview below.

Now cut half vertical stand with help of Rectangular Marquee Tool as like in preview.

Down the opacity of vertical stand layer till 50%.

Step 10
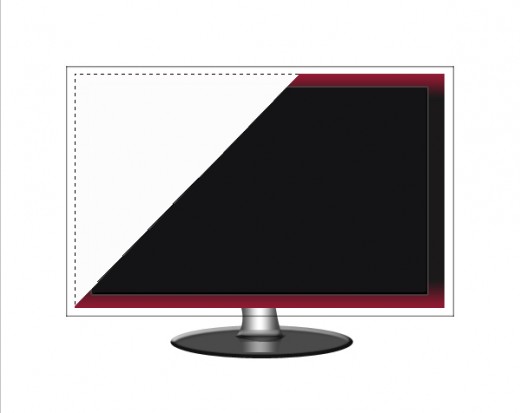
Create new layer select the Polygonal Lasso Tool and make a selection as like in preview.
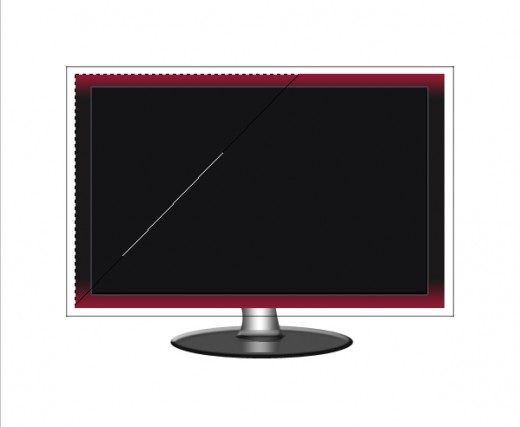
Fill the selection with white color #ffffff.
Now down the opacity 5% of this layer as like in final preview.
Final Preview
I hope you have enjoyed this most beautiful television tutorial. Naver forget to share your comments with us. Follow TutorialChip on Twitter or Subscribe to TutorialChip to Get the Latest Updates on Giveaways, Tutorials and More for Free.