Photoshop gives designers the ability to create some amazing effects. Lightning effect tutorial offer an assortment of techniques for making your work creatively glow.
Today I am going to create the best Photoshop lightning effects tutorial out there. This is a chance to put your learning into action. I hope you will appreciated our this new creation. If you like this tutorial then forward you sweet comments. Enjoy!
Other most visited photoshop tutorials:
- Create a Medieval Fantasy Themed Photo in Photoshop
- How to Create a Floating Over Grown Tree in Photoshop
- How to Create a Collage of Polaroids Photo in Photoshop
- Create a Fantasy Photo Manipulation Tutorial in Photoshop
Tutorial details:
- Program: Adobe Photoshop CS5
- Difficulty: Intermediate
- Estimated Completion Time: 30 Mins
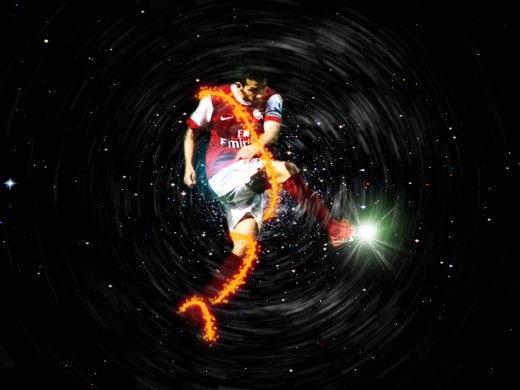
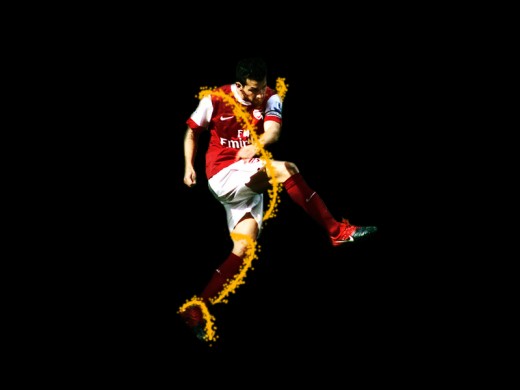
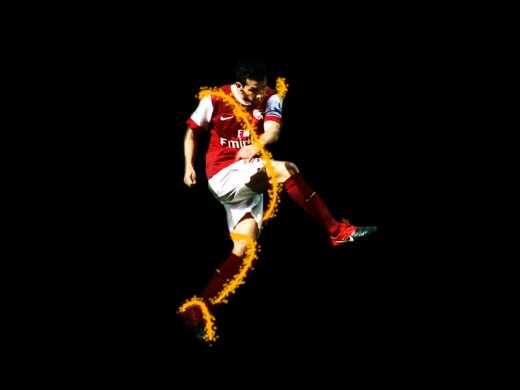
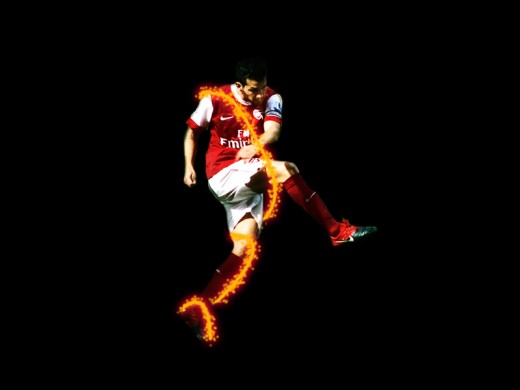
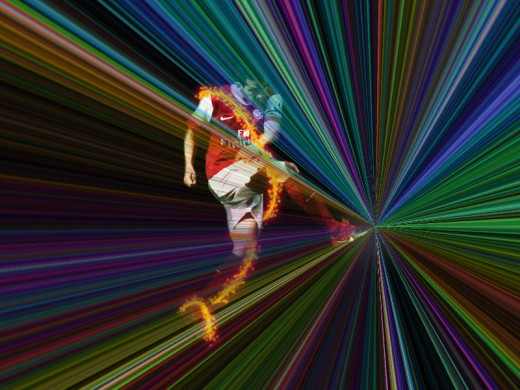
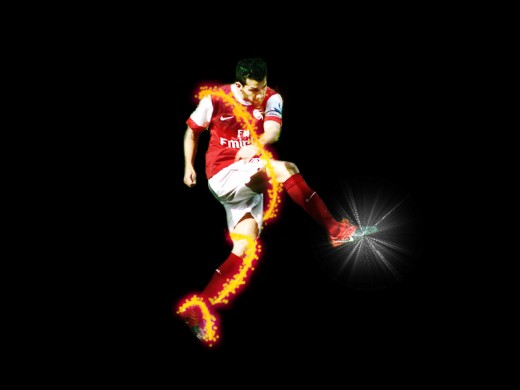
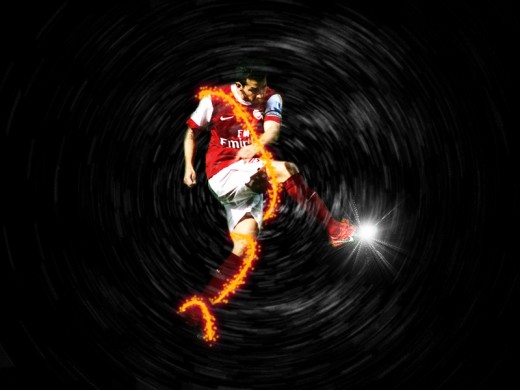
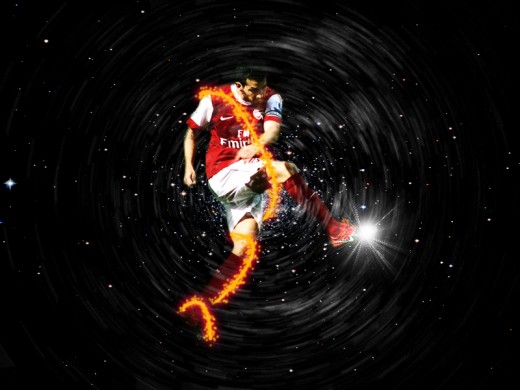
Create a Lightning Effect on Flying Man in Photoshop – Final Preview
Tools and Resources

External Resources
Photoshop Tools
- Pen Tool
- Brush Tool
- Eraser Tool
- Gradient Overlay
Lets start to create our flying man lightning effect in photoshop.
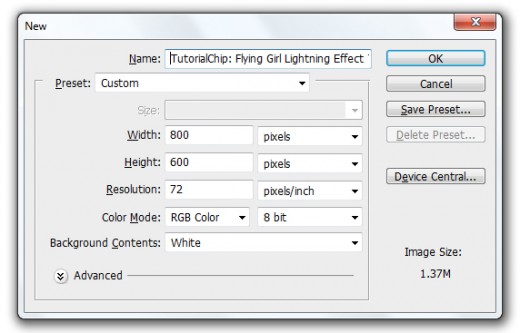
Step 1
Create a new document (Ctrl+N) with 800×600 of size.
Step 2
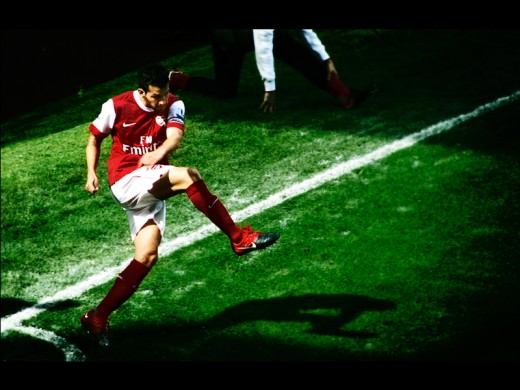
First of all set background color black #000000, now add Football Player Image in photoshop.
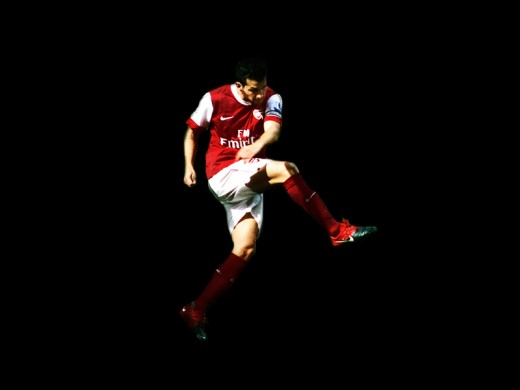
Rasterize it, select Eraser Tool from tool panel and erase the unneeded area, set player image center of the canvas as like in preview.
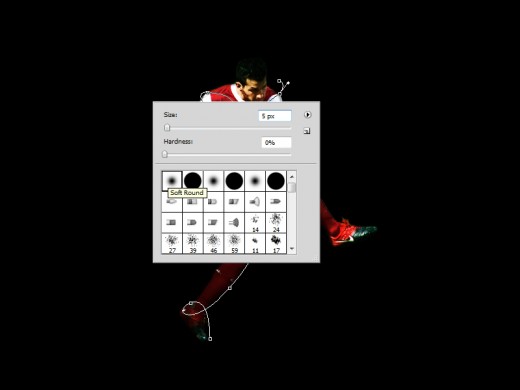
Step 3
Select Pen Tool create a path on football player image as like in preview.

After creating path select 5px any soft round brush and set foreground color #ffb400.
Now create a new layer (Shift+Ctrl+N) select Pen Tool, right click on path and select Stroke Path option then stroke panel will be opened.
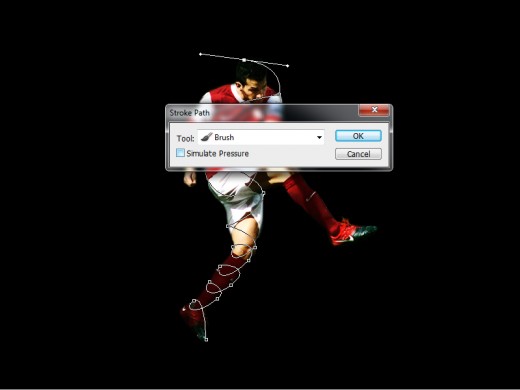
Press enter then a 5px stroke path created name it 1st Stroke.
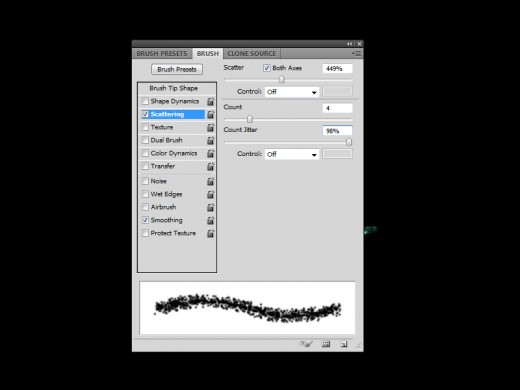
Step 4
Now again create a new layer (Shift+Ctrl+N) name it layer 2nd Stroke, select brush tool press (F5) to open brush panel and set Scattering option setting.
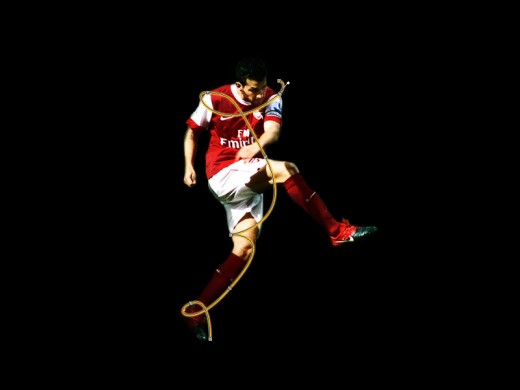
After brush setting select Pen Tool, right click on path select Stroke Path option then press ok and get this result.

Select Eraser Tool and erase these stroke areas as like in preview.

After erase stroke areas we get this result.
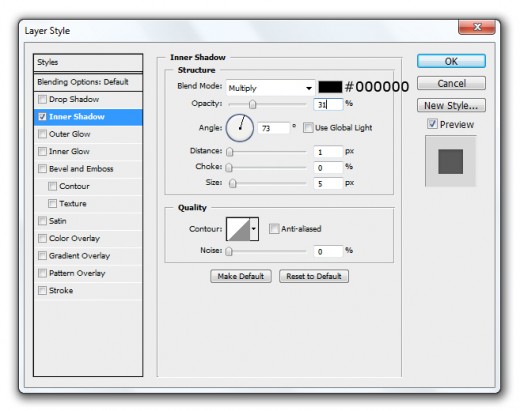
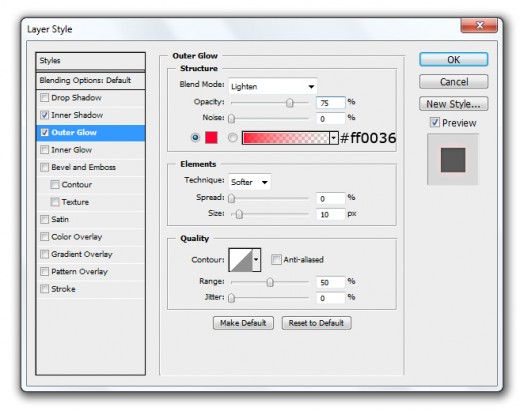
Now I am going to applying some Blending Options on 1st stroke layer.
Go to Layer > Layer Style and applying these Blending Options.
Inner Shadow
Outer Glow
Inner Glow
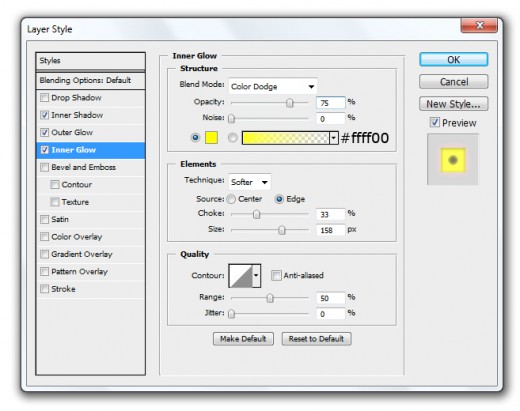
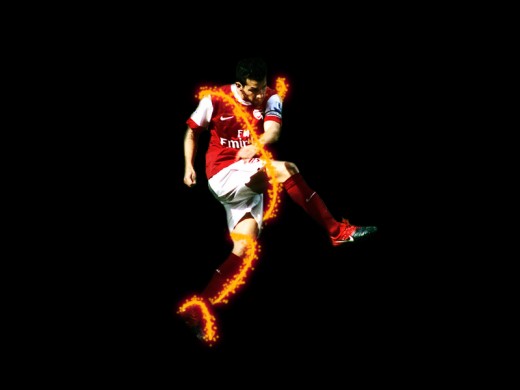
After applying these layer styles we get new effect on 1st stroke layer.
Step 5
Select 2nd stroke layer and applying Outer Glow.
Go to Layer > Layer Style > Outer Glow.
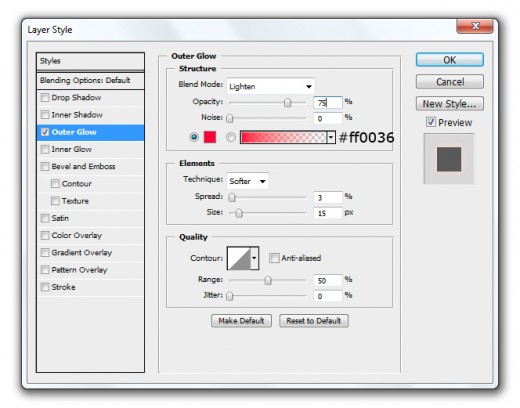
After applying outer glow we get nice effect on 2nd stroke layer.
Step 6
Select Eraser Tool from tool panel and erase both stroke layers from player right shoulder area as like in preview.
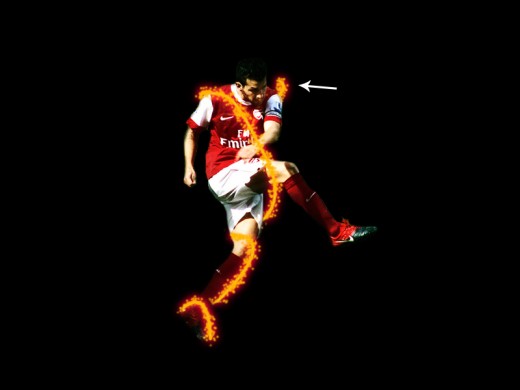
After erase stroke area here we get a new result.
Step 7
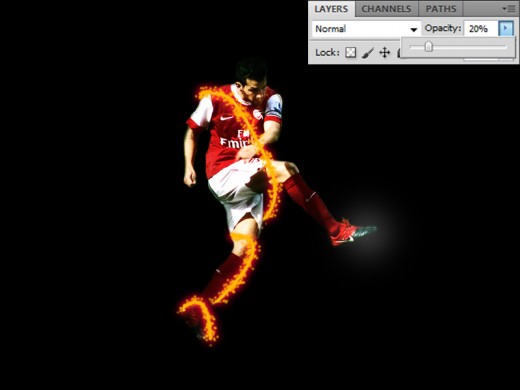
Create a new layer (Shift+Ctrl+N) select 100px soft round brush and paint player right foot area with white color #ffffff.
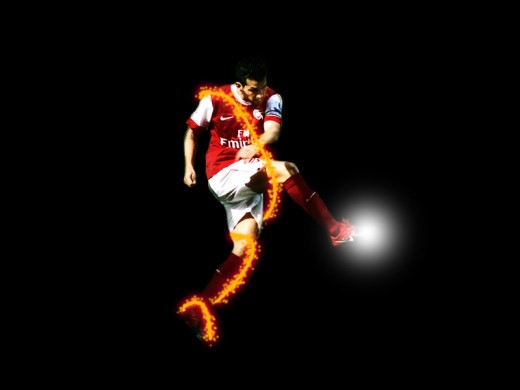
Now down Opacity (20%) of this brush Layer.
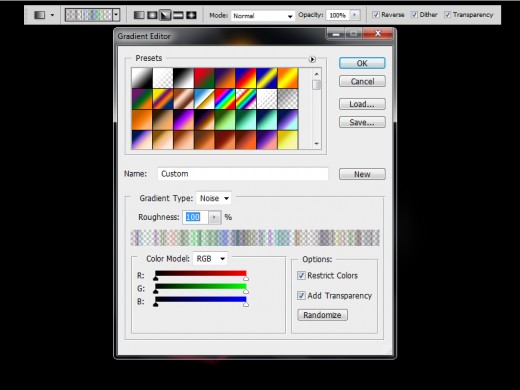
Step 8
Select Gradient Tool open gradient editor and set this settings.
After this settings create a new layer and paint with gradient on player right foot area as like in preview.
After applying gradient now go to Image > Adjustment > Desaturated, then we get this new result.

Now applying Gaussian Blur Filter on this gradient layer.
Go to Filter > Blur > Gaussian Blur.
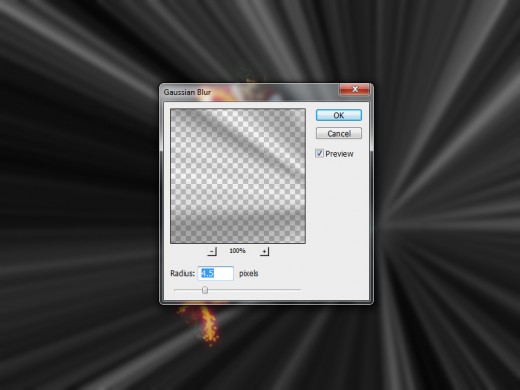
After applying gaussian blur we get this result.

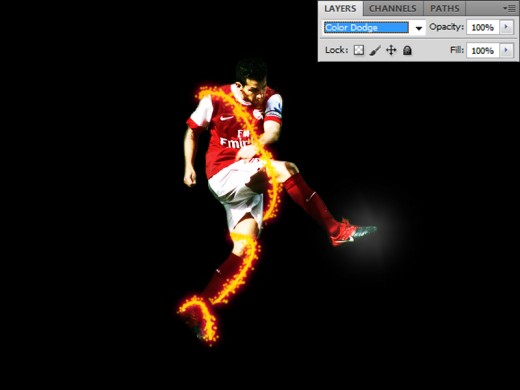
Set Blend Mode to (Color Dodge) of this gradient layer.
Now set Levels of this gradient layer.
Go to Image > Adjustment > Levels.
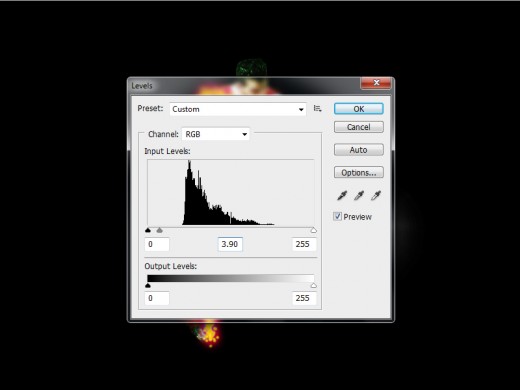
When we set levels we get a nice result.
Select Eraser Tool and erase gradient layer from player image layer, just erase left side body area as like in picture below.
Step 9
Select 50px any soft round brush, create a new layer and paint brush with white color #ffffff on football player right foot area as like in preview.
Step 10
In this step create a new layer (Shift+Ctrl+N) select Debris Brush and paint it to the whole canvas with white color #ffffff.
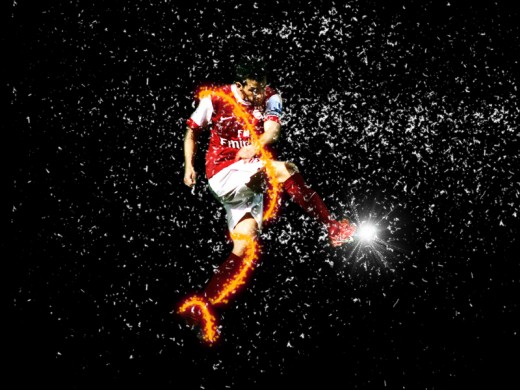
Go to Filter > Blur > Radial Blur set Amount (10).
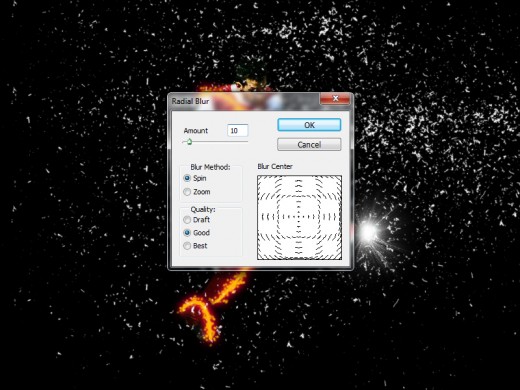
After applying radial blur we get a new effect on brush layer.
Step 11
Now add Hubble Image in photoshop.
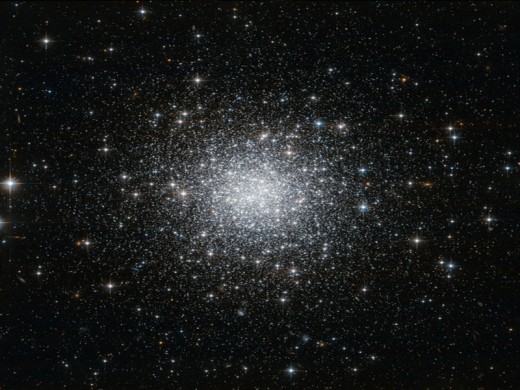
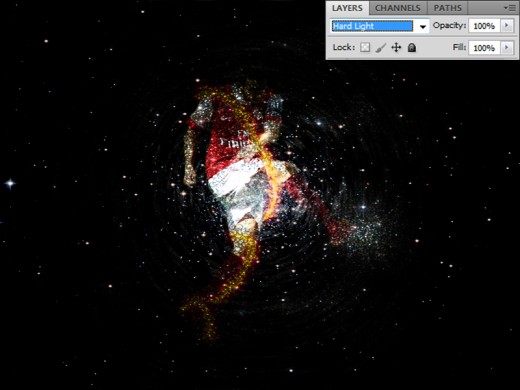
Set Blend Mode to (Hard Light) of this hubble image layer.
After set blend mode set hubble image bottom of all layers.
Step 12
Create a new layer select 100px any soft round brush and paint it with this color #0bb4eb on player body area as like in preview.

Set Blend Mode to (Screen) of this brush layer.
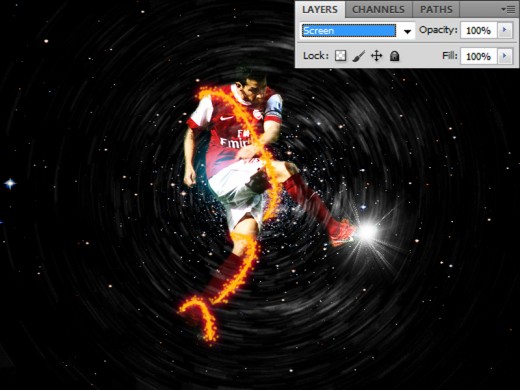
Step 13
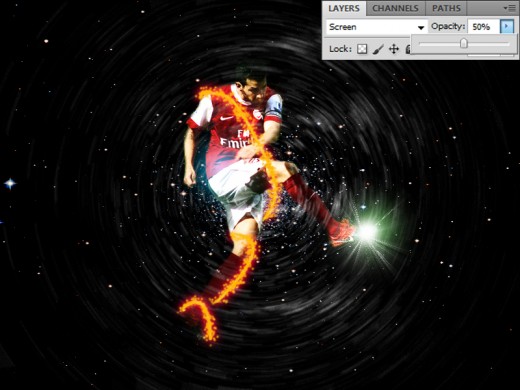
Again create a new layer, select 100px soft round brush paint player foot area with this color #7cc672.
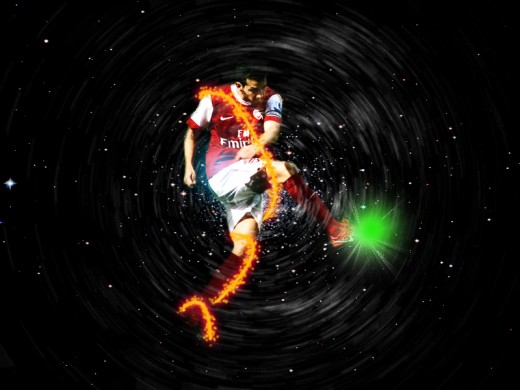
Set Blend Mode to (Screen) and Opacity (50%) of this layer.
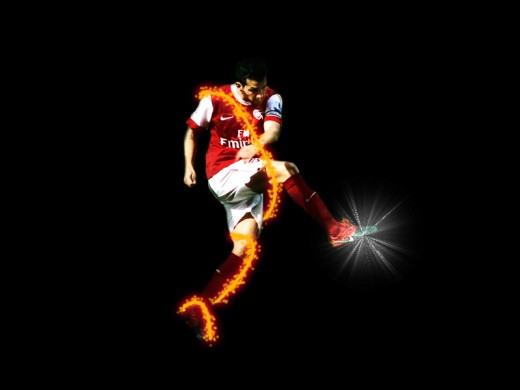
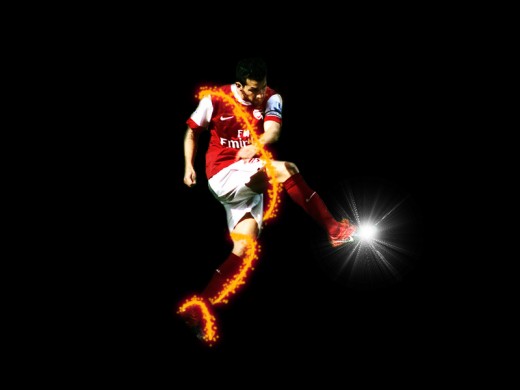
After doing all the procedure here we get our lightning effect on flying man in final preview.
Final Preview
I hope you will definitely like this flying man lightning effect tutorial and always remember to share your lovely comments with us. Follow TutorialChip on Twitter or Subscribe to TutorialChip to Get the Latest Updates on Giveaways, Tutorials and More for Free.
You’ve done really great job! Excellent tutorial it is,thanks a lot for sharing this nice post 🙂