WordPress is a powerful personal publishing platform, and it comes with a great set of features designed to make your experience as a publisher on the Internet as easy, pleasant and appealing as possible. WordPress is one of the best wed development platforms in the net today. Many don’t know what is WordPress and its capabilities.
Today I am going to share with you that how to design a WordPress logo in Photoshop CS5. Its so simple and easy tutorial to create your own logo designing. I have complied this tutorial step by step. I hope you will like it. Always remember to share your sweet comments with us.
Other related photoshop tutorials:
- Learn How to Create a Glass in Photoshop CS5
- Creating a Watercolor Painting Effect in Photoshop
- Create a Fantastic Retro Radio Using Photoshop CS5
- How to Create a Pencil Sketch Effect in Photoshop CS5
Tutorial details:
- Program: Adobe Photoshop CS5
- Difficulty: Intermediate
- Estimated Completion Time: 30 Mins
Create a WordPress Logo in Photoshop – Final Preview

Tools and Resources
External Resource
Photoshop Tools
- Text Tool
- Ellipse Tool
- Gradient Overlay
- Elliptical Marquee Tool
Lets start to create our word press logo in Photoshop.
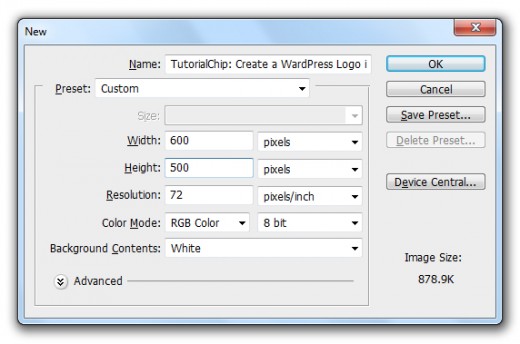
Step 1
1st of all create a new document (Ctrl+N) with 600×500 of size.
Step 2
Select Ellipse Tool (U) from tool panel and draw a circle with black color #000000.

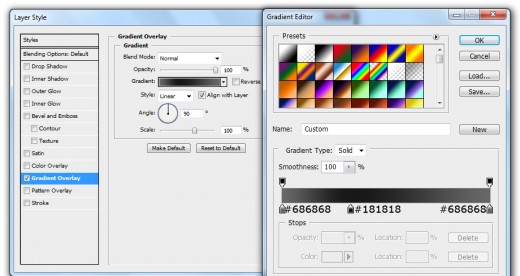
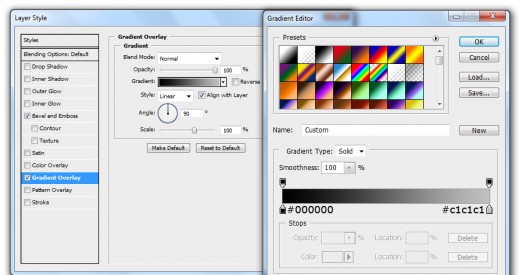
Name this layer 1st Circle, now we will applying Gradient Overlay on this 1st circle layer.
Go to Layer > Layer Styles > Gradient Overlay.
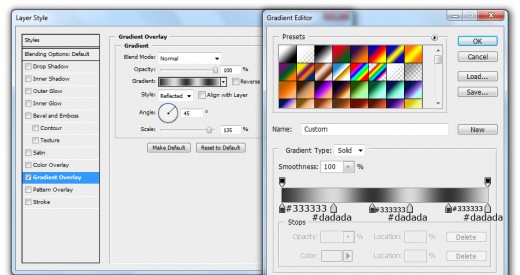
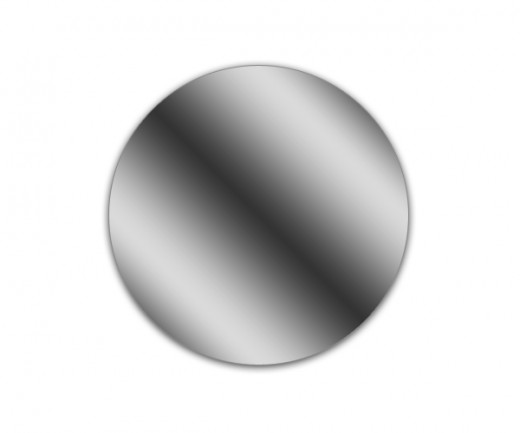
After applying gradient overlay we get a cool effect on 1st circle layer.
Step 3
Select Ellipse Tool again and create a circle with white color #ffffff as like in preview.

Name this layer 2nd Circle, go to the Blend Options and applying some Layer Styles on this 2nd Circle layer.
Go to Layer > Layer Styles and applying these Layer Styles.
Gradient Overlay
Stroke
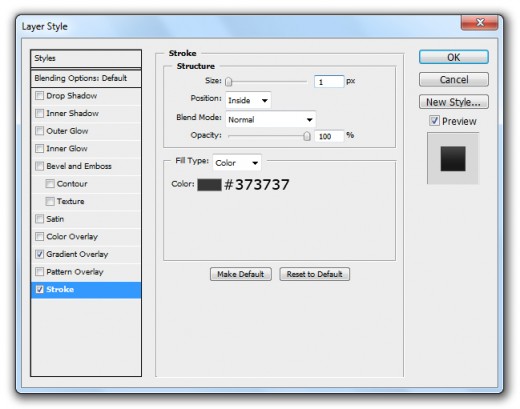
After applying these layer styles we get a new effect on 2nd circle layer.

Step 4
Select Ellipse Tool ones again and create a circle with white color #ffffff as like in picture below.

Name this layer 3rd Circle, select 1st circle right click and chose (Copy Layer Style) option then paste layer style on 3rd circle layer.

Step 5
Select Ellipse Tool and create a circle center of all circles with white color #ffffff name it 4rth Circle.

Go to the Layer Styles and applying some Blending Options on this circle layer.
Go to Layer > Layer Styles and applying these Blending Options.
Inner Glow
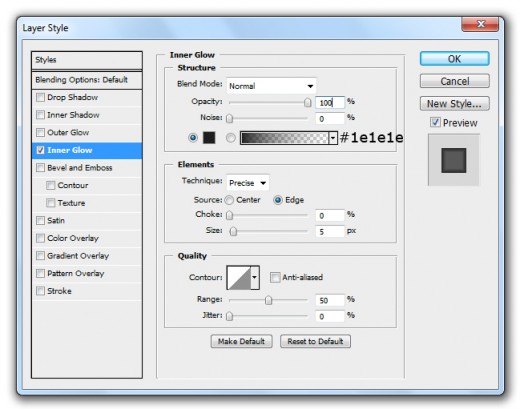
Gradient Overlay
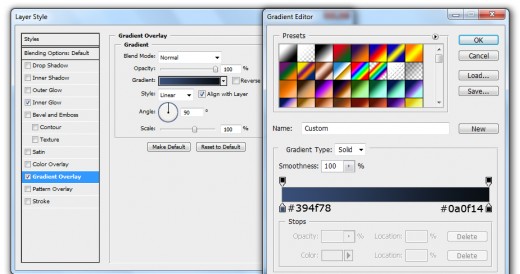
After applying these layer styles we get awesome effect on 4rth circle layer.

Step 6
Select Text Tool from tool panel and type a text with (220px) applying white color #ffffff.

Hold Ctrl key and click thumbnail of 4rth circle layer to make a selection.

Press (Shift+Ctrl+I) to inverse the selection.

Select text layer rasterize it hit delete button to delete selected area then press (Ctrl+D) to deselected selection.

Go to the Blending Options and applying some Layer Styles on text layer.
Go to Layer > Layer Styles and applying these Layer Styles.
Bevel and Emboss
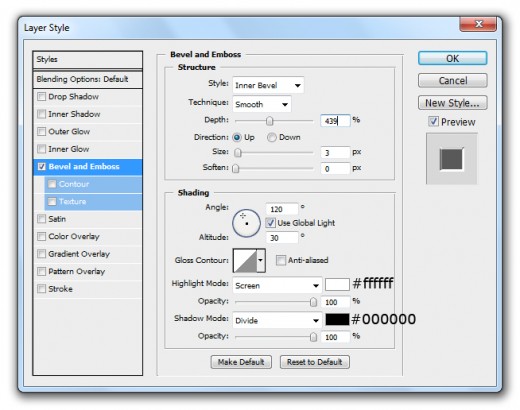
Gradient Overlay
After applying these layer styles we get nice effect on text layer.

Step 7
Select Ellipse Tool from tool panel and create a circle with white color #ffffff top of all the layers name it layer Crystal.

Select Elliptical Marquee Tool and make a selection as like in preview.
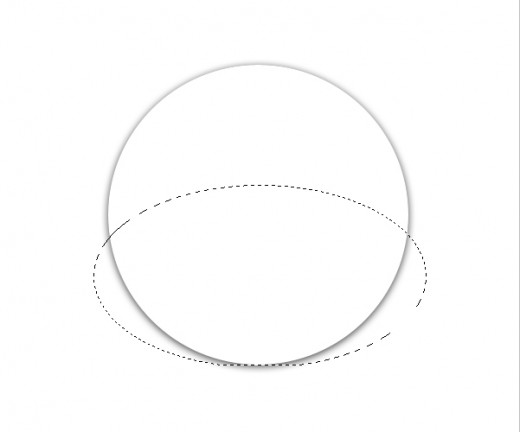
Rasterize crystal layer and hit delete button to delete selected area then press (Ctrl+D) to deselect selection.

Down Opacity (10%) of this crystal layer.
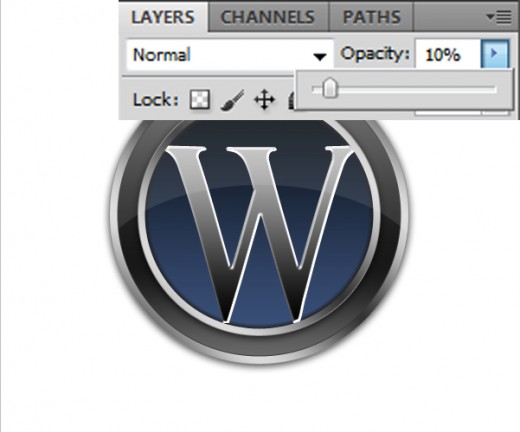
After down opacity get nice result.

After complete all steps, we get our WordPress logo in final preview.
Final Preview
I hope you will have like this WordPress logo tutorial. With theses useful techniques you can create your own any logo. If you have any question you can share with us without any hesitate. Follow TutorialChip on Twitter or Subscribe to TutorialChip to Get the Latest Updates on Giveaways, Tutorials and More for Free.