One of the most common questions I receive from our Photoshop users, and not just beginners, that What is the difference between the Opacity and Fill options in Photoshop? It’s a good question because in most cases, they actually are exactly the same. Both the opacity and fill options control a layer’s transparency.
So today, in this very useful and important tutorial I am going to share with you that what difference between opacity and fill options. I hope that you will like our struggle. Feel free to share your comments with us.
More useful photoshop basic tutorials:
- How to Change the Hair Color in Photoshop CS5
- Learn How to Create Your Own Brush in Photoshop
- Create a Clean and Sleek Separator Line in Photoshop
- How to Create an iTunes Icon for iPhone in Photoshop
Difference Between Opacity and Fill Options in Photoshop: Final Preview

Step 1
Open Adobe Photoshop, and create a new Photoshop document with any size and any color. Now take a new layer and create any object or any text as you like.

Step 2
Now applying the outer glow on this circle layer as like in preview.

Step 3
Now adjust the opacity setting of the circle layer into 30%. In this case, the black circle to something that will be obvious.
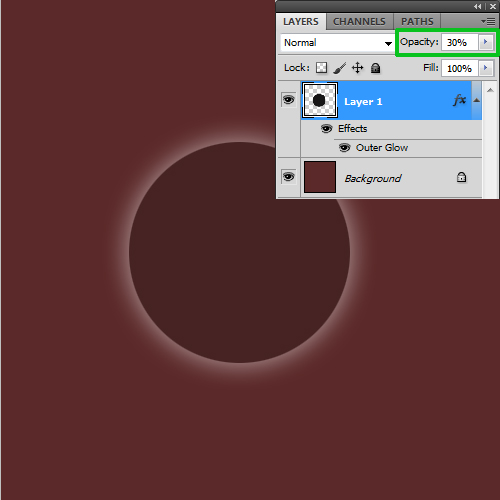
OK, you will notice that when we down the opacity then our circle and outer glow effect are faded to 30%.
“It mean that when we down and up the opacity then this opacity setting applying all of the layer including layer effects”.
Now we check the Fill option that what work is fill option on any layer.
Step 4
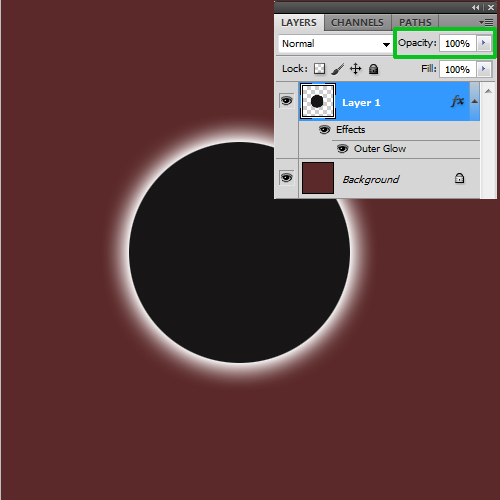
We go back on opacity option and again turn into 30% to 100%.
Step 5
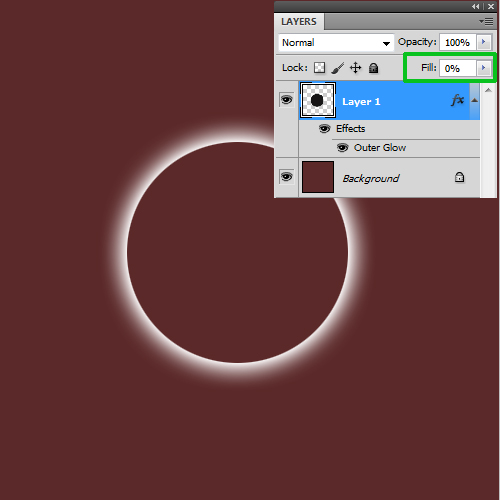
Now go to Fill option and down the fill into 0%. When we down the fill to 0% then our main object’s color is disappear just left the effect who applying on the object.
Solution
Remember, Opacity affects all of the layer including layer effects. Fill only affects the layer content, but not layer effects.