In this simple and easy Photoshop tutorial, you will learn how to change the hair color of any picture using a mask. You’ll learn to use the quick mask mode tool, the Hue/Saturation adjustment and the blending mode. I am currently using Adobe Photoshop CS5, but you can be done in any versions of Photoshop just as well. I hope you will like this helpful tutorial.
Other useful photoshop tutorials:
- Create a Clean and Sleek Separator Line in Photoshop
- How to Create an iTunes Icon for iPhone in Photoshop
- How to Create a Cool Glossy Button Using Photoshop CS5
- Create an Audio Player Slider with Easy and Simple Techniques in Photoshop
Tutorial details:
- Program: Adobe Photoshop CS5
- Difficulty: Beginner
- Estimated Completion Time: 15 Mins
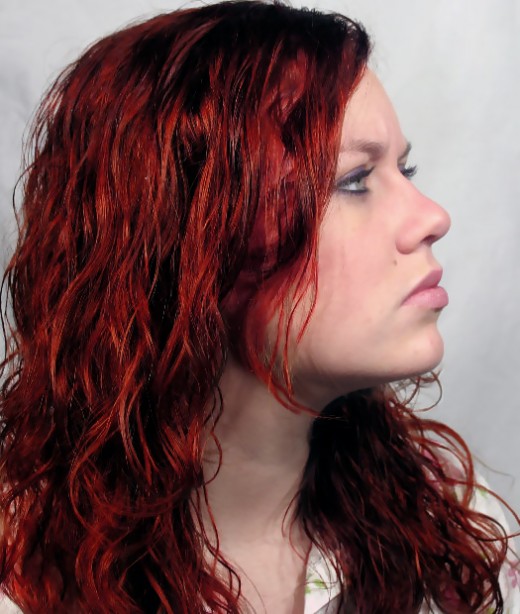
How to Change the Hair Color in Photoshop CS5: Final Preview
Tools and Resources
External Resource
Photoshop Tools
Following Photoshop tools are used in this tutorial.
- Brush Tool
- Quick Mask Mode Tool
Lets start to change the hair color in Photoshop CS5.
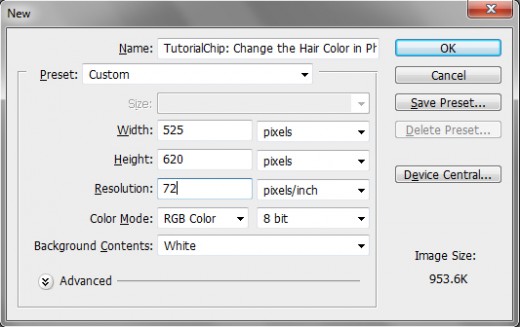
Step 1
Open Adobe Photoshop, and create a new Photoshop document. I am going to create a new document of 525 x 620 px with #ffffff color.
Step 2
Insert the girl photo in Photoshop. Before getting started, you should make here skin smoother by going to Filter > Blur > Surface Blur and use these settings:
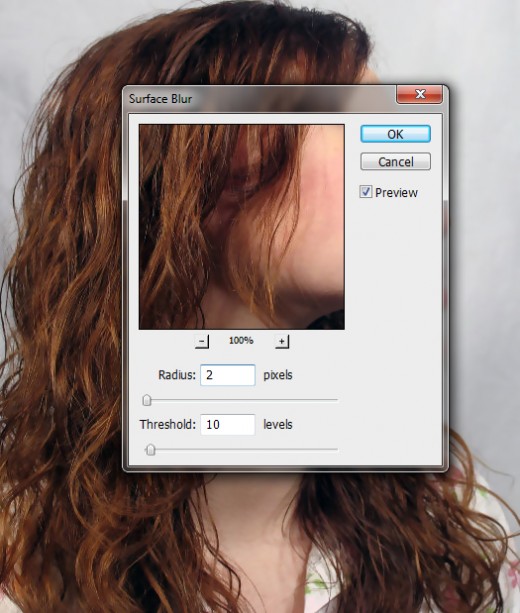
After applying the Surface blur filter then we have get a smooth skin as like in preview.

Step 2
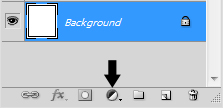
Create an adjustment layer by clicking on the Create new fill or adjustment layer button, and choose hue/saturation from the drop down menu.
A pop up window of hue/saturation will come up and we shift the Hue to -6 and saturation to -15.
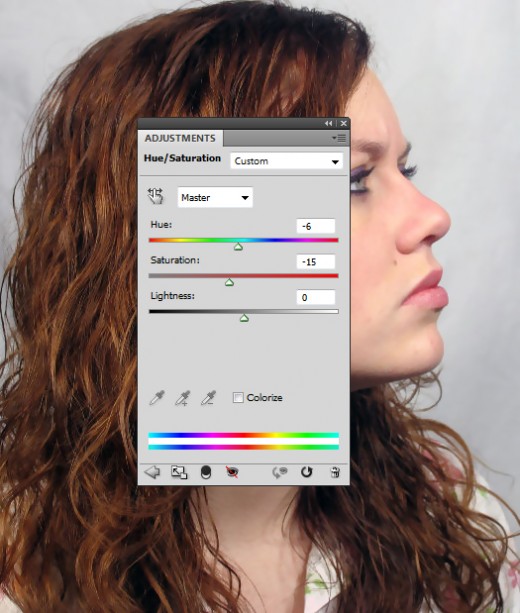
After applying the Hue/Saturation we have get cool effect on picture.

Step 3
Press D and X keys from your keyboard to reset and swap your foreground and background colors. Enter the Quick Mask Mode (Q) and use a soft brush to paint the hairs as like in preview below.
Step 4
Then exit the quick mask mode just click on quick mask mode tool. Now you can see there selected area and unselected area as like in below. The area that we painted on is now turn into unselected area.
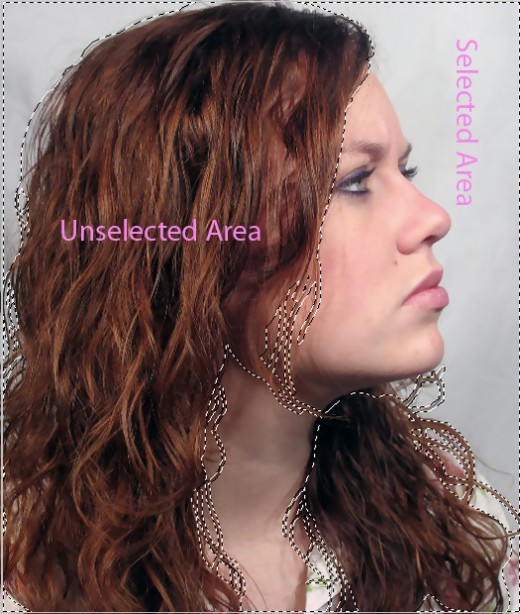
Press Ctrl+Shift+I to invert the selection areas as like in preview below.

Step 5
Press Ctrl+J to create a new layer with the selected area duplicated so that we can process it as we want.
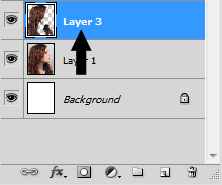
Step 6
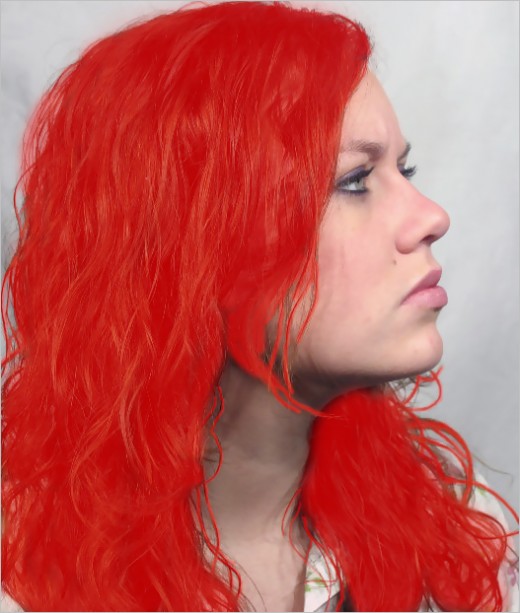
Go to Image > Adjustments > Hue/Saturation (Ctrl+U) to bring up the Hue/Saturation box, adjust sliders to achieve the color you want.
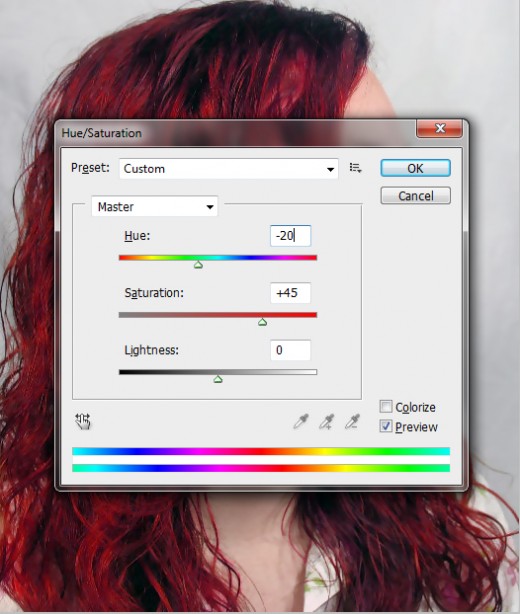
After applying the Hue/Saturation, then made the more attractive look we change the blend mode into Soft Light. Now you can see the final preview below.
Final Preview
Conclusion
So here it is your finished changing the hair color tutorial. You can try to make it in your own family and friends pictures. I hope you will have liked this tutorial. If you have any questions about this tutorial then feel free to you can share with us.