The digital camera is one of the most remarkable 21st century famous camera that takes video and photographs both. Digital camera recording images via an electronic image sensor. Its the originally main device used in the field of digital photography.
In this tutorial, we are going to create a digital camera in Photoshop using basic tools. This idea is useful for icons. I hope you will like this tutorial and don’t forget to share your comments with us.
More photoshop tutorials:
- Creating a 3D Globe in Photoshop CS3
- How to Draw a Laptop in Photoshop CS5
- How to Create a Webcam Icon: Photoshop Tutorial
- Awesome Apple QuickTime Icon Tutorial in Photoshop
Tutorial details:
- Program: Adobe Photoshop CS5
- Difficulty: Intermediate
- Estimated Completion Time: 45 Mins
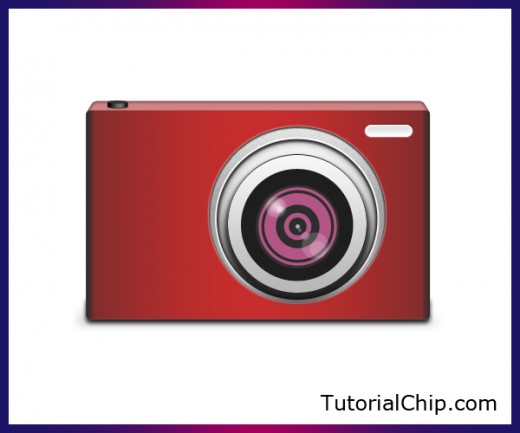
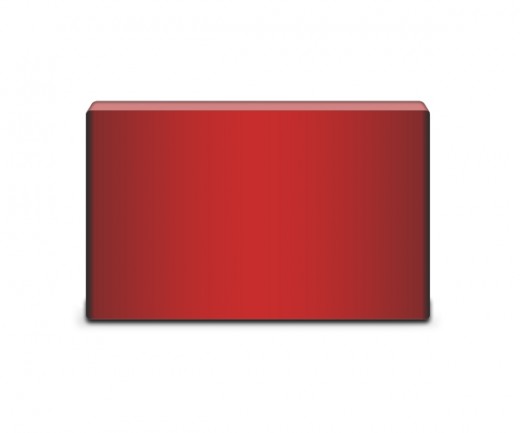
Create a Digital Camera in Photoshop – Final Preview
Tools and Resources
Tools
- Rectangle Tool
- Rounded Rectangle Tool
- Ellipse Tool
- Gradient Overlay
Lets start to create our digital camera in Adobe Photoshop CS5.
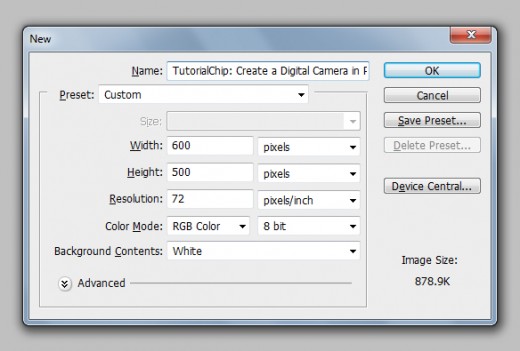
Step 1
Create new document (Ctrl+N) select any size you like I am selecting 600×500 of size.
Step 2
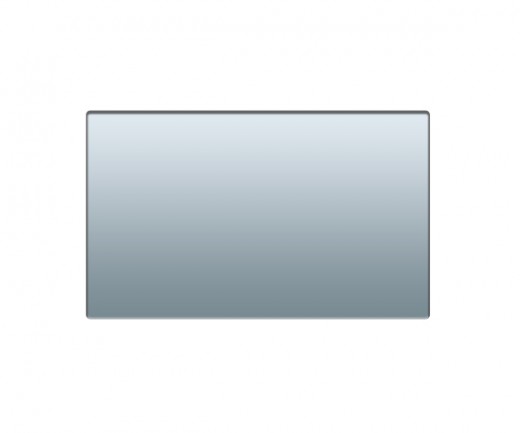
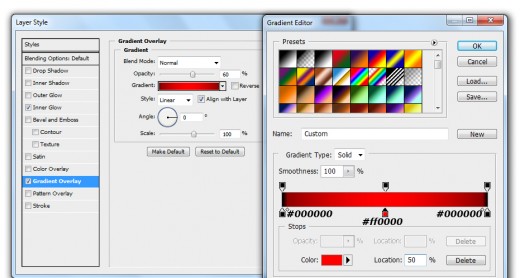
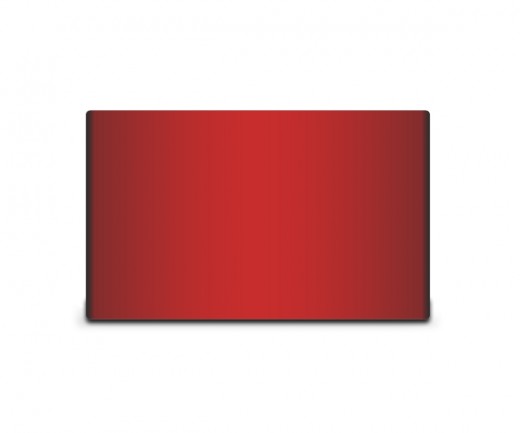
Select Rounded Rectangle Tool from tool panel set radius 5% and create a rectangle with gray color #707070 name it layer base rectangle layer.

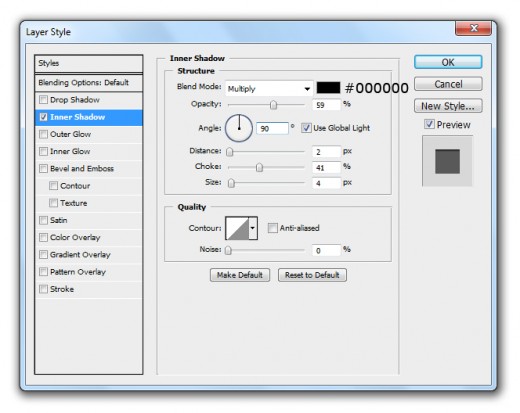
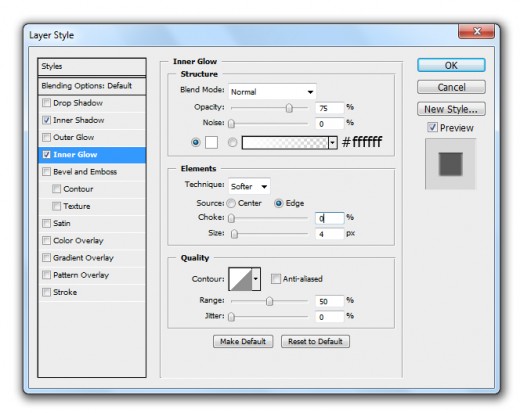
Go to Layer > Layer Style and applying some Blending Options on this base rectangle layer.
Inner Shadow
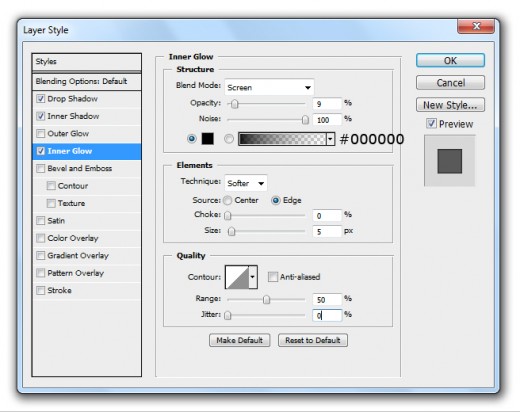
Inner Glow
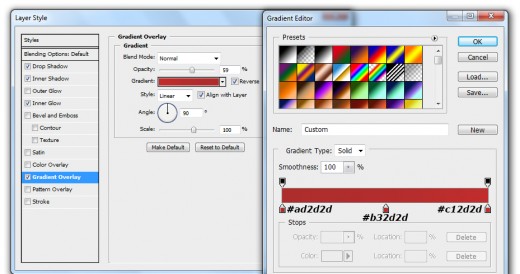
Gradient Overlay
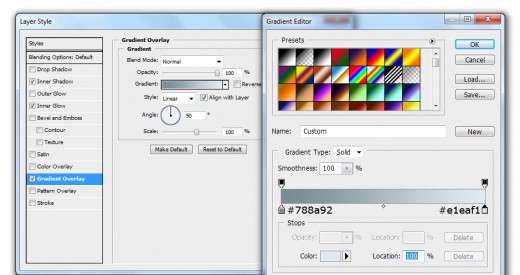
After applying gradient overlay we get nice effect on base rectangle layer.
Step 3
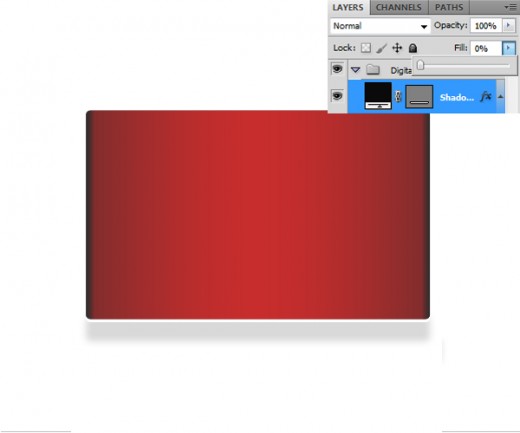
Duplicate the base rectangle layer and change the Blending Options.
Inner Glow

Gradient Overlay
After applying these blending options on duplicate base rectangle layer we get new base effect.

Step 4
Select Rounded Rectangle Tool again from tool panel set radius 5% and create a rectangle with black color #000000.

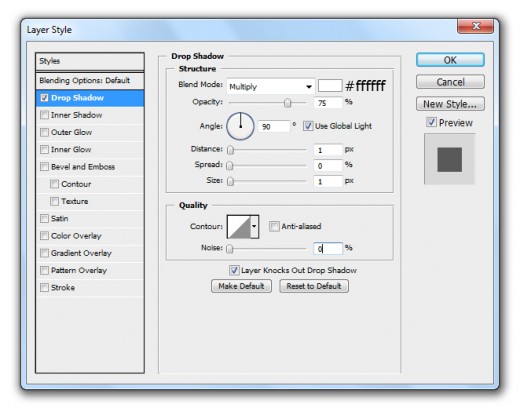
Go to Blending Option and applying Drop Shadow on this rectangle layer.
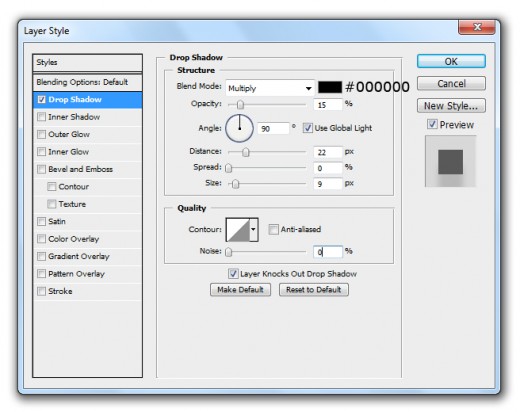
Now set Fill 0% of this black rectangle layer.
Step 5
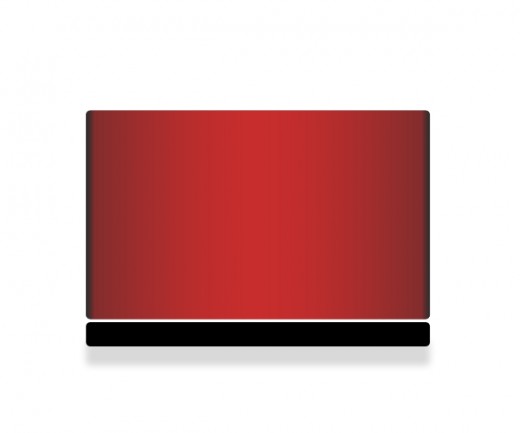
Duplicate this small rectangle layer and change the Drop Shadow setting of duplicate layer.
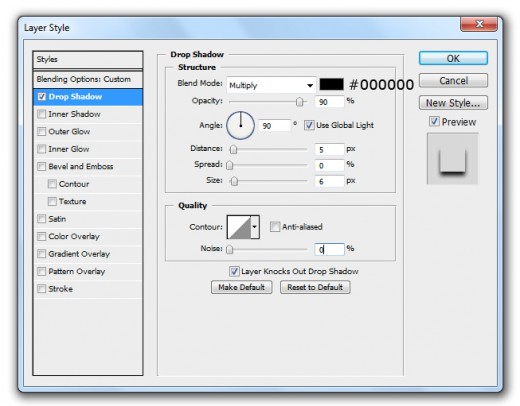
After applying drop shadow set both rectangle layers down side of base rectangle layer as like in picture below.
Step 6
Create another Rectangle of this color #cacaca with the selection of Rounded Rectangle Tool and set radius 5%.
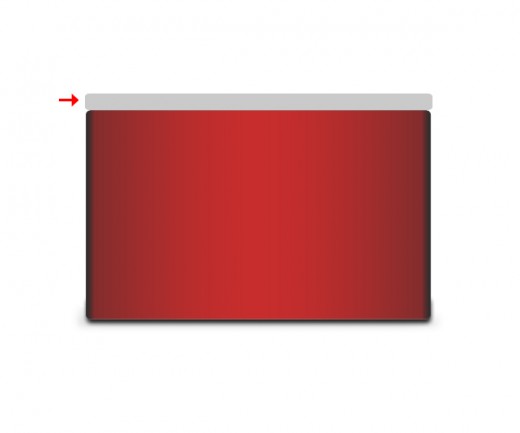
Go to Edit > Transform > Perspective and minimize the size of upper side corners as like in preview.
After transform the layer set it bottom of the base layer as like in picture below.
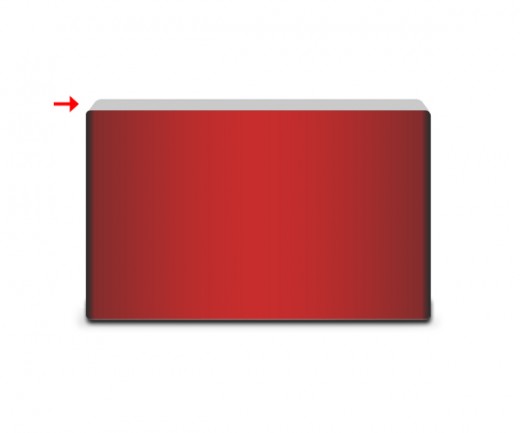
Step 7
Now go to Layer > Layer Style and applying some effects on this layer.
Drop Shadow
Inner Shadow

Inner Glow
Gradient Overlay
After applying effects we get cool result.
Step 8
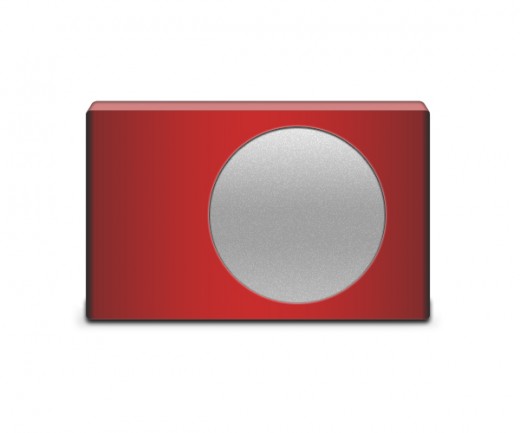
Select Ellipse Tool and create a circle with white color #ffffff name it layer first circle layer.
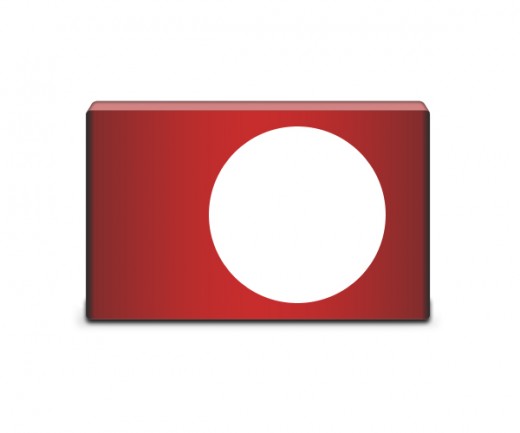
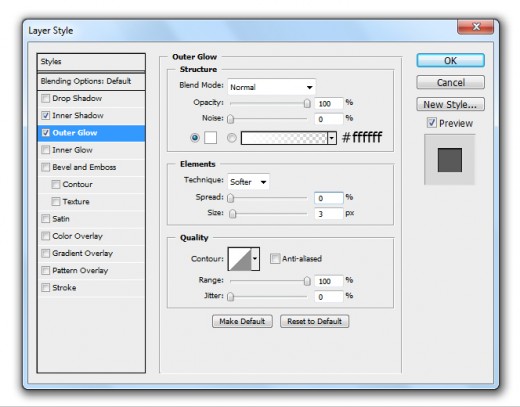
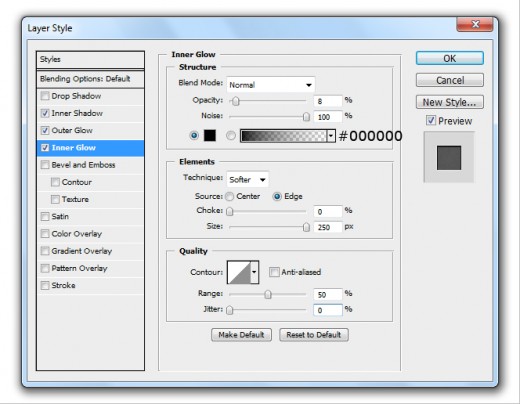
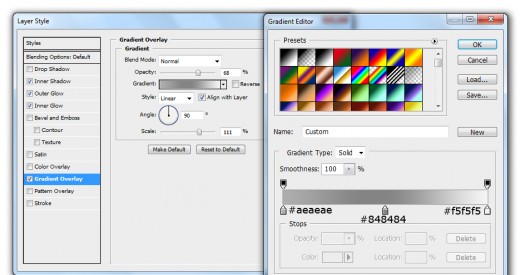
Now applying some Blending Options to this first circle layer.
Inner Shadow

Outer Glow
Inner Glow
Gradient Overlay
After applying these effects we get nice effect on first circle layer.