In this tutorial, I will show you that how to make a texture text effect using a texture in Photoshop. I will give you the step by step instructions to follow this tutorial. You can create your own texture text effect in Photoshop using these useful techniques. I hope you will like this awesome creation and feel free to share with us your expensive comments. Enjoy!
More related useful photoshop tutorials:
- Create a Glossy Emblem Text Effect in Photoshop
- How to Create a Grungy Metal Text Effect in Photoshop
- How to Create a Grunge Text Effect: Photoshop Tutorial
- How to Create a Glossy and Shiny Text Effect in Photoshop
Tutorial details:
- Program: Adobe Photoshop CS5
- Difficulty: Intermediate
- Estimated Completion Time: 30 Mins
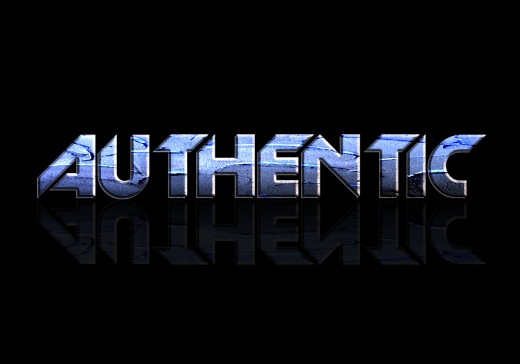
Create a Texture Text Effect Tutorial in Photoshop – Final Preview
Tools and Resources

External Resources
Photoshop Tools
- Text Tool
- Gradient Overlay
Lets start to create our texture text effect tutorial in Photoshop.
Step 1
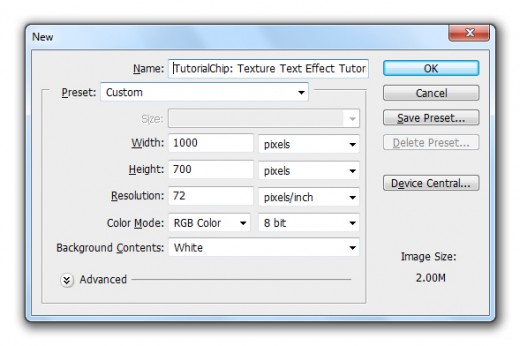
First of all create a new document (Ctrl+N) with 1000×700 of size.

Step 2
Select Text Tool form tool panel and type some text with (180px) applying white color #ffffff, you can use any font here I am using Slant Font.


Step 3
After type the text we applying Bevel and Emboss effect on text layer.
Go to Layer > Layer Style > Bevel and Emboss.
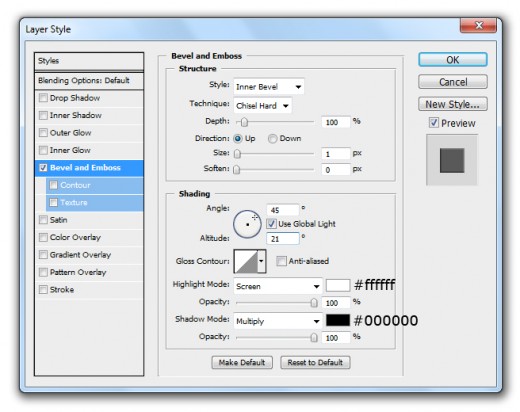

After applying bevel and emboss we get a new effect on text layer.


Step 4
Duplicate this text layer one time and set this duplicate layer one pixel right side and one pixel upper side as like in preview.


Now again duplicate text layer three time, set these duplicate layers one pixel right side one by one and one pixel upper side one by one of other duplicate layers.


Step 5
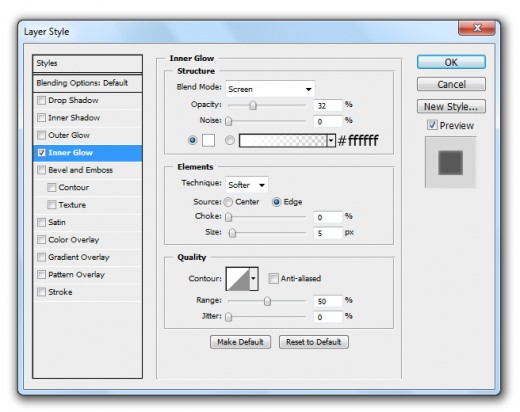
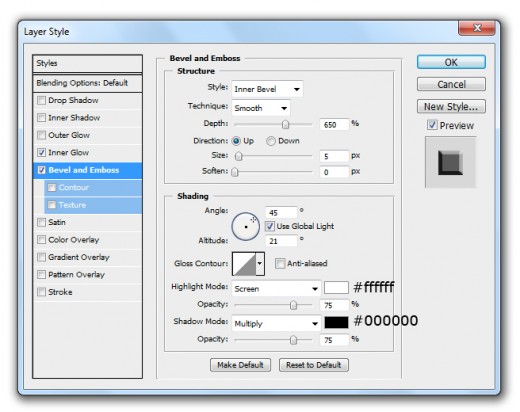
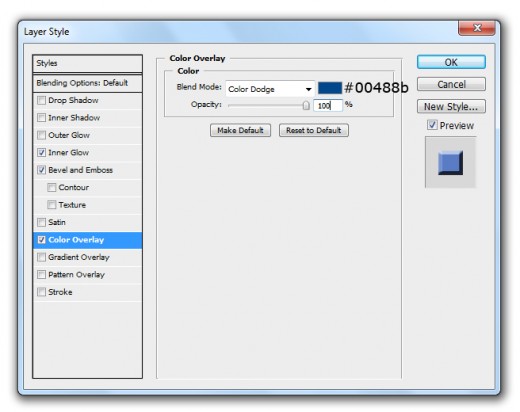
In this step select the four duplicate text layers and press (Ctrl+E) to merge them, now go to the Blending Options and applying some Layer Styles to this duplicate text layer.
Inner Glow

Bevel and Emboss

Color Overlay

Gradient Overlay
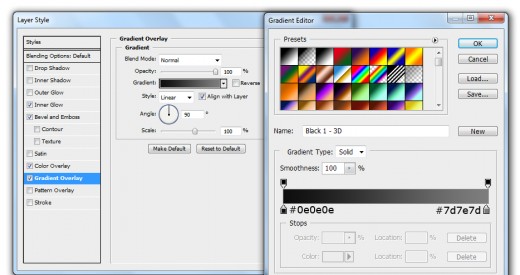

After applying these blending options we get awesome effect on duplicate text layer.


Step 6
Now I am going to add the Texture Image in Photoshop.
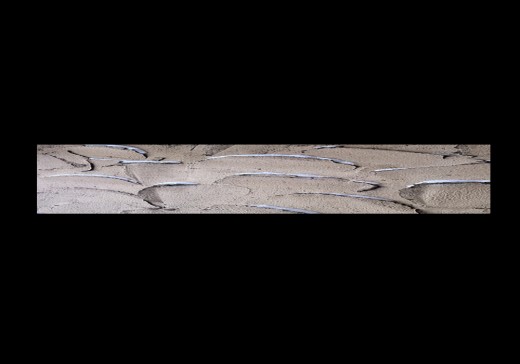

Step 7
Now hold Ctrl key and left click on thumbnail of any text layer to make a selection as like in preview.
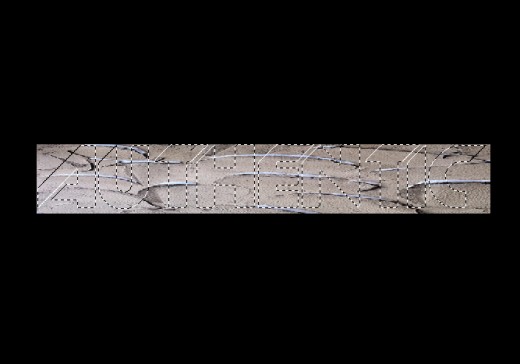

Press (Ctrl+Shift+I) to inverse the selection as like shown in picture below.


Hit delete button for delete the unneeded area as like you see in picture.
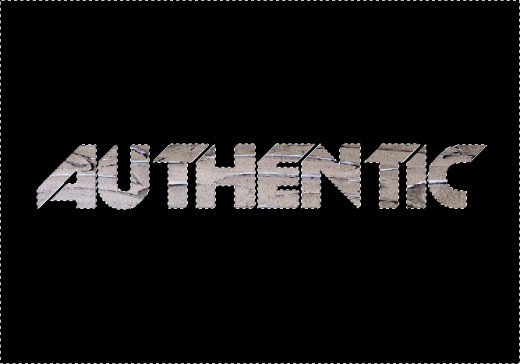

Press (Ctrl+D) to deselect the selection and set the Blend Mode to (Vivid Light) of this texture layer.
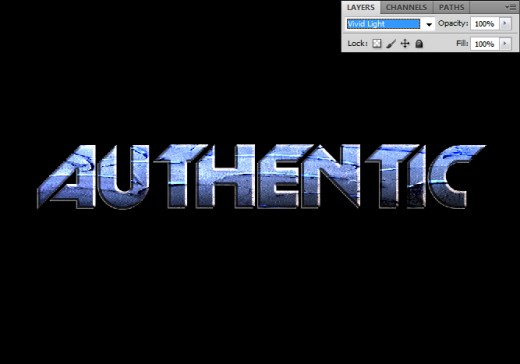

Step 8
Select all layers press (Ctrl+E) to merge them. Now duplicate the marge layer. Go to Edit > Transform > Flip Vertical and set downside this layer as like in preview.
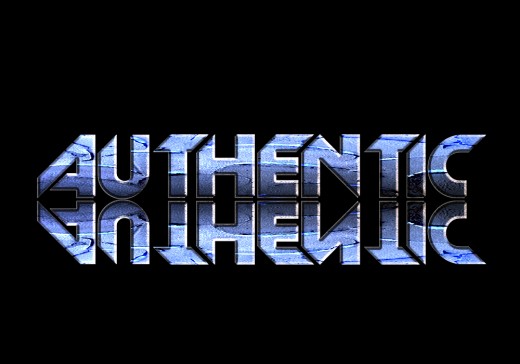

Set Opacity (10%) of this duplicate layer.
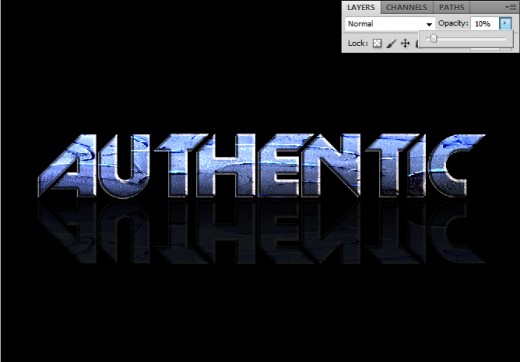

After whole this struggle we get a nice texture text effect in final preview.
Final Preview


I hope you have definitely enjoy this awesome texture text effect tutorial. Don’t forget to share your comments with us. Follow TutorialChip on Twitter or Subscribe to TutorialChip to Get the Latest Updates on Giveaways, Tutorials and More for Free.