Today I am going to share with you that how to create a vector composite effect in Photoshop. With the help of this tutorial you can make your own design very quickly and easily, because this tutorial is very short and comprehensive.
I am confidently say that you will not face any trouble to make a design like this, just focus your full attention to it.I hope you will definitely like this tutorial and always remember to share your comments with us.
Other useful tutorials:
- How to Apply Face Makeup in Photoshop CS5
- Breathtaking Space Explosion Tutorial in Photoshop
- Create a Fantasy Photo Manipulation Tutorial in Photoshop
- How to Create a Glossy and Shiny Text Effect in Photoshop
Tutorial details:
- Program: Adobe Photoshop CS5
- Difficulty: Intermediate
- Estimated Completion Time: 30 Mins
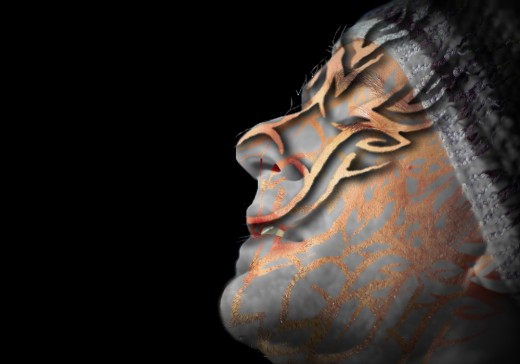
Create a Vector Composite Effect in Photoshop – Final Preview

Tools and Resources

External Resource
Photoshop Tools
- Gradient Overlay
- Eraser Tool
Lets start to create our vector composite effect in Photoshop.
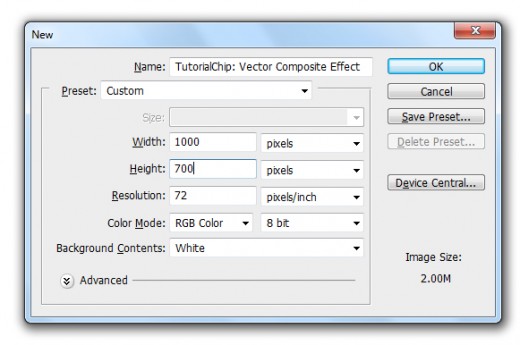
Step 1
Create a new document (Ctrl+N) with 1000×700 of size.
Step 2
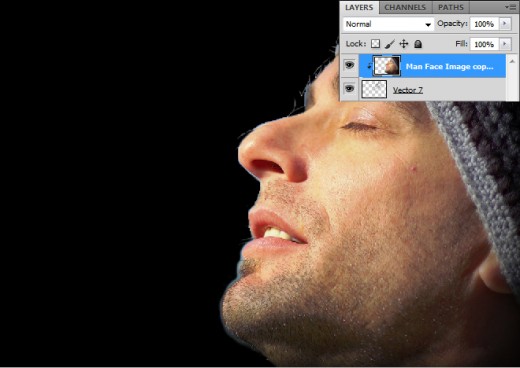
Now first of all I am going to add the Man Face Image in Photoshop to start create our vector effect.

Now rasterize this image layer, select Eraser Tool from tool panel and erase the background area of face image layer.

Step 3
In this step duplicate face image layer and press (Ctrl+Shift+U) to desaturated this duplicate layer.

Step 4
Go to Filter > Blur > Lens Blur and applying this setting on duplicate image layer.
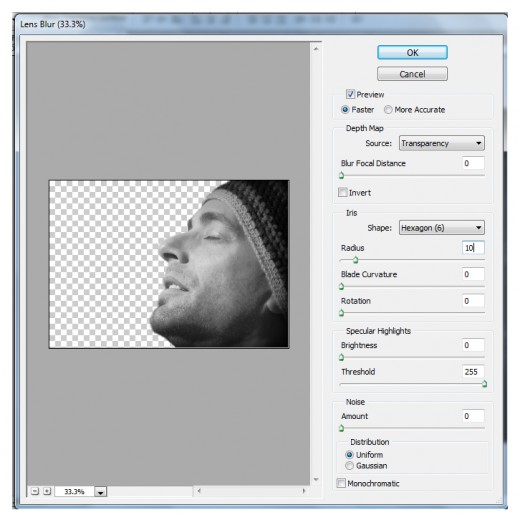
After applying lens blur we get a new effect on duplicate image layer.

Step 5
Now go to File > Save As and save this document, name it (Dismap) or whatever you like. Now I am going to add the Vector Image in Photoshop to make a vector effect.

Select the Eraser Tool from tool panel and erase the background white area of vector image as like in preview.

Go to Edit > Free Transform or press (Ctrl+T) and rotate the vector image.
After transform press enter and get this result.

Now select Eraser Tool and erase unneeded area of vector layer as like in picture below.
Step 6
Now duplicate this vector layer six times and adjust to the whole face area as like shown in preview.
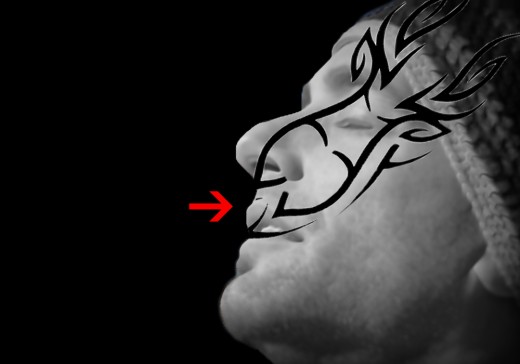
Step 7
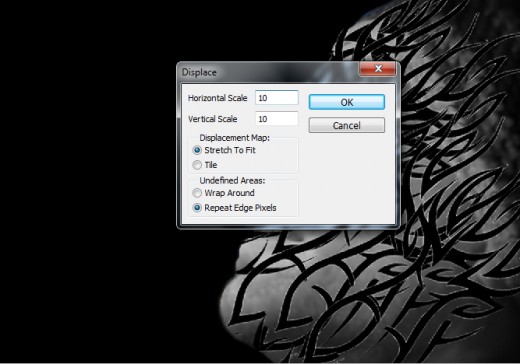
Now select the first vector image layer and go to Filter > Distort > Displace and set Horizontal and Vertical scale (10%).
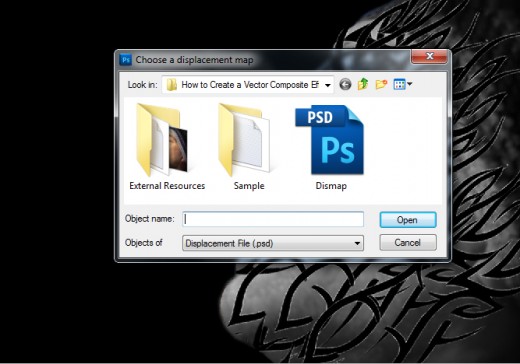
After set displace press enter button then a window bar opened now select the save file which name is dismap and open it.
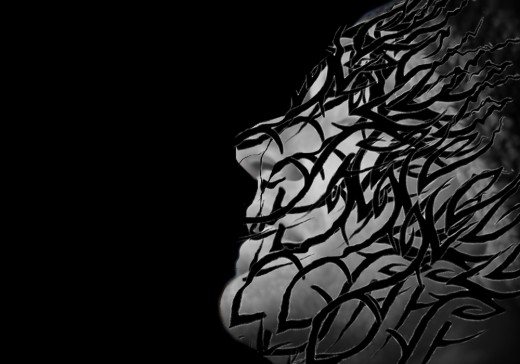
After open the file hide the other five duplicate vector layers and see the result of first vector layer.

Step 8
Now in this step unhidden the all five duplicate vector layer and repeat the step 7 one by one on all duplicate vector layer then we get this result.
Step 9
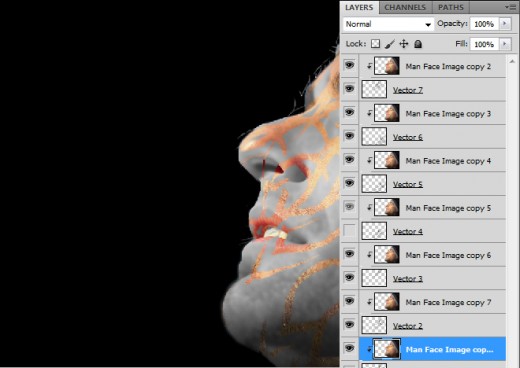
Now select the man face original image layer and duplicate it seven times and adjust each duplicate picture upper side of each duplicate vector image layer as like shown in picture below.
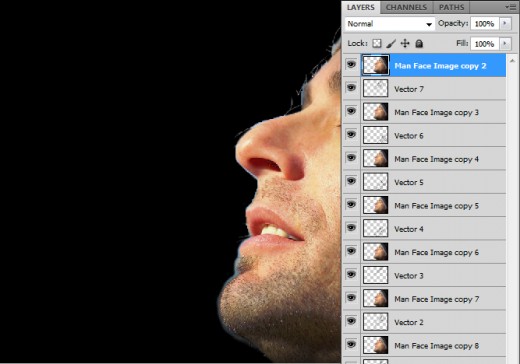
Now select the top duplicate man face image layer, right click on image and a bar opened then click on Create Clipping Mask then you see that image enter in to the top vector image layer.
Step 10
Now repeat step 9 in to the all duplicate man face image layers, and we get a new effect as like in preview.
After repeating step we get a new look in preview.
Step 11
Select top duplicate vector layer and go to the Blending Options and applying Drop Shadow.
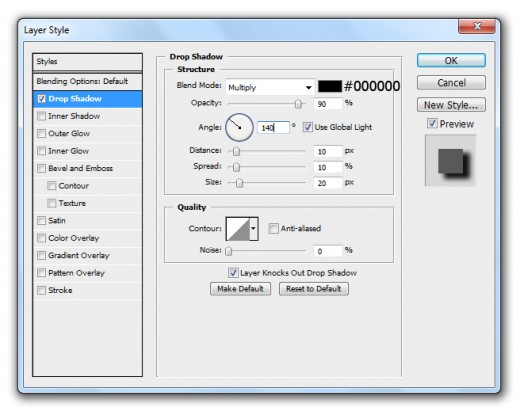
After applying drop shadow we get a new effect in top duplicate layer.
Right click on this top duplicate vector layer and click on Copy Layer Style, then click every duplicate vector layer one by one and select Paste Layer Style, here we get new result.

Step 12
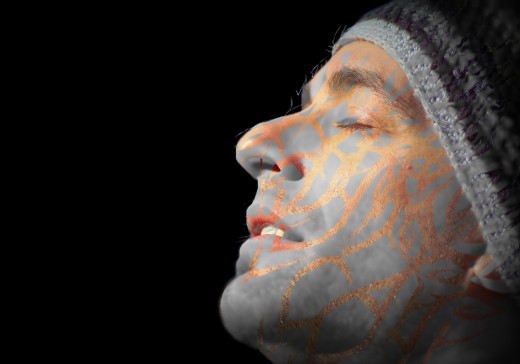
In this step select the background layer then select Gradient Tool from tool panel and applying on background.
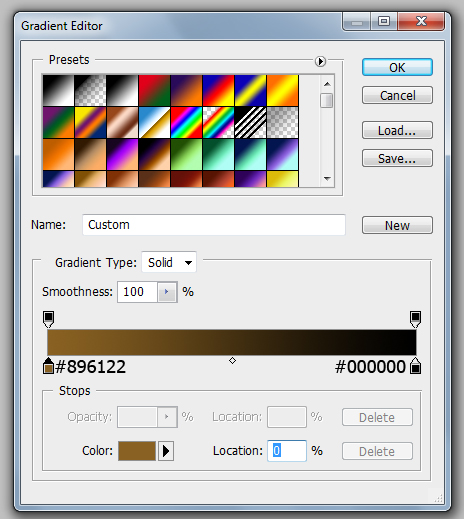
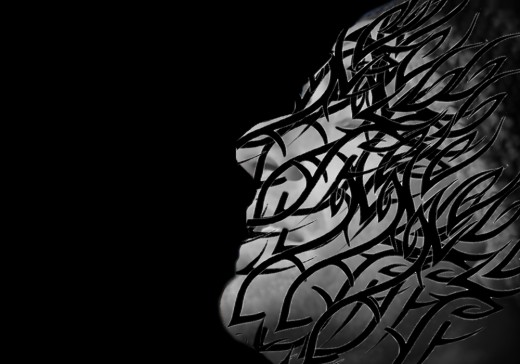
When we applying gradient we get this awesome result in final preview.
Final Preview
I hope you will be happy to learn this vector composite effect tutorial and always share your sweet opinions with us. Follow TutorialChip on Twitter or Subscribe to TutorialChip to Get the Latest Updates on Giveaways, Tutorials and More for Free.
Hi, great tutorial. Thanks for using our vector image.