In this tutorial, I will try to deliver a technique that will help you to create water drops using a very simple and scalable method. All you need is a picture with a surface that’s prone to have water drops. We’re using a green leaf for create a water drop in Photoshop. I hope you will like this tutorial, feel free to share your opinion with us.
Other useful tutorials:
- Photoshop Smoke Text Tutorial in 10 Minutes
- Photoshop Tutorial: Glossy Orbit Style Button
- Professional Photoshop Banner Tutorial
- 3D Text Effect Tutorial in Photoshop
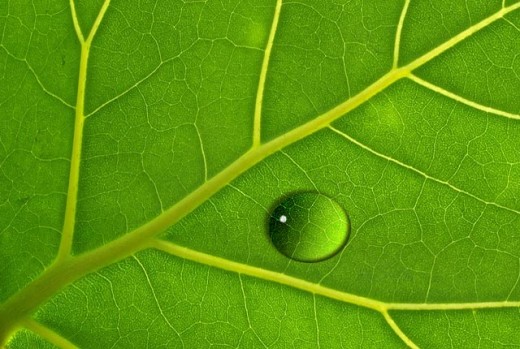
Water Drop Tutorial in Photoshop – Final Preview
Tools and Resources
Tools
These following photoshop tools are used in this tutorial.
- Brush Tool
- Gradient Tool
- Elliptical Marquee Tool
External Resource
We will use following external resource to complete this Water Drop tutorial in photoshop.
You can download this image from Flickr to complete this tutorial. Let’s start to create our awesome water drop tutorial.
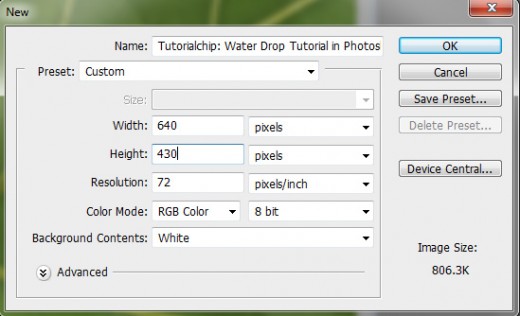
Step 1
Open Adobe Photoshop, and create a new Photoshop document. I am going to create a new document of 640 x 430 px with any color.
Step 2
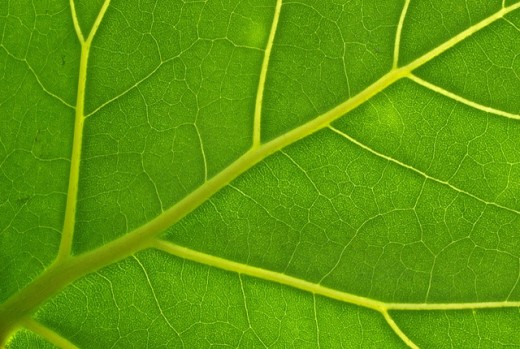
We import the Leaf image in Photoshop and adjustment this image in our current canvas as shown in preview.
Step 3
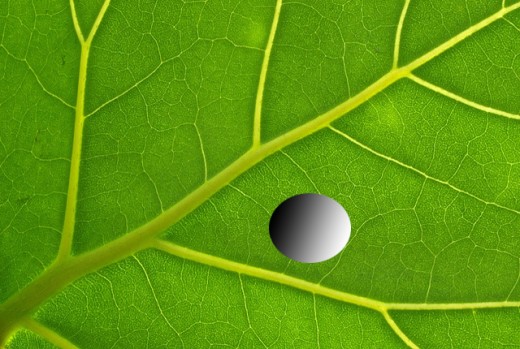
Select the Elliptical Marquee Tool and draw a perfect circle as like in below picture.

Step 4
With the selection still active, select the Gradient Tool and select a linear gradient (B) in the options bar at the top. We change the foreground color into Black and background color change into white.
Now applying the Gradient in circle left to right. After you’re done, deselect the selection by pressing (Ctrl+D).
Step 5
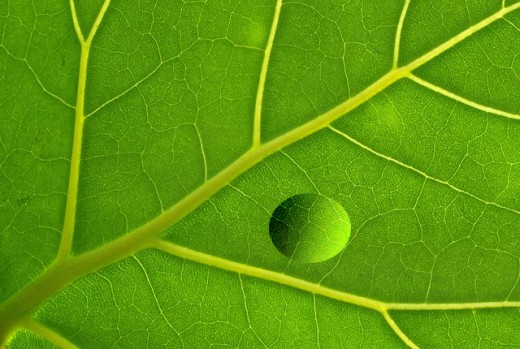
In this step we change the Blending Mode of this layer in the layers palette to Overlay.
Step 6
Now apply some blending options on this circle layer. Follow these following blending options.
Drop Shadow

Inner Shadow
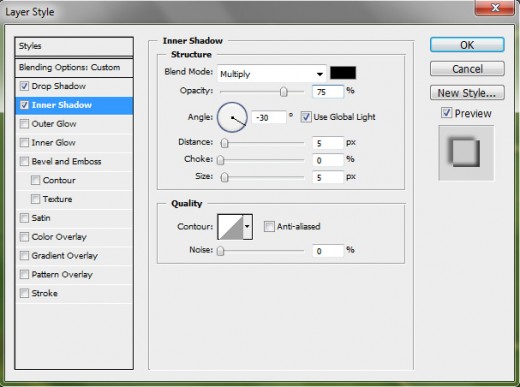
After applying the these layer styles or blending options, we have get a really water drop as shown in preview.
Step 7
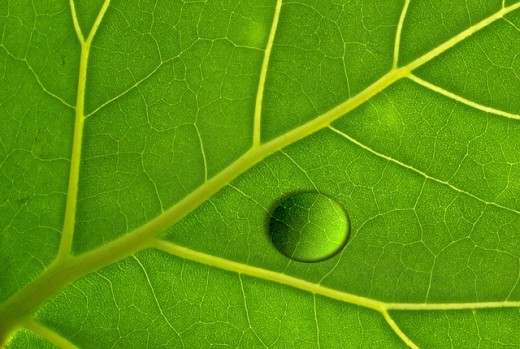
Now we add a highlight on the drop, select the Brush tool and chose a any hard brush with a 6px, now change the foreground color in white. Click 3 to 4 time in the upper left corner of our water drop. Now you can see this final preview below.
Final Preview
I hope you have enjoyed this water drop tutorial. Don’t Forget to Follow TutorialChip on Twitter or Subscribe to TutorialChip to Get the Latest Updates on Giveaways, Tutorials and More for Free.
Nice tutorial and idea of improving my photo – a water drop would have been nice ideed 😉
One more step: make a selection from the droplet, copy that section of the background, and use filter>distort>spherize, while the selection is still active.