A picture is worth a thousand words. Yes of course it is but those words can become coarse, misleading and even meaningless if your picture is not of a decent quality. There are many reasons that can hamper the quality of your image.
Maybe when you were taking the picture a stranger walked past and you failed to get that solitary pose of your brother; or perhaps on the perfect backdrop on a perfect sunlit summer day you were planning to take a friend’s photo in that perfect suit but as it turned out your friend managed to get some pimples on his face which ruined everything; or maybe your great grandma’s photo which is now entering its second century has got torn from different places and has scratches and tears all over it and you are now reluctant to put it into a frame on the wall.
Problems like these fortunately are solvable today and all of them have just one solution – Inpaint.
Yes you can argue that such errors are also rectifiable through Photoshop, but that requires some advanced knowledge. If you don’t have a good enough command over Photoshop you won’t be able to do away with such faults.
Inpaint on the other hand lets you work with ease. In most cases, all you have to do is to just select the area you wish to remove or rectify and then hit the Inpaint button. That’s it. Inpaint will automatically delete that area and will substitute the surrounding background with intelligently generated textures pulled from the surrounding image data.
Unlike Photoshop, this is a fast and easy method.
Let me demonstrate the method with an example. Below I show you how to repair old photos by removing scratches and tears from it.
Step 1

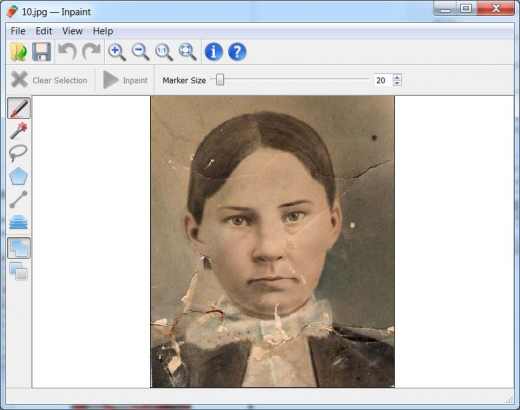
Open the Inpaint software and import the respective image in it. The screen should look somewhat like the screenshot above.
As you can see, the Inpaint software has many tools to work with. All are not relevant for our present discussion but it should suffice to say that you can make a selection through a number of different tools. Just like Photoshop Inpaint has tools like Marker, MagicWand, Lasso and Polygonal Lasso for selections.
Step 2

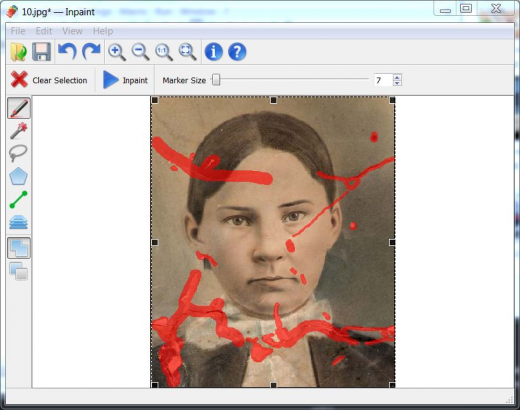
Now select the tears and scratches through any tools you like as mentioned above. Be careful only to select the damaged parts. After you have made your selections the screen should look somewhat like above. The red marks indicate selections.
Step 3

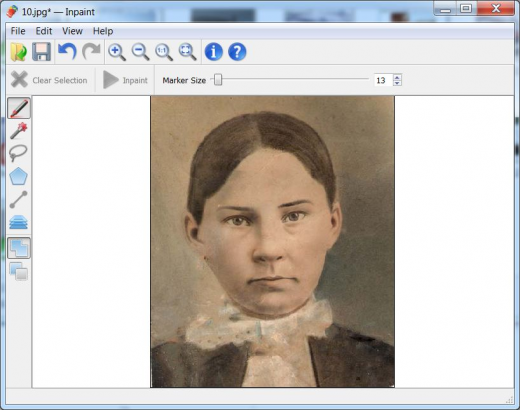
Now that everything is in place it’s time to run the process and see the magic. Click the button on the toolbar and within moments your picture will be cleared of all the marks and blemishes and will be ready to be framed and hanged in your drawing room.
There is no Step 4. You see it is as simple as that. You can download the free trial version of the software today and see how it works.