WordPress is a powerful personal publishing platform, and it comes with a great set of features designed to make your experience as a publisher on the Internet as easy, pleasant and appealing as possible.
Today we will learn together, how to install the WordPress locally in Windows. For the installation of the WordPress, we have to install the WAMP Server in our local laptop/computer. If you have not installed yet the WAMP Server, read the following useful WAMP Server installation tutorials.
- WAMP Server Installation Guide for Windows 7 32/64 Bits
- How to Install Apache, PHP, MySql and phpMyAdmin on Wind
I hope you have installed successfully the WAMP Server in your system/laptop. Lets start WordPress installation,
I have installed wordpress 3.2.1 on Windows 7, and same installation steps are used for Windows XP.
Step 1
In first step, open the WampServer. In Windows, the WAMP Server icon will now appear in your taskbar.

Step 2
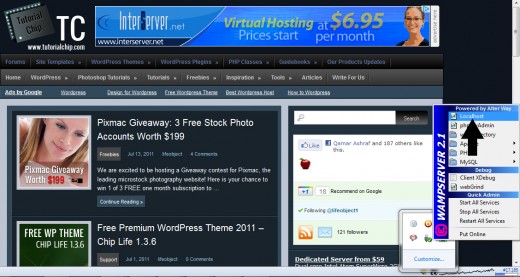
Click on WAMP Server icon, a menu bar will appear on your screen. Now click on localhost option.
Step 3
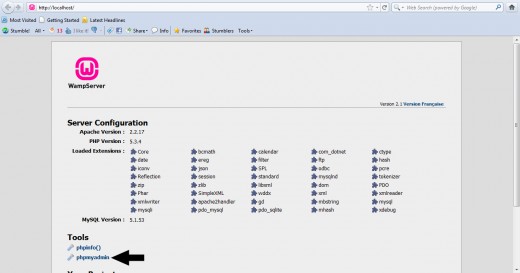
Click on localhost, new page open in your current browser. Now click on phpMyAdmin option.

Step 4
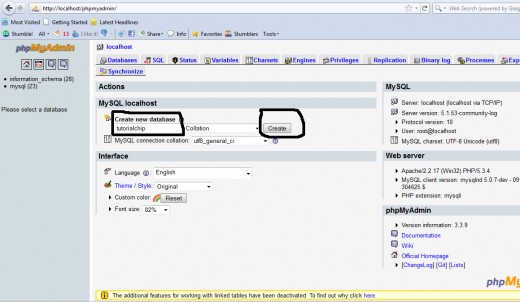
When you click on phpMyAdmin option, you will go to phpMyAdmin page. Where you can create your database name.
- Write new Database name
- Click on Create button
My Database name is tutorialchip, but you set your database name as you like.

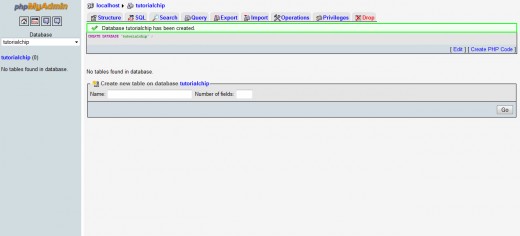
After this procedure you will successfully create a new database.

Step 5
Now we will download the latest version of the WordPress in our local laptop/machine. Latest version of the WordPress 3.2.1 can be found for download at official web page of WordPress.
Click on Download WordPress 3.2.1 button.
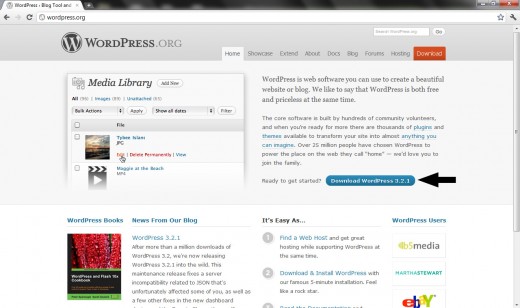

When you click on this button, then a new WordPress 3.2.1 download page will open.
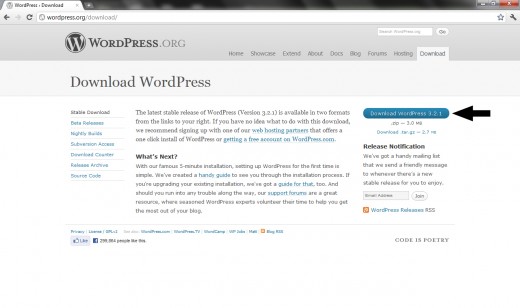

Step 6
You can easily download WordPress 3.2.1 just one click on download button. After click on this button you will notice that wordpress is starting to download.
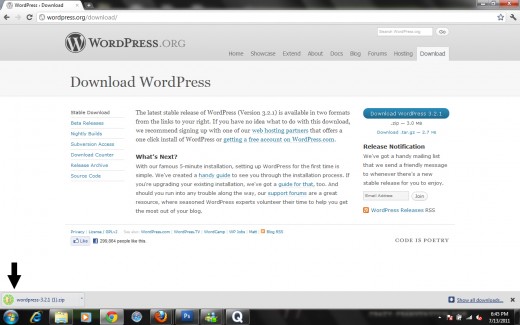

Downloading of WordPress 3.2.1 is complete now, and you will find zip file of WordPress 3.2.1 in your download location/folder.
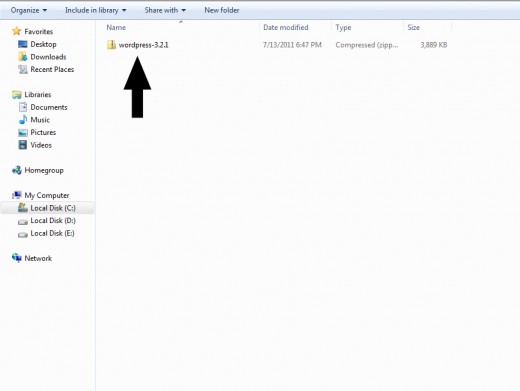

Extract the WordPress Zip file.
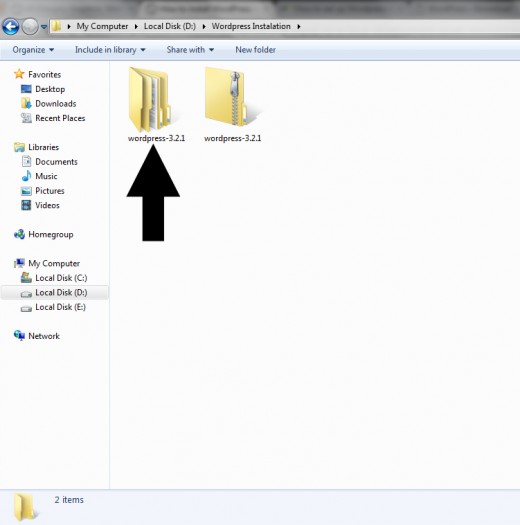

Step 7
Unzipped WordPress folder.
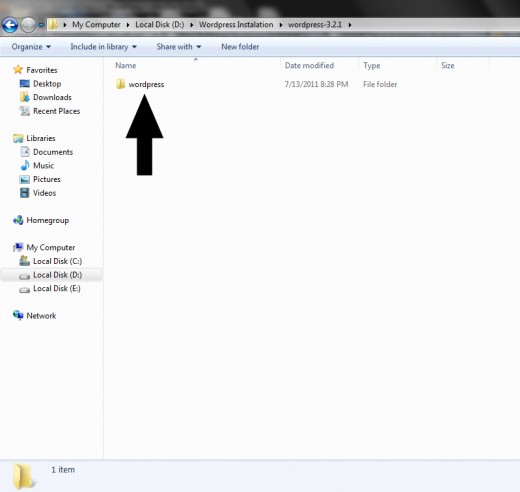

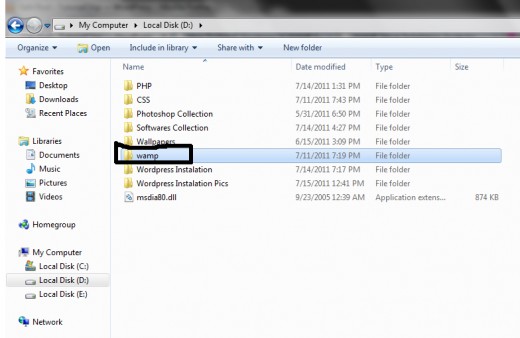
Now open the the WAMP folder which is in drive D, Because i have installed the WAMP Server in drive D.

When you opened this wamp folder, you will see www folder.
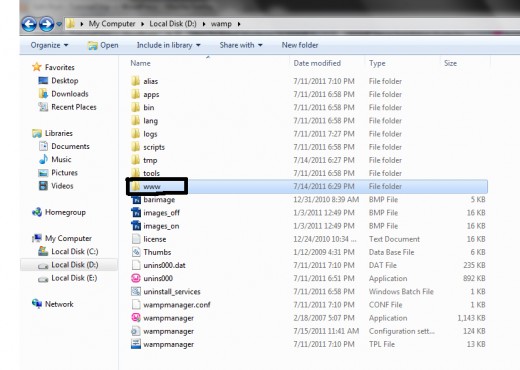

Open this www folder and paste the wordpress folder in it and rename this folder with your project name (domain name). My project name is tutorialchip, therefore I rename it with tutorialchip.
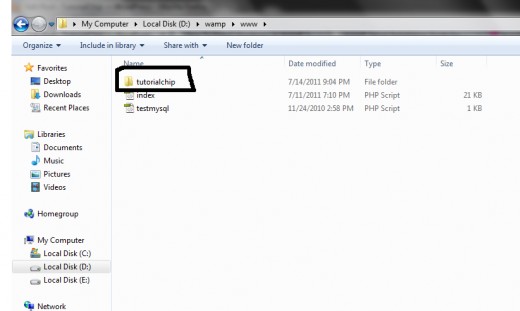

Now open this folder (tutorialchip) and you will find configuration file wp-config-sample.php in it.
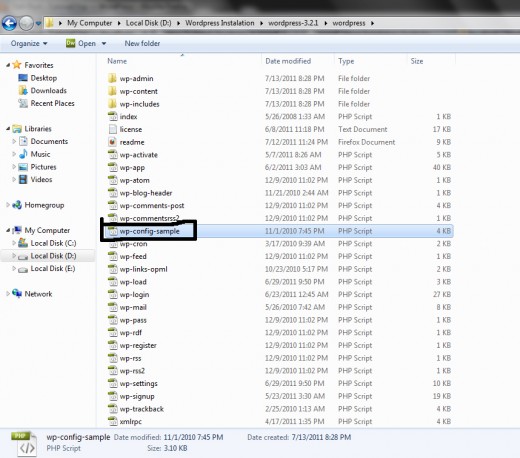

Step 8
Rename this file with wp-confing.php . Just eliminate the sample word.
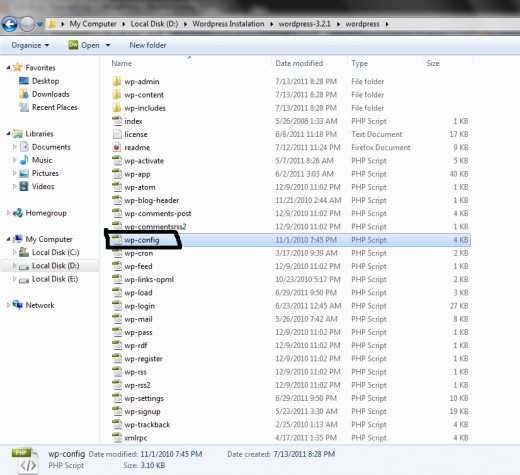

Step 9
Open this wp-confing.php file in Notepad or Dreamweaver for Database setting. I opened this file in Dreamweaver.
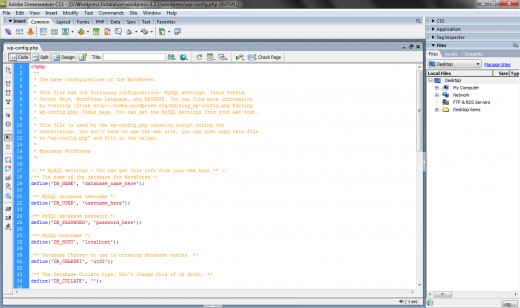

Step 10
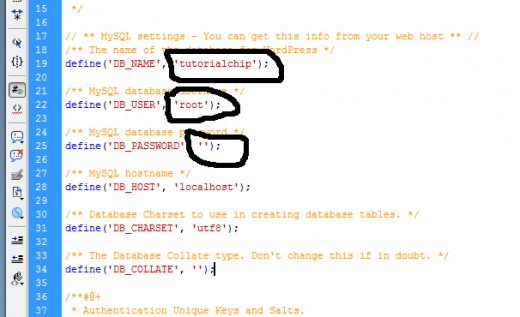
Write down Database Name, Database User Name and Database Password. We set Database Name tutorialchip as we create above and Database User root and Database Password will leave blank.

Step 11
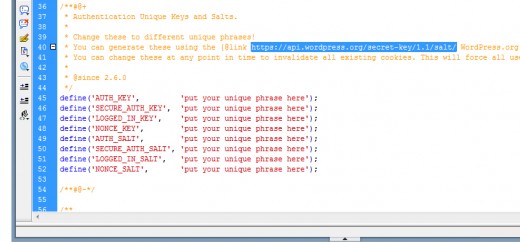
Open the selected link in browser (https://api.wordpress.org/secret-key/1.1/salt/) for Secret Key.

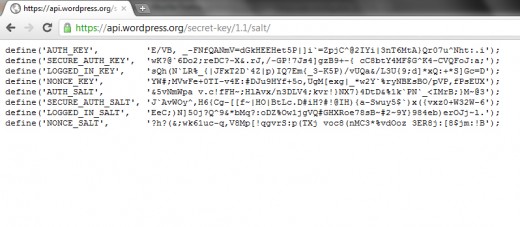
You will find the Random Secret Key as below,

Step 12
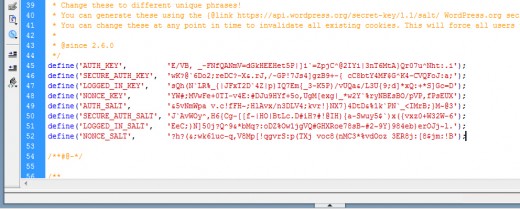
Now Copy this Secret Key Code and Replace with the existing code as below,
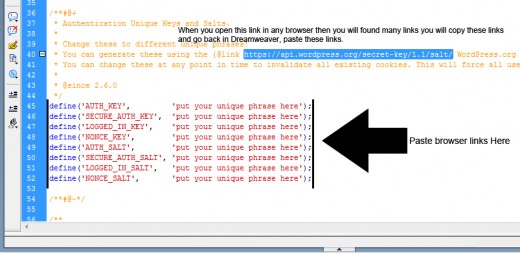

Finally you set the Secret Key,

Step 13
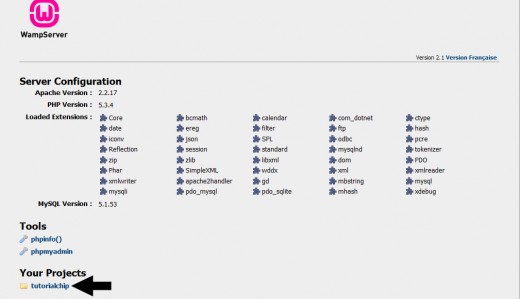
Now go to taskbar and click on WAMP Server icon, a menu bar will appear on your screen. Now you click on again Localhost option.


After click on Localhost option, a new page opened in your browser. Now you see bottom of this page and click on your project name. I will click on tutorialchip because my project name is also tutorialchip.

Step 14
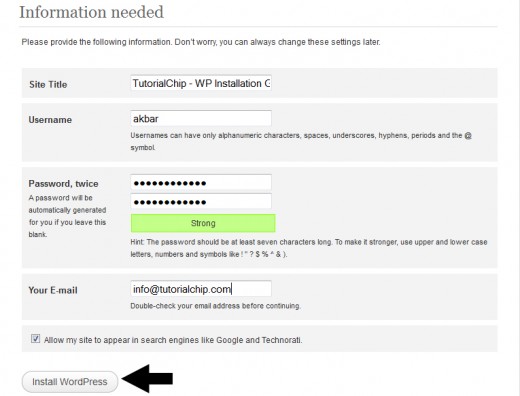
When you click on your project name folder, a new page opened and fill those blank fiels with,
- Site Title: Tutorialchip (Your website title)
- User Name: Akbar (My name is Akbar therefore I wrote Akbar in user name box. You can type your name.)
- Password: Type password as you like
- Your-Email: Type your e-mail address.
Now click Install WordPress button.

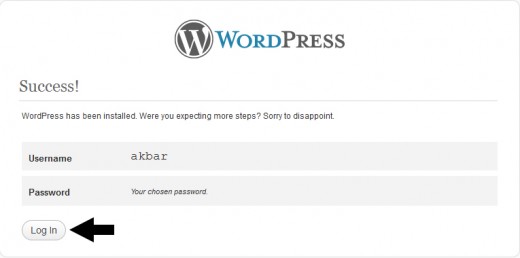
Congratulation, WordPress 3.2.1 is successfully installed. Now click on Log In button.

Step 15
When you click on log in button, new page opened, enter your User Name and Password as set previous. Click on login button.


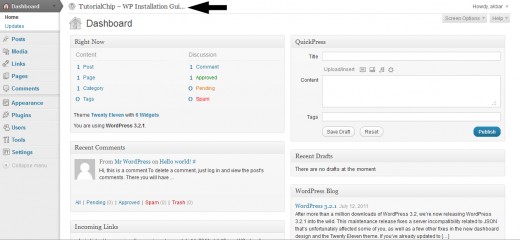
When you click login button, your WordPress Admin Page will opened in new browser tab.
You can open your project admin page directly in your browser as,
http://localhost/yourprojectname/wp-admin/
My project name is tutorialchip, so my link will be,
http://localhost/tutorialchip/wp-admin/

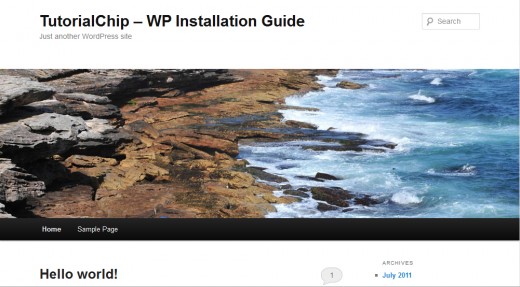
You can directly open your project or domain home page in browser as,
http://localhost/yourprojectname/
My project name is tutorialchip, so my link will be,
http://localhost/tutorialchip/

I hope you have successfully installed WordPress 3.2.1 at your Laptop/Computer. If you have any question, feel free to ask at the contact page, and don’t forget to write your valuable comments.
Thanks every thing worked great!
hello, first of all I would like to know what is the use of the wordpress and what is the relation between php and word press.I’m totally confused , can you please explain in detailed way.as much as information is needed.Thanks in advance 🙂
Hello! You have done gr8 work but i have a problem when i put secret keys then go to localhost click on my project name then page is opened with these contents “There doesn’t seem to be a wp-config.php file. I need this before we can get started.
Need more help? We got it.
You can create a wp-config.php file through a web interface, but this doesn’t work for all server setups. The safest way is to manually create the file.
Create a Configuration File”
How can i overcome this problem???…:(
plzzzzzzzzzzzzz help me its urgent plz plz plz….
Works like a charm!
Previously, I’d tried to install WP in localhost for testing and development. Tried to do it the way WordPress has it in their own Codex. I could not resolve the database connection errors (“Error establishing database connection”).
But then I found your tutorial here. After starting completely over, your instructions worked and on the first try! Way to go! Thanks!
-PeterMac