My favorite feature of WordPress 3.0 is “Custom Menus”. I have integrated this awesome feature in my all themes Chip Zero, Chip Life and Chip Photo. I have received a number of mails about the usage of Custom Menus, so i am going to write a detailed tutorial about WordPress 3.0 Custom Menu Power.
I am using my theme Chip Zero as a tutorial model, but this tutorial will help you to setup WordPress custom menus in any theme which has built in support of them.
1. Theme ( Chip Zero ) just after Activation
This is the default screen shot of Chip Zero after activating it from the Themes panel in Appearance tab.
I would like to share,
- Different themes may have different menu locations, as Chip Zero has two menu locations i.e Primary Menu and Secondary Menu.
- Different themes may treat their menu locations differentially as default. For example, the default behavior of Chip Zero for her menu locations is,
- Primary Menu is hidden by default
- Secondary Menu is accommodating “WordPress Pages Navigation” by default
2. WordPress Menu Panel
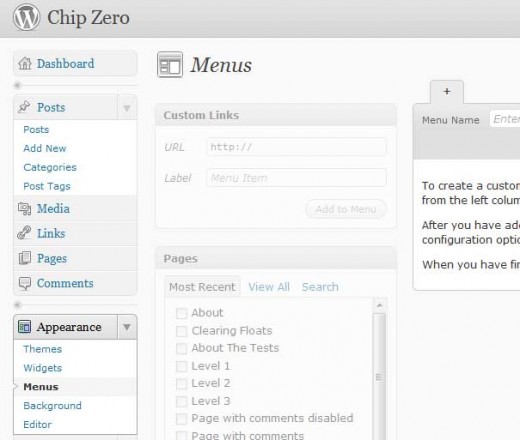
It is time to access WordPress 3.0 menu panel. You can access menu panel by clicking on Menus link under Appearance tab. Following screenshot will help you,
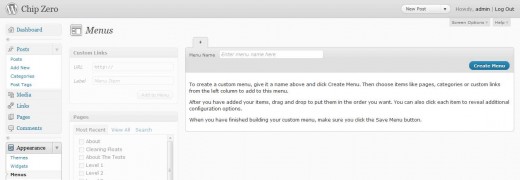
You will see my favorite and the powerful screen of WordPress Menus management after getting click on Menus link.
3. Create WordPress Custom Menu
Follow very simple steps to create your first WordPress custom menu,
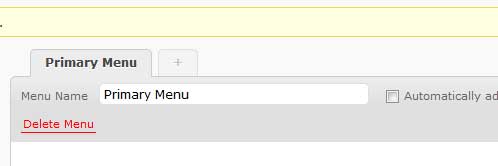
- Enter your first menu name in the “Menu Name” text box. I will enter Primary Menu.
- Click on “Create Menu” button.
4. Build WordPress Custom Menu
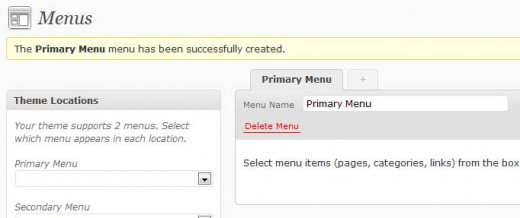
We have successfully created our first WordPress custom menu named “Primary Menu”. Now it is time to build our Primary Menu by adding pages, categories or custom links.
I am going to add three different menu items in our primary menu for the sake of clarification.
a. Adding Categories Navigation
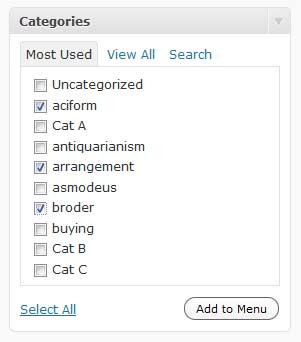
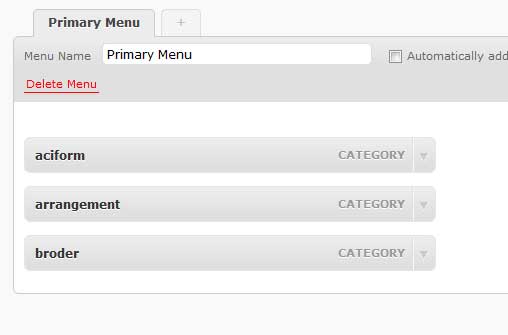
We can add WordPress categories to the custom menus. You will find your categories in the box labeled “Categories”. I have selected aciform, arrangement and border category to add in the primary menu. Hit the button “Add to Menu”
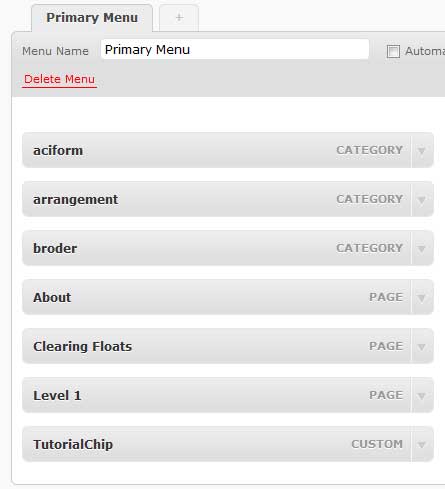
WordPress will add these categories in the Primary Menu after hitting “Add to Menu” button. You will see like that.
Thanks to WordPress, who have manged it beautifull.
b. Adding Pages Navigation
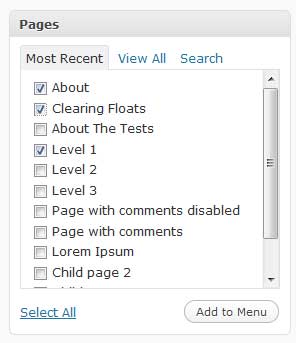
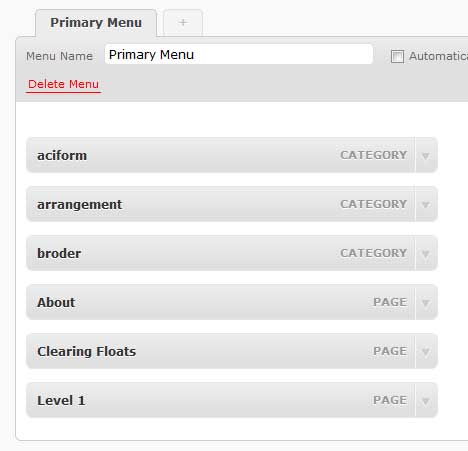
I can add some pages navigation to the Primary Menu as well. You will see all your created pages in the box labeled “Pages”. Just select your pages and hit the “Add to Menu” button.
Now the Primary Menu will look like this,
c. Adding Links Navigation
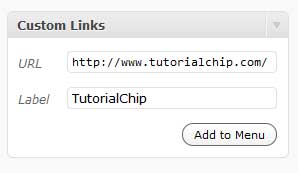
This is the great power of WordPress custom menus that we can add links of our choice to the menu as well. You can add custom links via the panel named “Custom Links”. You have to given “URL” and “Label” of your link, and finally hit “Add to Menu” button to be included in the primary menu. I am going to create a custom link of my website TutorialChip as below,
You can add more custom links as you want. Here is the screenshot of Primary Menu after adding Custom Link.
5. Save Menu
I have build a sample items containing categories, pages and links to our primary menu. Please remember, these menu items are not saved yet. So you should click “Save Menu” button to save our menu items.
I will explain other extra and important features like change of menu item label, menu re-arrangement, nested menus, and deletion of menu item at the end of tutorial.
6. Theme Locations
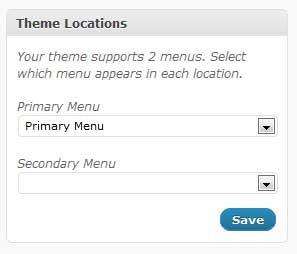
We have “build” and “saved” our first primary menu but it will not display at the theme yet because we have not assigned a location for our primary menu. As i have discussed at the start of tutorial that different themes may have different theme locations it may be one, two or even more. Chip Zero has two theme locations named “Primary Menu” and “Secondary Menu”.
I am going to place our newly created “Primary Menu” to the “Primary Menu Location” of Chip Zero. You can do this via the Menus panel named “Theme Locations”. Select Primary Menu from drop down menu and hit “Save” button.
7. Primary Menu in Action
We have successfully done the following steps,
- Creating Primary Menu
- Building Primary Menu
- Saving Primary Menu
- Assigning Primary Menu to Primary Menu Location
Let’s see it in action,
8. Create Secondary Menu
As our theme Chip Zero has two menu locations, so let’s create a secondary menu as well. It is 100% same as of primary menu with one exception. We have to click on “+” link to initiate secondary menu panel.
After clicking on “+” button, you will be at the same screen where you was at the Step 3 of the tutorial.
Enter the name of your menu like “Secondary Menu” and repeat the steps 4 to 5. You should assign secondary menu to the “Secondary Menu Location” after saving the secondary menu. I have created a sample secondary menu for you.
9. Both Menus in Action
I have created “Primary” and “Secondary” menus for Chip Zero. Let’s have a look,
10. Change Menu Item Labels
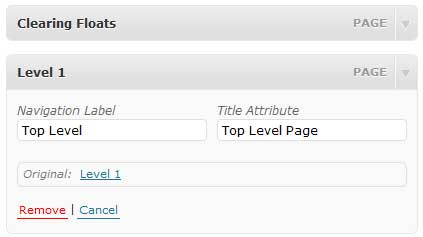
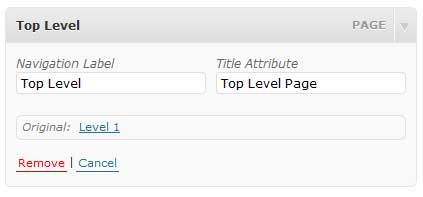
We can change the label of our pre-assigned categories and pages as well. Click on “Drop Down Arrow” to expand the menu item.
You can change the navigation label of your selected item by entering a new label in “Navigation Label” field. You can assign “Title Attribute” as well.
Hit “Save Menu” button after making necessary changes.
11. Build Nested Menu
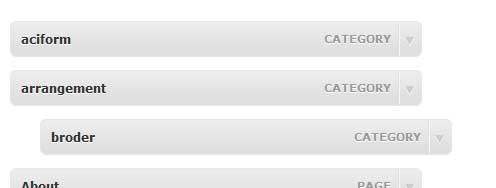
You can build nested menus (Drop Down Menus) by using the “Drag & Drop” power of menu items provided by great WordPress. Let nest the “border” menu under “arrangement” menu.
- Click and Drag “border” menu item slightly towards right and Drop it on a slightly right to “arrangement” menu item.
Powerful logic of Chip Zero will convert this nested state in the form of “Drop Down Menu”. Enjoy! Don’t forget to hit “Save Menu” button.
12. Re-Arrange Menu Items
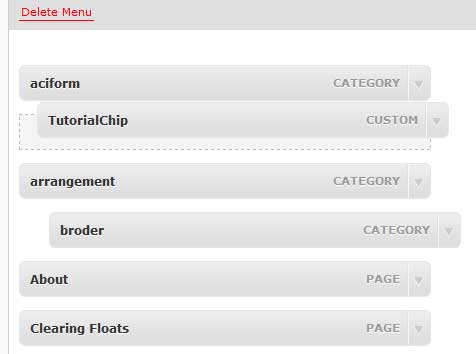
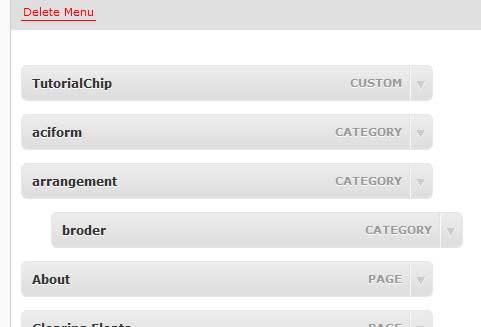
We can re-arrange our menu items. Let drag the “TutorialChip” menu item and drop it at the top of menu items.
Don’t forget to hit “Save Menu” button.
13. Delete a Menu Item
We can remove a menu item from the menu as well. Simply click on the drop down arrow of menu item, and you will notice “Remove” link in red color. Click on “Remove” link to delete menu item from the menu. Don’t forget to hit “Save Menu” button.
14. Final Preview
Let’s have a final preview of our tutorial after making above changes. You will interested to notice,
- Primary Menu Location
- Secondary Menu Location
- Re-arrangement of “TutorialChip” menu item from last number to first number
- Change of label “Level 1” to “Top Level”
- Drop Down menu of “arrangement” menu item
I hope you have learned a bit, and don’t forget to write your valuable comments.







Thanks for the overview. I have a nested menu working using different categories until I realised that the top level items where linking to a redundant page as the top level item should serve just as a header for the subitems to extend from. Any idea how this is achieved?
Thank you. That was a great help. I’m glad it works like I expected.