After releasing free premium WordPress themes i.e Chip Zero, Chip Life and Chip Photo, i am going to share very important and vital points for WordPress theme development. It is very important to test the theme in different aspects before offering to the clients, and to face tough competition at marketplace.
You need to plan in advance for all edge cases, and ensure that your theme is as customizable as possible. If you’re inexperienced, chances are that some things will unfortunately slip through the cracks. Luckily for you, i am going to share important points to share with you, that i have learned during theme development.
1. Editor Style Settings
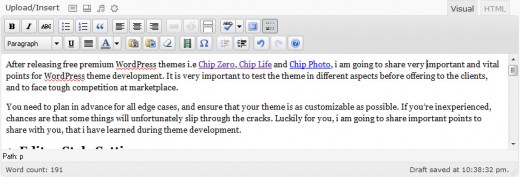
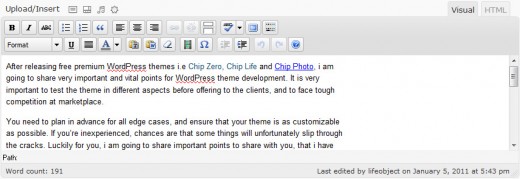
To style the TinyMCE editor that comes with WordPress, just create a file named editor-style.css in your theme directory. It’s very easy to fill, as you only need to match the typography with that on the main stylesheet, and there is no need to worry about block layout. TinyMCE has some quirks though. You can avoid the lines being too long by setting a max-width property on the .mceContentBody class.
WordPress Editor Without Style
WordPress Editor With Style of Chip Life
2. Take Care of Paginated Post
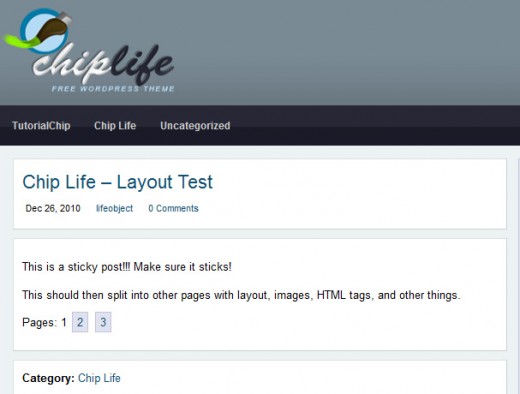
Paginated entries (not to be confused with a paginated list of entries) are separated into pages by their author with the Quicktag. Admittedly, this feature does not seem to get much use on most WordPress sites, but if you forget to do your part, visitors will be unable to read beyond the first page. To allow the whole content to be read, you must use the wp_link_pages tag within The Loop.
Following code snippet is from the WordPress theme Chip Life to take care of this vital concept.
<?php
$wp_link_pages = wp_link_pages( array( 'echo' => 0 ) );
if( !empty($wp_link_pages) ):
?>
<div class="wplinkpages"><?php echo $wp_link_pages; ?></div>
<?php endif; ?>
Preview
3. Threaded Comments
Comments are a bit of a design conundrum. There is a lot of stuff to display (avatars, commenters names, comment dates, comment body, reply buttons), so you need to give it quite a bit of space, but, at the same time, it should not overwhelm the main content, and should be visually distinct in some way. Threaded comments compound all these difficulties, because you also need to distinguish replies. Generally, this is achieved with a margin, but as you cannot know how many levels of replies there will be, you always risk either not allowing for enough width or allowing for too much.
Also, keep in mind that the reply form will not only appear at the bottom of the page, but also in the middle of the comment thread when someone clicks the reply button. So margins and padding should be adequate for both cases. There is also the ‘cancel reply’ link which has to be styled and positioned.
Here is screen-shot of Chip Photo WordPress theme that is a professional WordPress photoblog product, who is taking care of this vital concept beautifully.

4. Support Thumbnails
Although TutorialChip themes have built-in support of powerful image plugin Chip Get Image, WordPress, since 2.9, includes support for thumbnails (‘featured images’) out of the box. To take advantage of this functionality, you just add some lines in functions.php:
add_theme_support( 'post-thumbnails' );
set_post_thumbnail_size( 150, 150 );
The first line tells WordPress your theme supports thumbnails, while the second forces the thumbnail size to 150x150px, to avoid breaking your layout with differently sized thumbnails. Additionally, you can choose the resizing policy. The example above will just resize the image, while
set_post_thumbnail_size( 150, 150, TRUE );
will also crop the image to make it fit the given ratio. You can also make additional thumbnail sizes available, to use them in different areas of the site:
add_image_size( 'chip-thumb', 500, 500 );
Now,
/*
|-----------------
| Displays a 70×70 thumbnail
|-----------------
*/

the_post_thumbnail();

/*
|-----------------
| Displays a 500×500 thumbnail
|-----------------
*/

the_post_thumbnail( 'chip-thumb' )
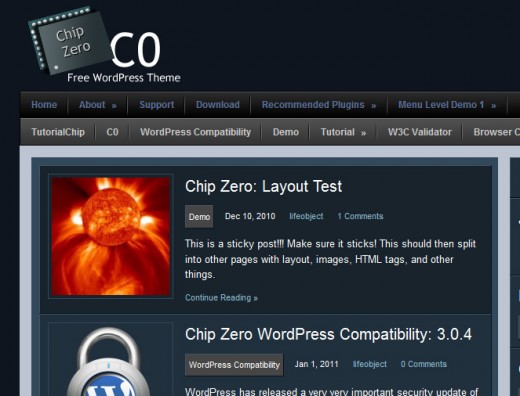
Here is sample preview from Chip Zero WordPress theme which has built-in support of WordPress featured image.
5. WordPress Custom Backgrounds
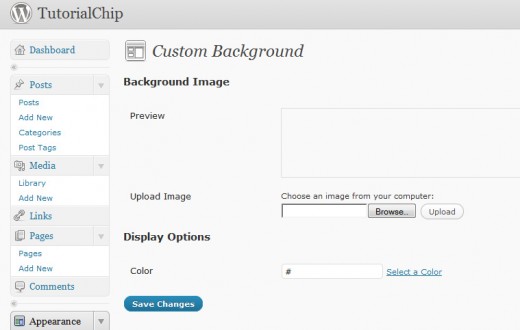
This is a new feature in WordPress 3.0, and it’s also the easiest to implement. It’s literally one line:
add_custom_background();
That’s it! Users can now choose any custom background they want, I have already provided the support for this excellent feature in all TutorialChip themes.
6. Don’t Display Comments on Protected Posts
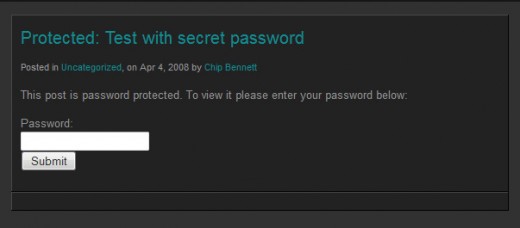
WordPress has the option to make a post password-protected: visitors should be able to access this type of content only after typing in the password. You do not need to do anything special concerning the post itself, but if you forget to check before displaying comments, visitors will still see all comments on the protected post, which sort of defeats the purpose of protecting the post in the first place. You can remedy this with a simple check in comments.php:
Here is sample code snippet from Chip Photo WordPress Theme to accommodate this vital idea,
/*
|--------------------------
| Password Post
|--------------------------
*/

if ( post_password_required() ) {
?>

<!-- Begin Comments -->
<div id="comments">
  <p class="nopassword"><?php echo "This post is password protected. Enter the password to view any comments."; ?></p>
</div>
<!-- End Comments -->

<?php
return;
} // if ( post_password_required() )
?>
Preview
7. Style Default Widgets
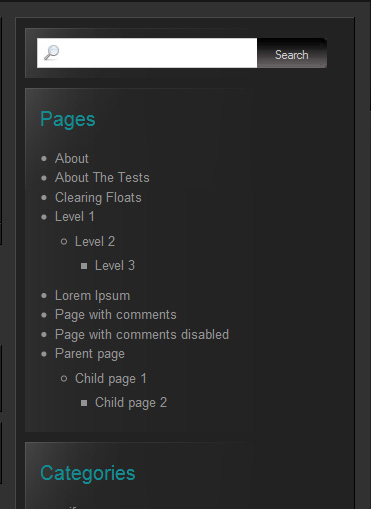
While you can’t style every possible widget under the sun, it is a good idea to check that every widget supplied with WordPress displays convincingly. All of them can receive an optional title and some have different appearances. For example, the Category widget can display as a dropdown and also display multiple levels of nested categories or tags, so make sure you are styling nested lists. Pay particular attention to the Calendar wiget. It’s a table, and you’ll generally want the days to be centered in their cells, so that they align with the week days in the header. On the first picture, numbers look slightly out of place, while they are correctly aligned on the second picture.
Let’s have a look into the screen-shot of Chip Photo to get better idea.
8. Do not Forget wp_footer() and wp_head()
Call wp_footer() just before closing the body tag, and wp_head() just before the closing head tag. Both functions are action hooks, which can be used by plugin and theme developers. If you leave them out, some features and plugins may not work, including custom headers.
9. Support Custom Menus
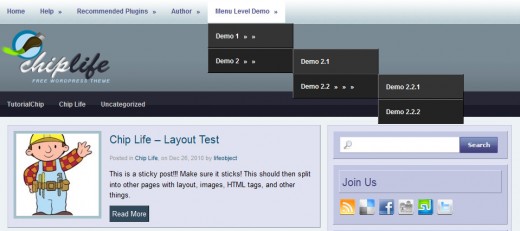
WordPress 3.0 introduced the long awaited custom menus, so it’s about time to make your users profit from this feature. After registering theme support, like so:
register_nav_menu( 'main_nav', __( 'Main navigation menu', 'mytheme' ) );

/*
|------------------
| Display Menu(s)
|------------------
*/

wp_nav_menu( array( 'theme_location' => 'main_nav' ) );
All the themes of TutorialChip are taking care of this core feature of WordPress. Here is a screenshot of WordPress Theme Chip Life who is giving support of ths core feature beautifully, and best thing it is free and professional.
10. Display Images Correctly
Images are a vital part in blogging which deliver the message silently but in a comprehensive and beautiful way. You should empower your theme with a powerful support of images in all dimensions. I will recommend to visit Chip Life Images Test post to grip the concept of this vital ideas like,
- Image Captions
- Image Alignments
- Image Re-sized in Editor
- Wide Images
- Image Gallery
You may be interested to visit Chip Zero Images Test support as well.
11. Make Sure Everything Looks Consistent
One of the difficulties of theming a dynamic system, such as WordPress is that there are many edge cases which do not occur too often, but that can still ruin the appearance of the site when they do. Think of posts with closed comments, or with very short bodies. Make sure no weird spaces creep in, or that elements are not mashed together because something is not displayed. The comment section might not be displayed if comments are not allowed, or a password entry field might replace the usual post content when the post is password protected.
12. Use the WordPress.org Theme Unit Test
WordPress.org offers a sample content file that you can import into your WordPress installation, which contains an assortment of test posts, pages and images.
To import the file in WordPress 3.0, you need first to install the WordPress Importer plugin. Then, choose Tools > Import > WordPress. Be sure to check the ‘Download and import file attachments’ tickbox when prompted. Otherwise, you won’t get the images associated to some sample posts.
After the import completes, you can use this checklist to determine whether the content displays as it should.
Good Luck
I hope these points will be helpful to WordPress developers during the development of a WordPress theme. These points will also be helpful for the end user while selecting a perfect theme for blogging of any kind, photo blogging or others. This list is certainly far from exhaustive, so i want to hear from you in the comments! What do you think are the most often forgotten pieces of functionality?
Hello – love the theme – am keen to use it but struggling to see how / where I can change the logo size? My logo does not suit the size specified. Where can I change this? Thank you