Rainbows are optical and meteorological phenomena that cause a spectrum of light to appear in the sky when the sun shines onto droplets of moisture in the Earth’s atmosphere. we’ll create together a multicolored arc in this tutorial with the help of Gradient Tool and the Gaussian Blur Filter.
This is a very detailed step by step tutorial where I will show you how to make rainbow effect on a photo. I hope you will like this step by step useful Rainbow Effect Tutorial.Feel free to share your opinion with us and do not forget to share this post with your friends on social network.
For Further Reading:
- Photo Retouching Tutorial in Photoshop
- Photoshop Smoke Text Tutorial in 10 Minutes
- Layered Text Effect Tutorial in Simple 5 Steps
- Create a Mysterious Space Photo Manipulation in Photoshop
Create A Rainbow Effect in Photoshop: Final Preview

Tools and Resources
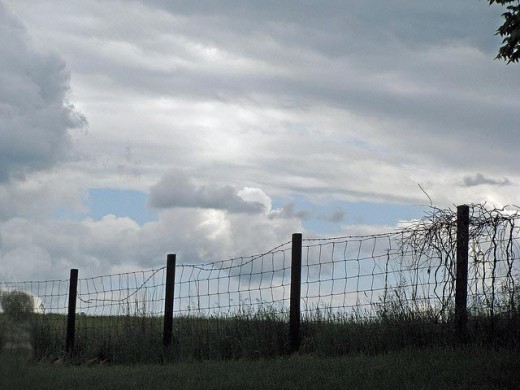
External Resource
We will use following external resource to complete this Rainbow Effect tutorial in photoshop.
You can download this image from Flickr to complete this tutorial.
Tool
- Gradient Tool (G)
Let’s start to create our Realistic Rainbow effect tutorial.
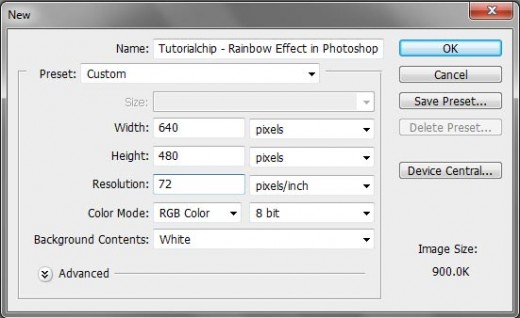
Step 1
Open Adobe Photoshop, and create a new Photoshop document. I am going to create a new document of 640 x 480 px with any color background which you like.
Step 2
In this step we import the image into photoshop and name this layer “Image″ and fit on your current document as like in preview below:
Step 3
Now we will set the Hue/Saturation of this image for create a awesome effect. Choosing for Hue/Saturation option, you can go layer panel below and click on Create New Fill and Adjustment Layer option where you will find Hue/Saturation option and set the following positions.

After setting these options you will get a new look of this image as like in preview below.

Step 4
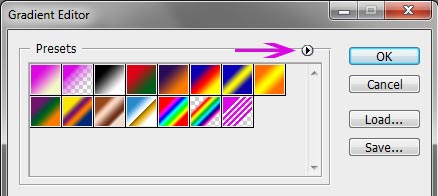
Photoshop have a ready made rainbow gradient for us to use. It’s not one of the gradients that Photoshop makes available to us by default, but all we need to do is load it in manually.
To do that, select the Gradient Tool from the Tools panel. Then, with the Gradient Tool selected, click on the Gradient Picker in the Options Bar at the top of the screen:
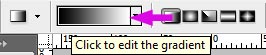
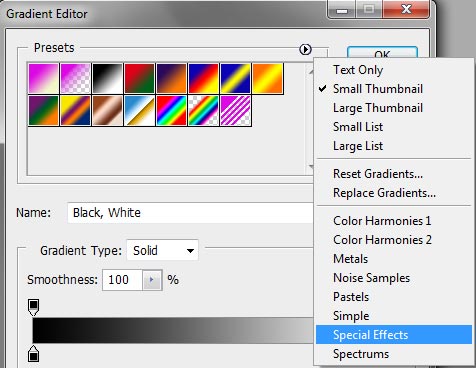
This open photoshop’s Gradient Editor which shows us small thumbnails of the gradients we can choose from. By default, the rainbow gradient is not one of them, so let’s load it in. Click on the right pointing arrow in the top right of the Gradient Editor:
A list of additional gradient sets appears. The one we want is Special Effects. Chose it from the list:
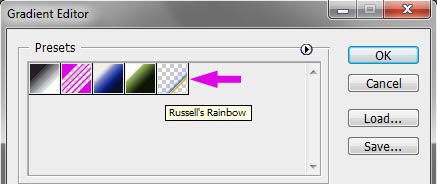
Now we select the Russell’s Rainbow gradient from this gradients gallery as shown in preview below.
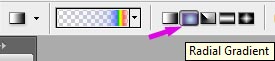
Step 5
After select the Russell’s Rainbow Gradient, we go back up to the Options Bar at the top of the screen and click on the Radial Gradient option:
Step 6
In this step we take a new layer and name it Rainbow. Drag the gradient horizontally right to left as shown in preview.
Step 7
Go up to the blend mode options in the top left of the layers panel and change the blend mode of the Rainbow layer to Overlay and we applying Filter.
Filter > Blur > Gaussian Blur

Step 8
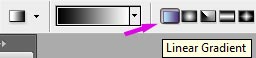
Now click on the Layer Mask icon at the bottom of the Layers panel. Ok select the gradient tool and choose the black to white gradient. Go back up to the Options Bar and this time, click on the Linear Gradient option:
Step 9
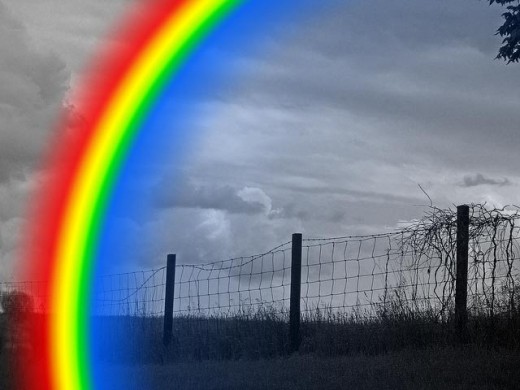
To do that, Gradient Tool selected, we’ll click mouse somewhere along the bottom of the wire bar on the left. Then, with my mouse button still held down, I’ll hold down my Shift key as well and drag straight up to the top of the image. Holding down Shift makes it easy to drag in a vertical direction:
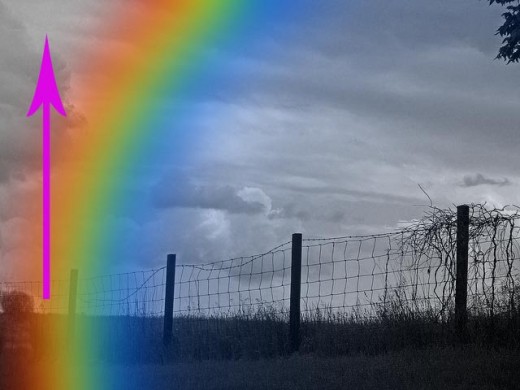
When we release mouse button, Photoshop draws the black-to-white gradient. Since the gradient was drawn on the layer mask, not on the layer itself, we don’t see the actual gradient in the image. Instead, the rainbow now appears to start near the bottom of the wire bar on the left and gets brighter as it reaches higher into the sky. In which result you see the final preview of this amazing tutorial below:
Create A Rainbow Effect in Photoshop: Final Preview
I hope you have enjoyed this tutorial and look forward to your comments. Don’t Forget to Follow TutorialChip on Twitter or Subscribe to TutorialChip to Get the Latest Updates on Giveaways, Tutorials and More for Free.