Lot’s of creations we can make in Photoshop. If you’re interested in learning some new skills, whether you’re a beginner, intermediate or advanced user, this Photoshop tutorial is for you. Today I am creating a concrete text effect in Photoshop.
This tutorial explains how to use Photoshop effects and texture’s to create a concrete text effect. I am sure you definitely like our this new creation. If you like this tutorial then never forget to share your exclusive comments with us. Enjoy!
Other Related photoshop tutorials:
- Create Flourish Marble Text Effect in Photoshop
- How to Create a Texture Text Effect in Photoshop
- Create a Glossy Emblem Text Effect in Photoshop
- How to Create a Stuffed Text Effect: Photoshop CS5 Tutorial
Tutorial details:
- Program: Adobe Photoshop CS5
- Difficulty: Intermediate
- Estimated Completion Time: 40 Mins
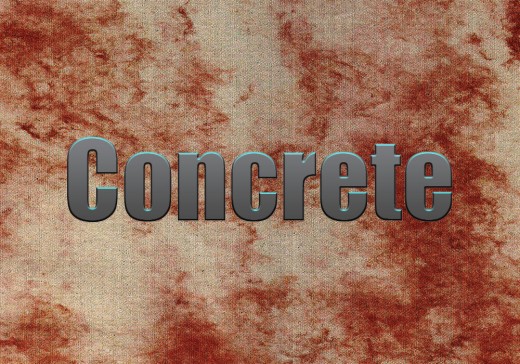
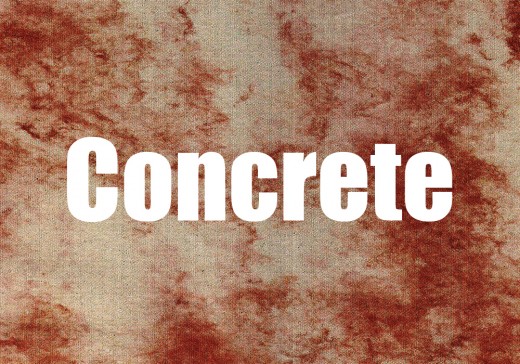
Create a Beautiful Concrete Text Effect in Photoshop – Final Preview
Tools and Resources
External Resources
Photoshop Tools
- Text Tool
- Eraser Tool
- Gradient Overlay
Lets start to create our concrete text effect in photoshop.
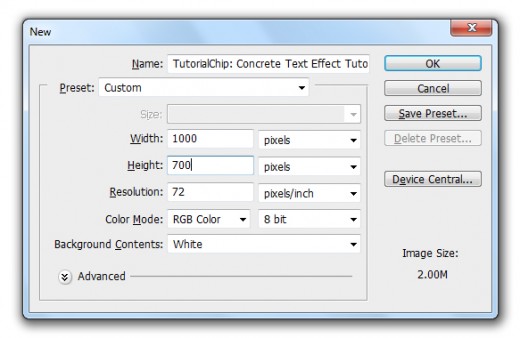
Step 1
Create a new document (Ctrl+N) with 1000×700 of size.
Step 2
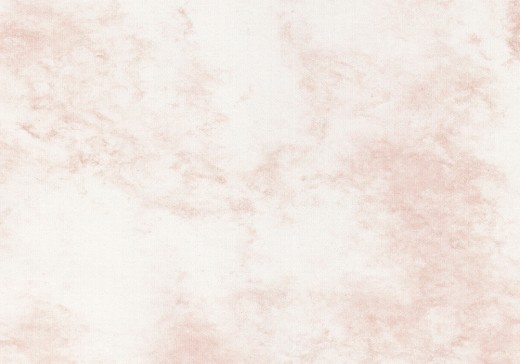
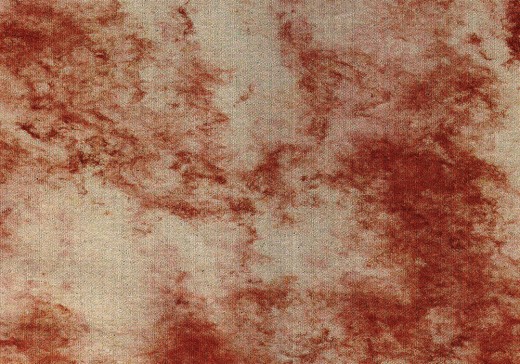
First of all I am going to add the Paper Texture Image in photoshop.
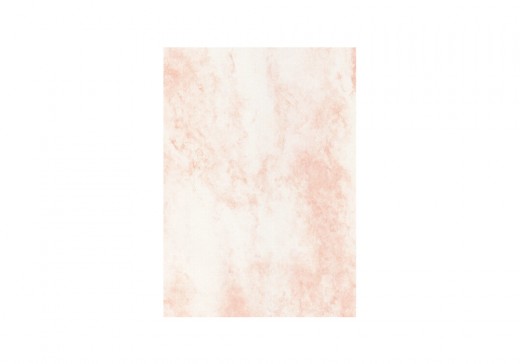
Go to Edit > Free Transform or press (Ctrl+T) and set texture image to the whole canvas.
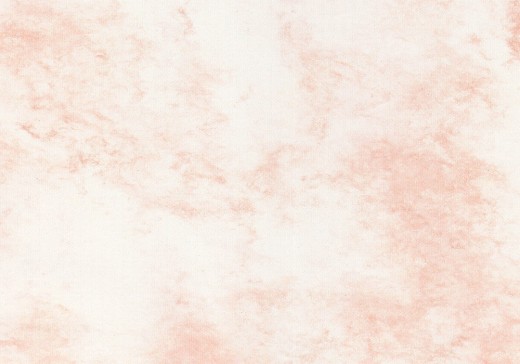
After set texture image we get this result.
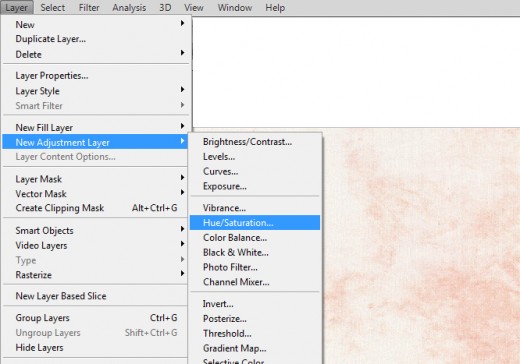
Step 4
Now I am going to applying Hue Saturation on this texture layer.
Go to Layer > New Adjustment Layer > Hue Saturation.
Hue Saturation panel opened now set Hue (-1) Saturation (-34) Lightness (+1).
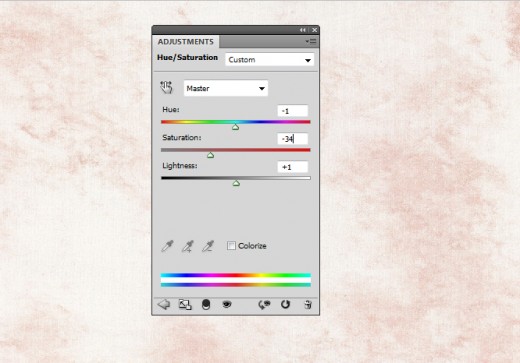
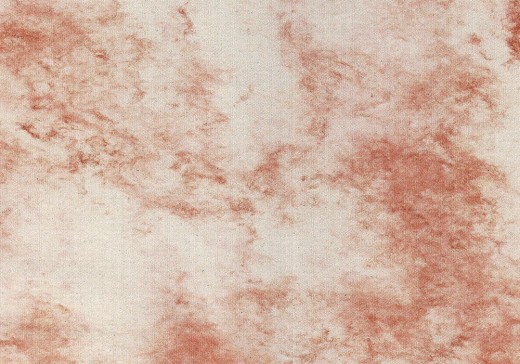
When we set hue saturation we get new effect on texture layer.
Step 5
In this step set the Levels of this texture layer.
Go to Layer > New Adjustment Layer > Levels.
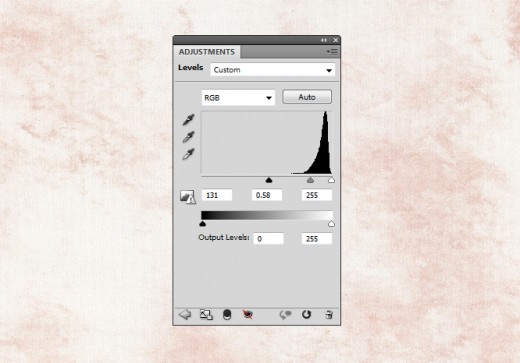
After set levels we can see the texture effect changed.
Step 6
Now create Curves layer and set it.
Go to Layer > New Adjustment Layer > Curves.
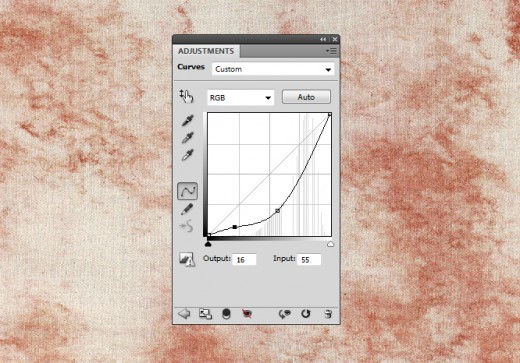
After set curves we get new effect on texture layer.
Step 7
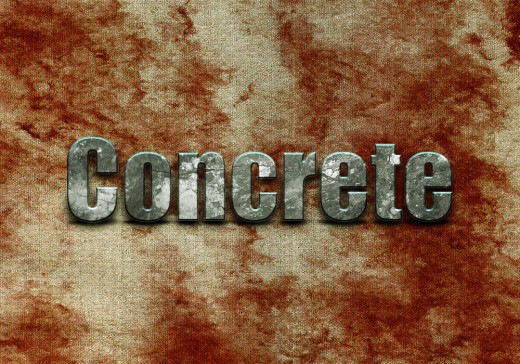
Now I am going to type some text, select Text Tool form tool panel here I am using Impact Font with (200px) of size applying white color, you can use any of font you like.
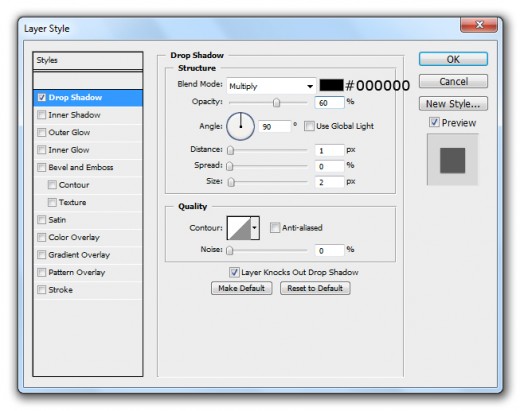
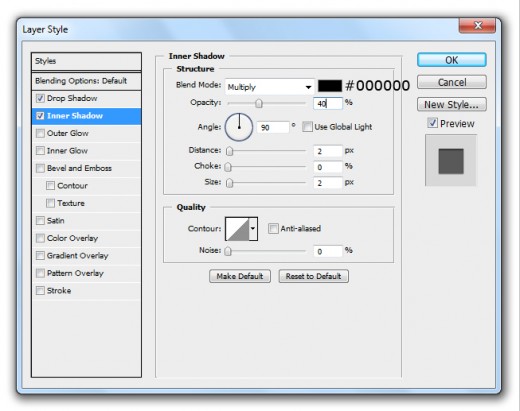
After type text now applying some Blending Options on this text layer.
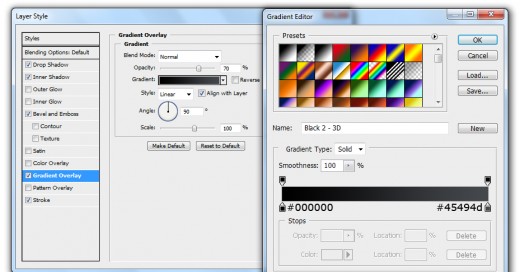
Go to Layer > Layer Style and applying these Blending Options.
Drop Shadow
Inner Shadow
Bevel and Emboss
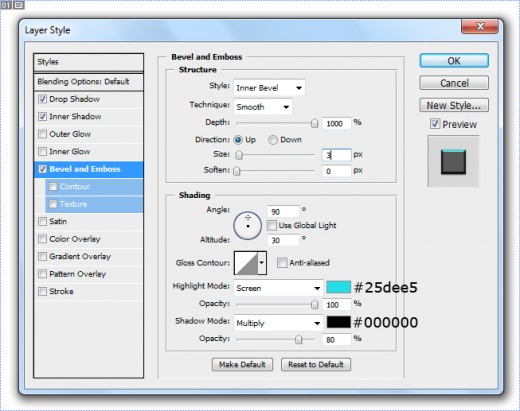
Gradient Overlay
Stroke
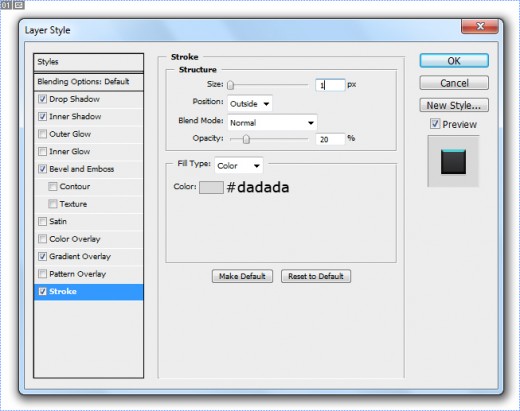
After applying these layer styles we get awesome effect on text layer.