3D design is now more popular in designing field. No need to use 3D applications to create beautiful 3D effects. The tools of Photoshop and Illustrator, when used correctly, can help you achieve very nice results.
Today we are going to create a cool 3D flowery text effect in photoshop CS5. We are hopeful that you will like this tutorial and find some new tricks and techniques to learn. So Let’s start to create your own 3D design to follow this tutorial. Enjoy!
Other photoshop tutorials:
- Create Flourish Marble Text Effect in Photoshop
- Create a Splendid Water Text Effect Using Photoshop
- Photoshop Tutorial: Learn Melting Chocolate Text Effect
- Create a Beautiful Concrete Text Effect: Photoshop Tutorial
Tutorial details:
- Program: Adobe Photoshop CS5
- Difficulty: Intermediate
- Estimated Completion Time: 40 Mins
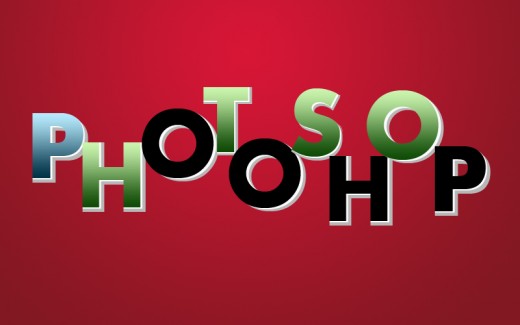
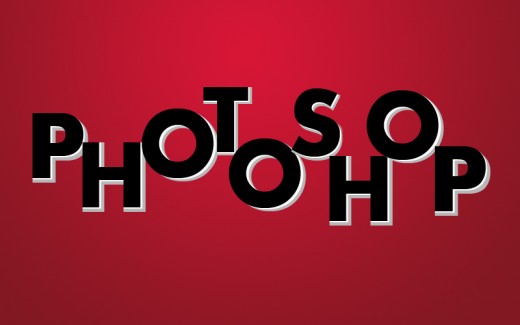
Create a 3D Flowery Text Effect in Photoshop – Final Preview

Tools and Resources
External Resources
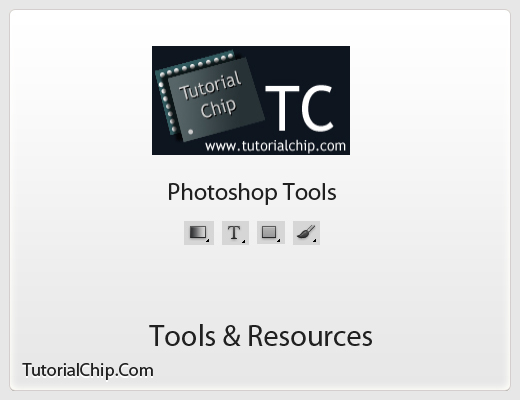
Photoshop Tools
- Text Tool
- Brush Tool
- Gradient Overlay
- Rectangle Tool
Lets start to create our spectacular 3d flowery text effect in photoshop.
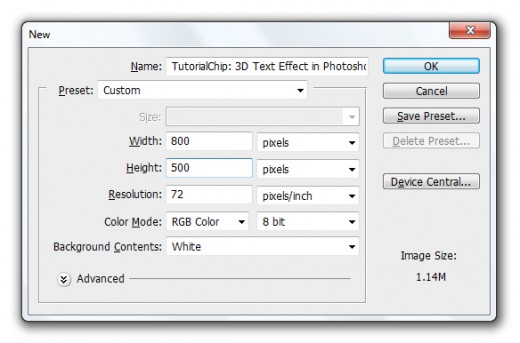
Step 1
Create a new document (Ctrl+N) with 800×500 of size.
Step 2
First of all applying gradient on background, select Gradient Tool open gradient editor and set colors.
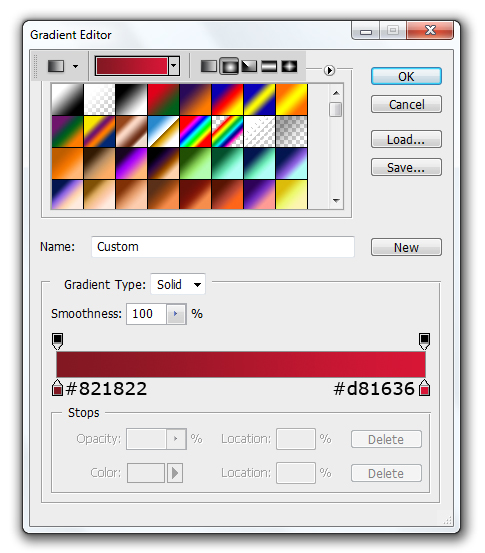
Now applying gradient on background, after applying we get a beautiful background.

Step 3
Now select Text Tool and type a text with black color #000000, here I am using Aharon Font you can select your own choice of font.

After type text now duplicate this text layer name it 2nd Text applying white color #ffffff and set it bottom little bit right side of first text layer.

Now duplicate 2nd text layer, applying this color #b7b7b7 name it 3rd Text and set it bottom little bit right side as like in preview.

Step 4
In this step we can fill these empty areas for make our effect complete.
Select Rectangle Tool from tool panel create a rectangle with white color #ffffff as like in preview.
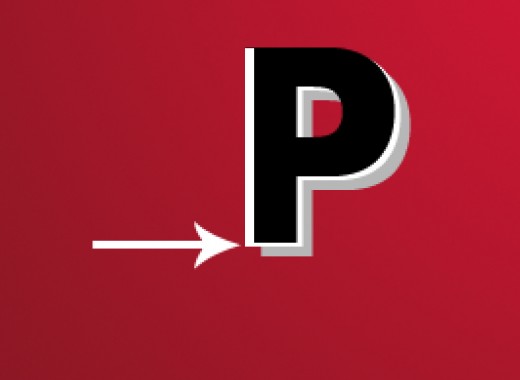
Set this rectangle bottom of first text layer as like in picture below.

Step 5
Again select Rectangle Tool and create a rectangle with this color #b7b7b7.
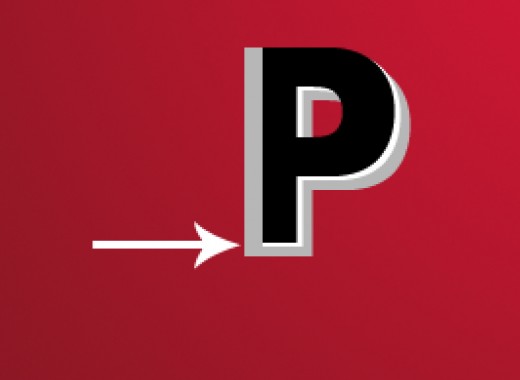
Set this rectangle bottom of all layers as like in preview.
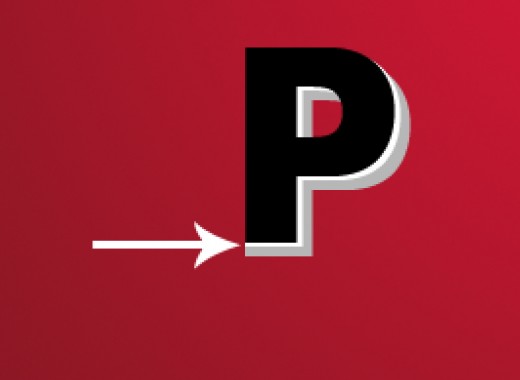
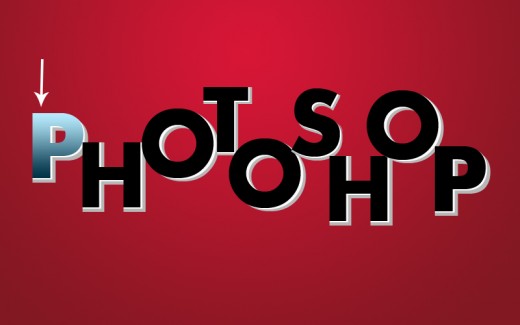
Here in this step we get our complete first text.

Step 6
In this step type more text and set them same as step 3,4,5 as like in preview.
Step 7
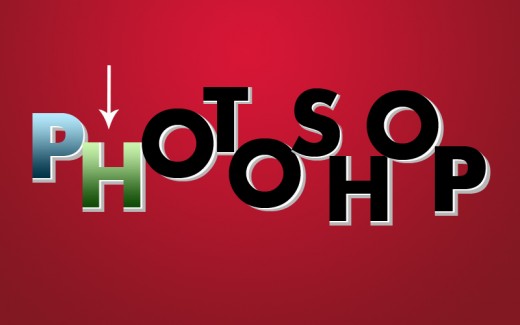
Now select first black color text as like in picture below.

Now go to the Blending Options and applying Gradient Overlay on this text layer.
Go to Layer > Layer Style > Gradient Overlay.
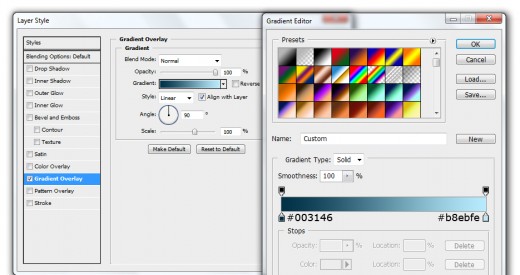
After applying gradient overlay we get a new effect on first text layer.
Step 8
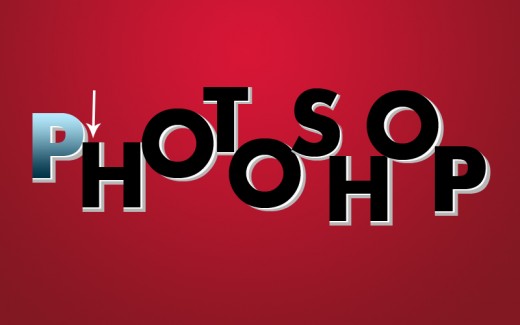
Select 2nd black color text and applying Gradient Overlay on this layer.
Go to Layer > Layer Style > Gradient Overlay.
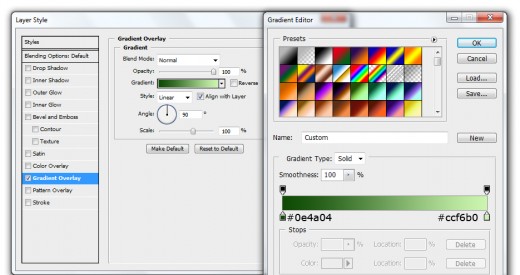
After applying gradient overlay we get a nice effect on second text layer.
Now right click on second text layer and select (Copy Layer Style) option then paste layer style on these selected layers as like in picture below.
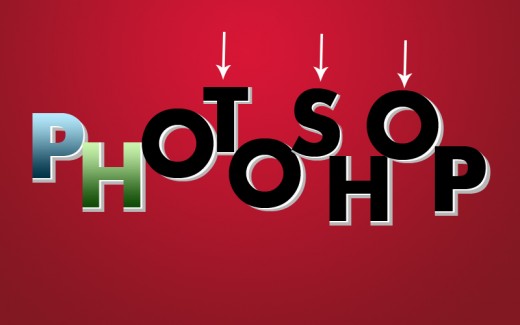
After paste layer style on pointed layers here we get awesome result.